
Creating and Managing Teams
A team is a group of resources, such as facilities, users, and vehicles, working together to fulfil an order. Teams can be organized based on geographic constraints, based on facilities, or any other criteria that are specific to your business.
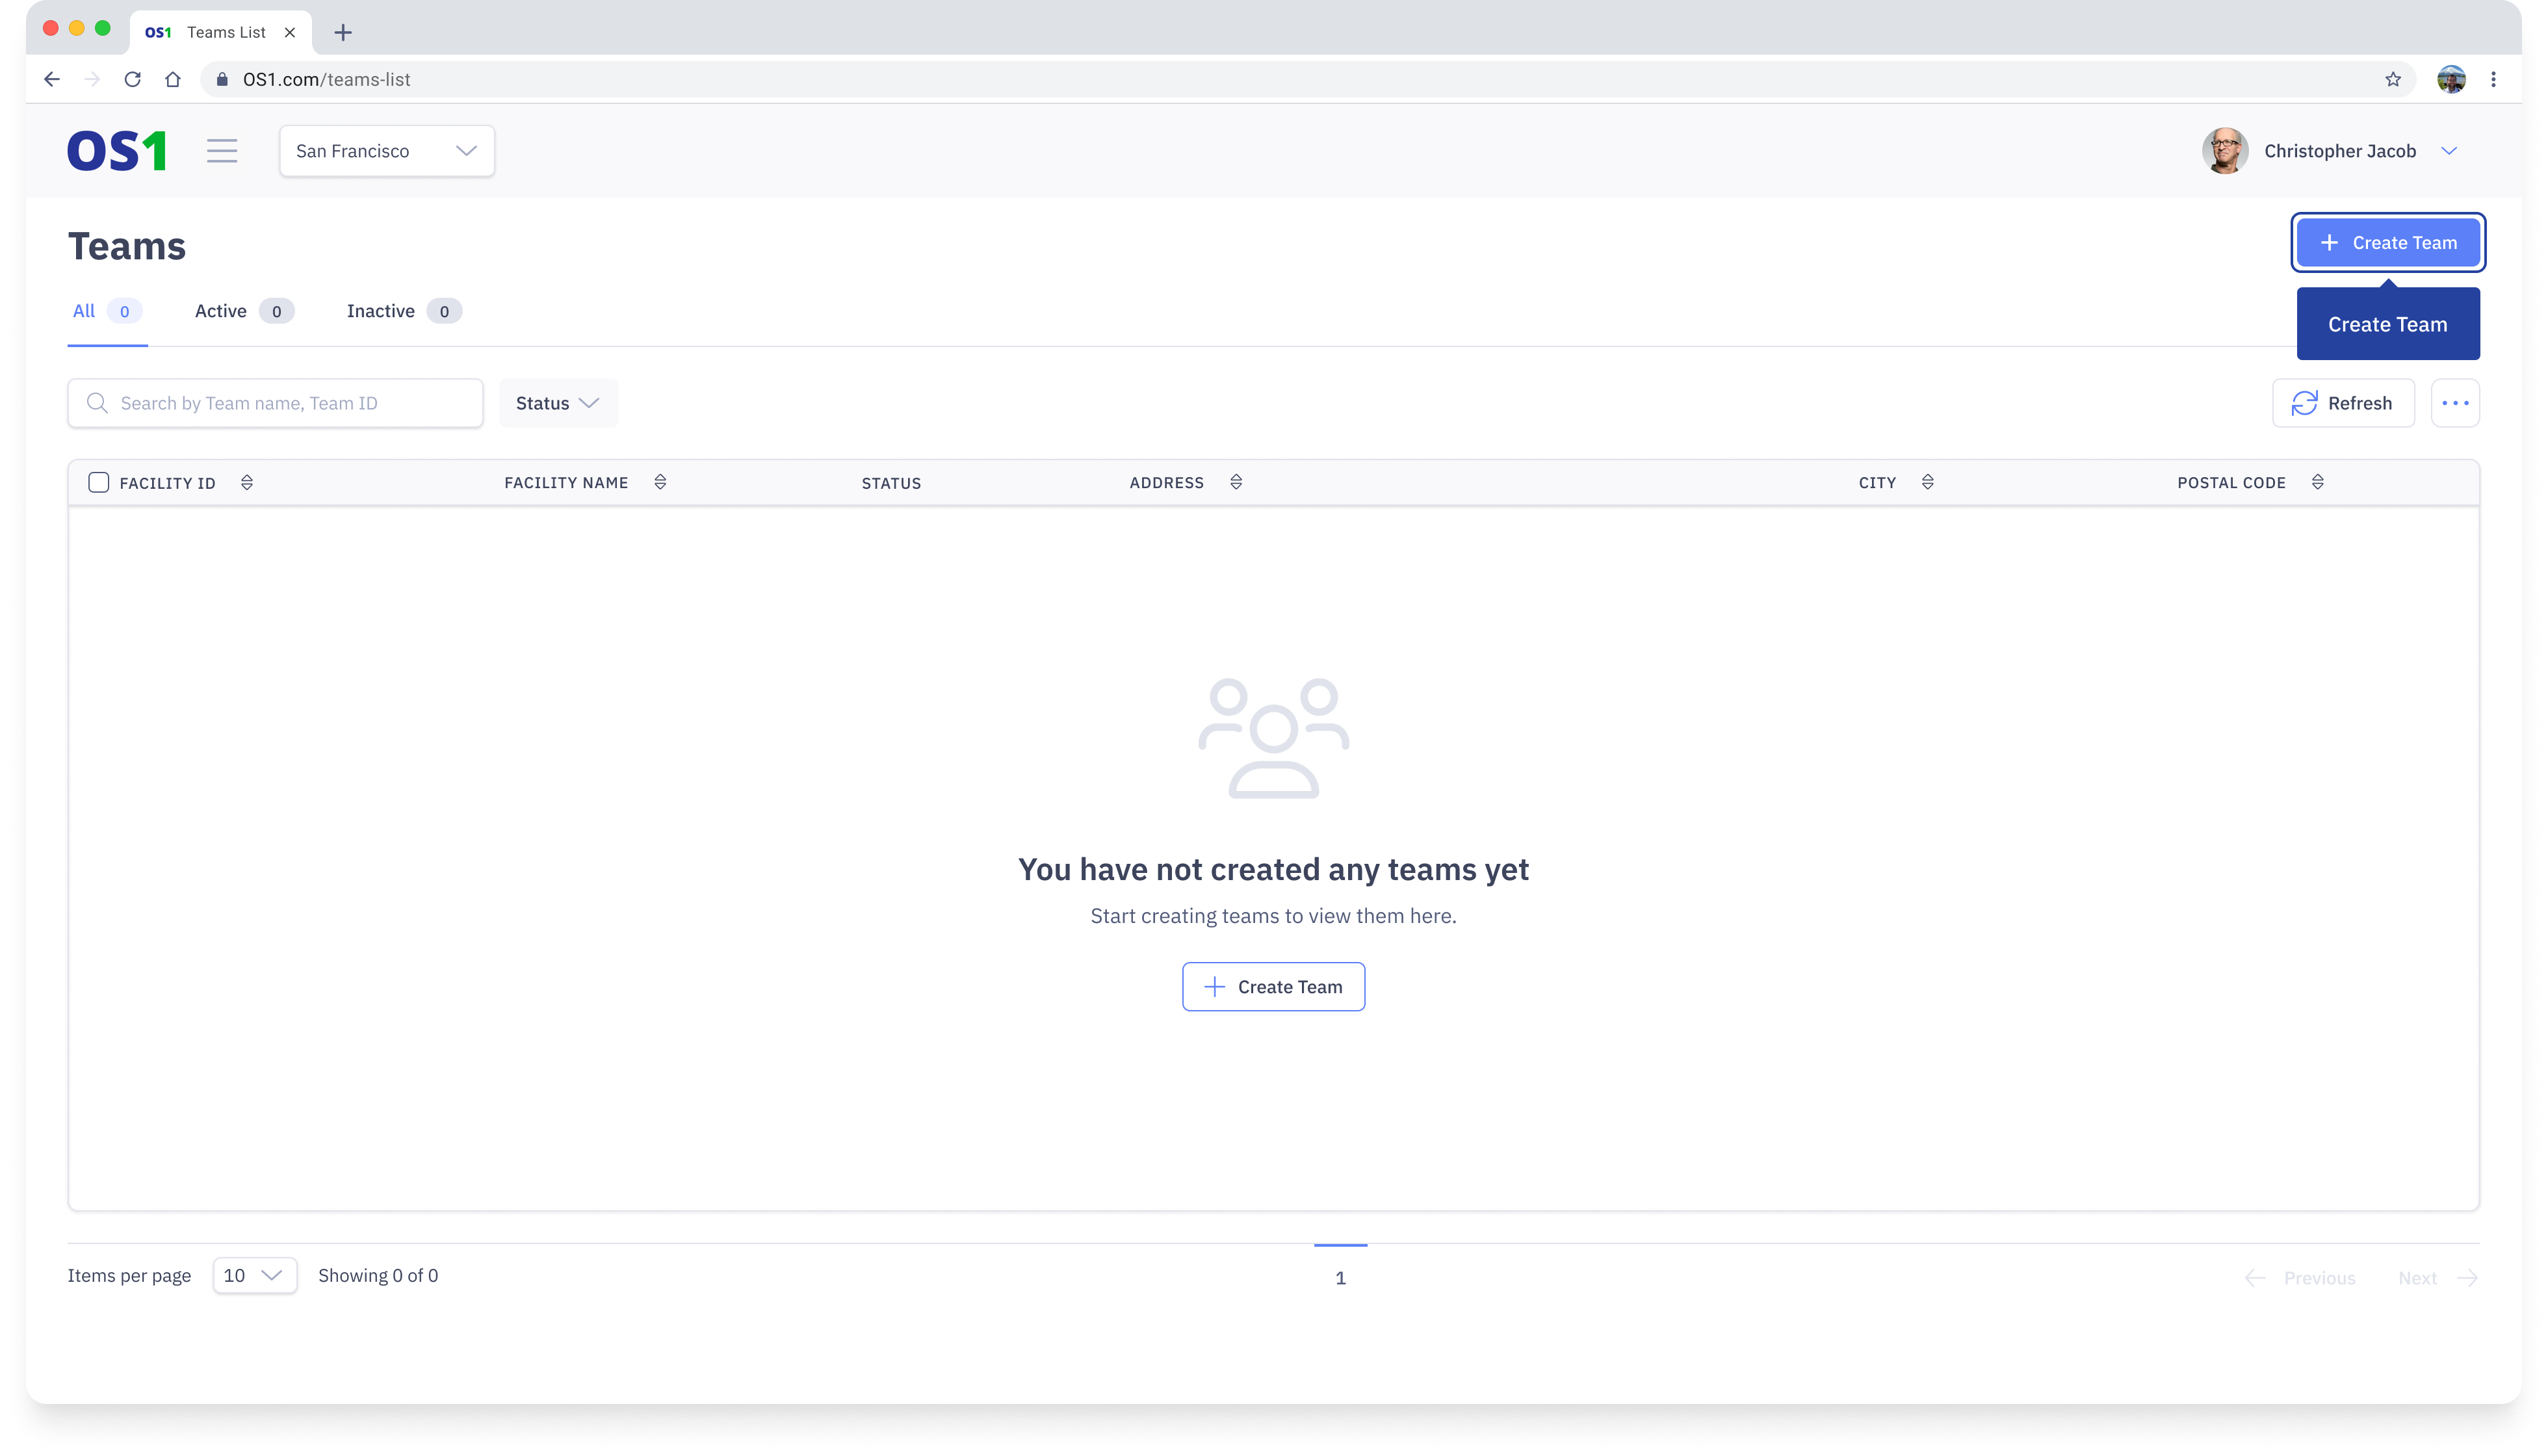
To create your Teams, click on the “Teams” application located in the side navigation menu. Here, you will be able to perform various actions, including:
- Creating new Teams using the “New Team” button
- Viewing a list of all existing Teams in the system
- Editing the information of an existing Team using the “Edit” button
- Searching for a specific Team by its Team Name or Team ID
- Filtering the Team list based on status
- Modifying the columns that you see on the Teams list view
- Updating the status of multiple Teams at once using the bulk status update feature
Create Team
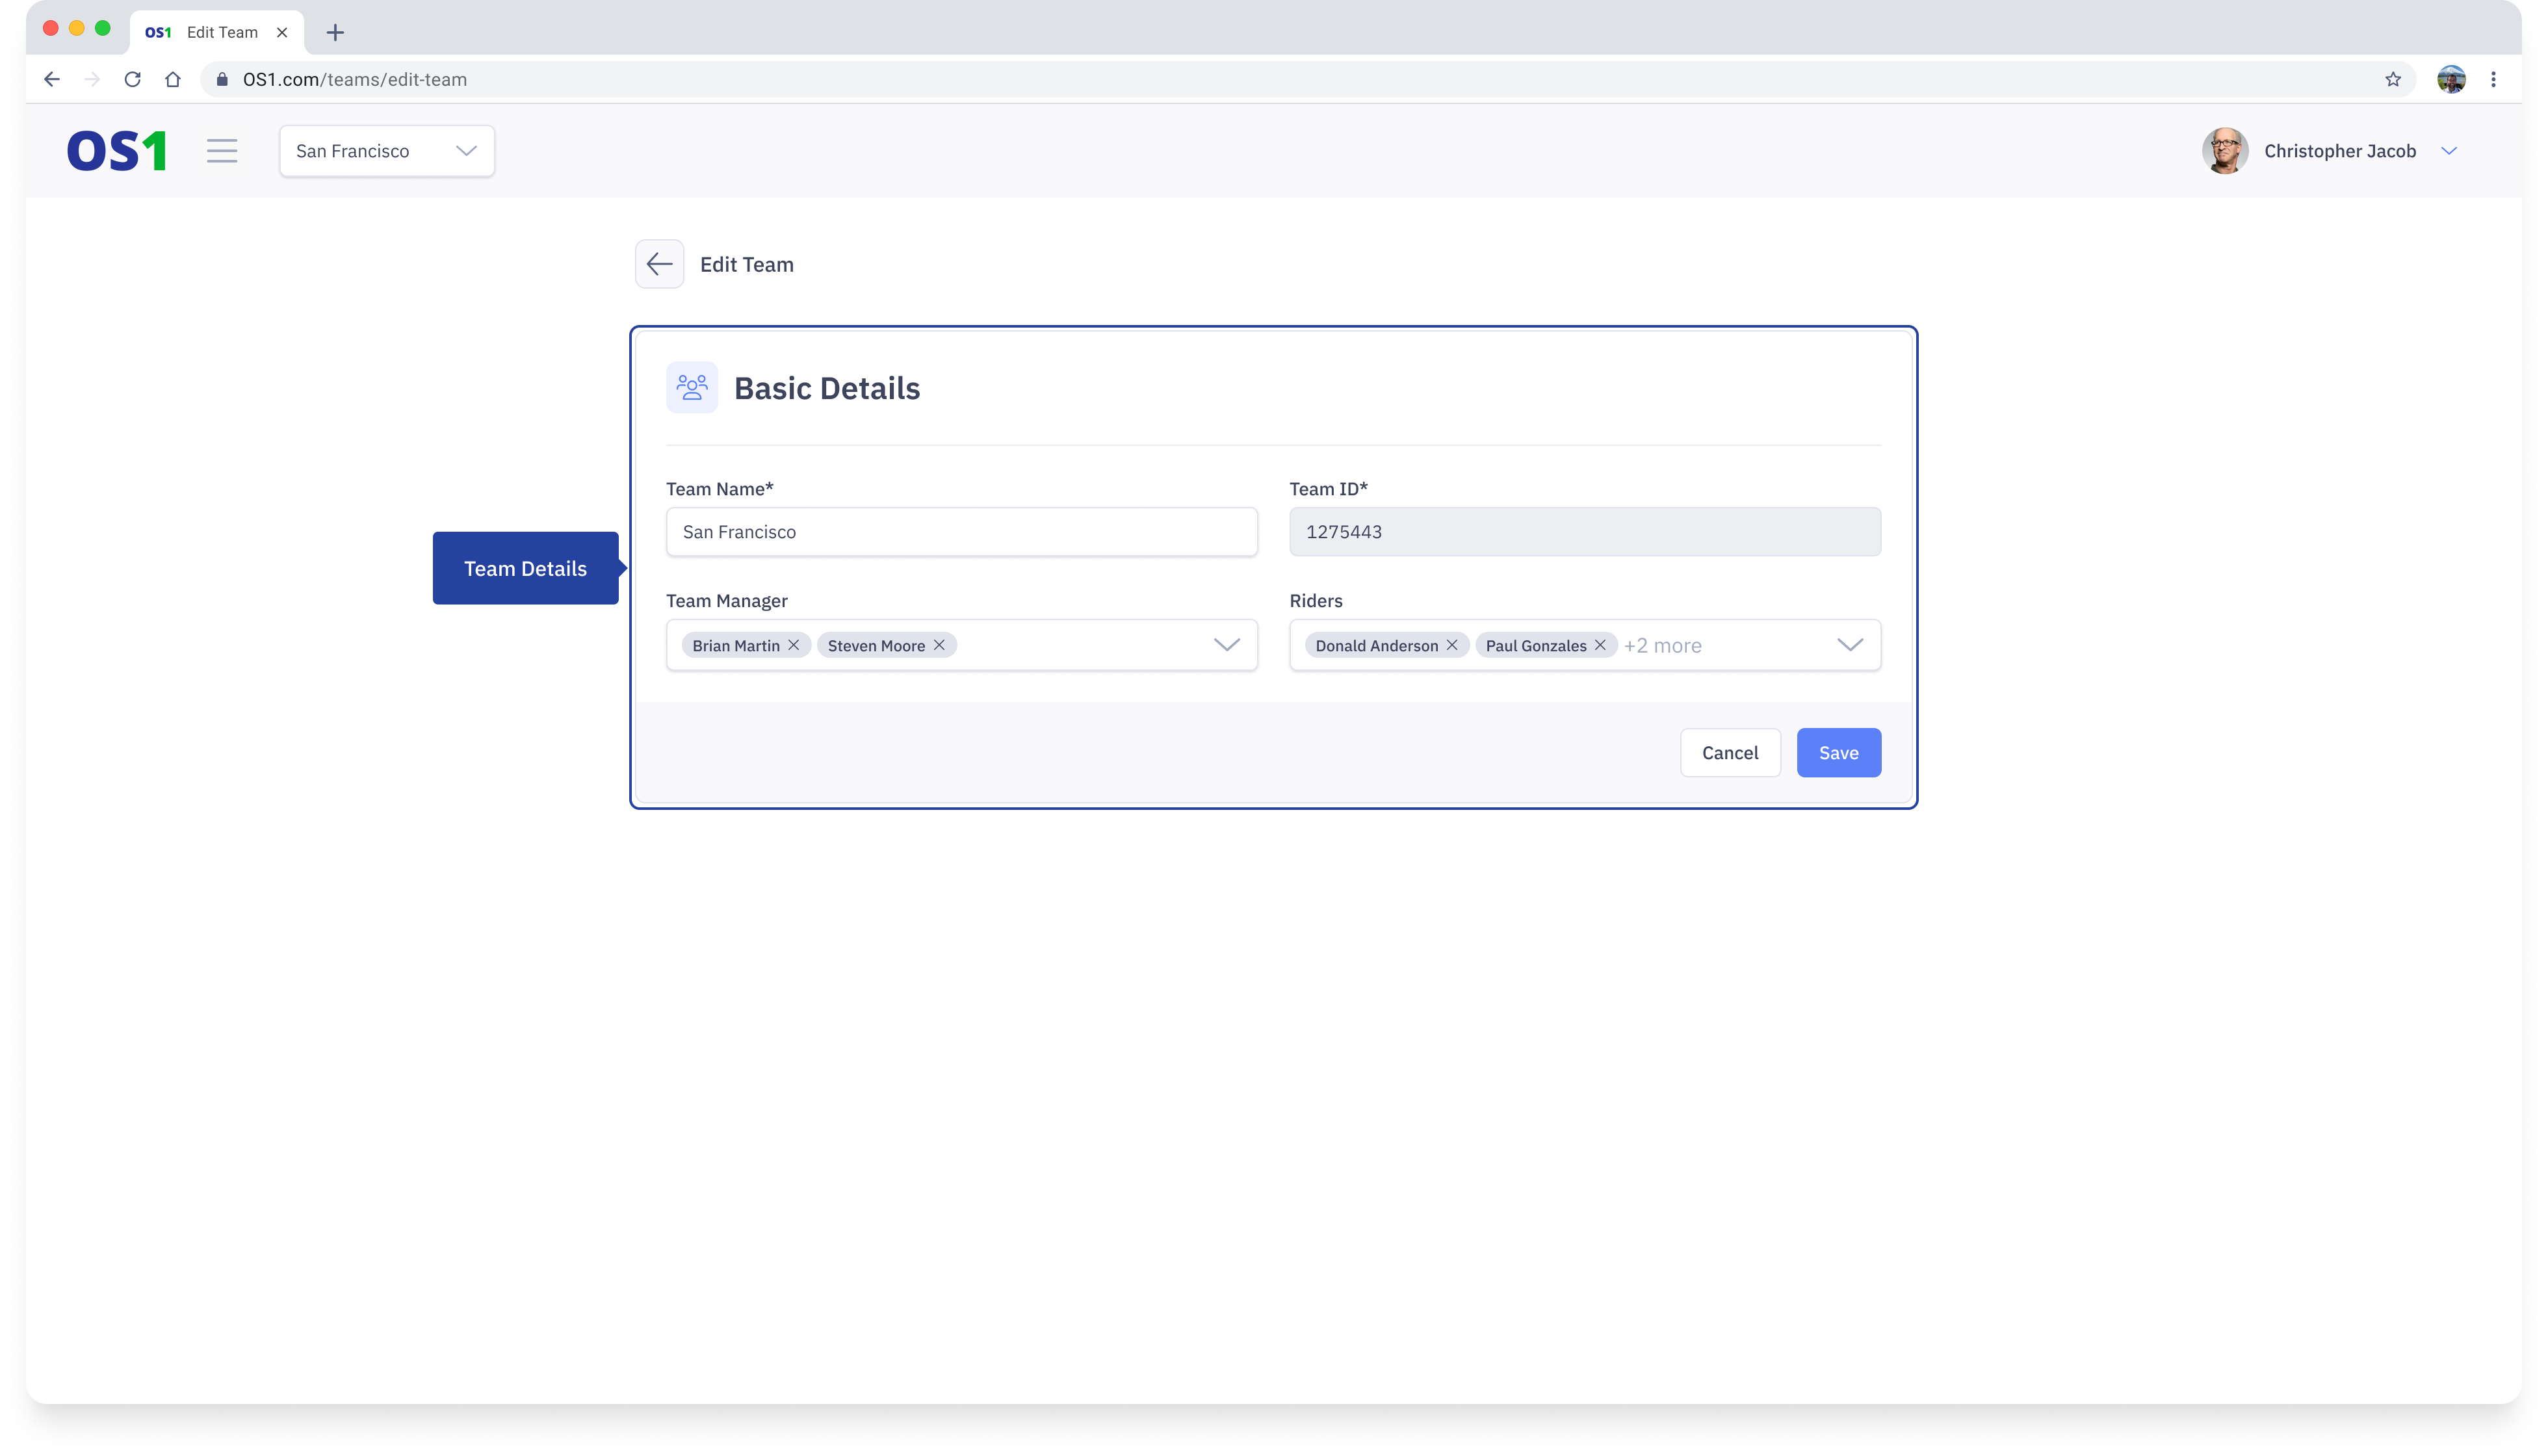
To create a Team on DispatchOne, navigate to the Teams page and click on the "Create Team" button located in the top right corner of the page. This will take you to the Create Teams page, where you need to enter the following information:
- Team Name: Enter the name of the Team you want to create
- Team ID: Enter a unique ID for the Team you want to create. By default, the system will generate a unique Team ID for you.
- Team Manager: Select one or multiple Team Managers who will manage this Team. A Team Manager is responsible for the overall management of a Team and ensuring that its orders get completed
- Rider: Select one or multiple Riders/Drivers who will be a part of this Team to fulfil its orders
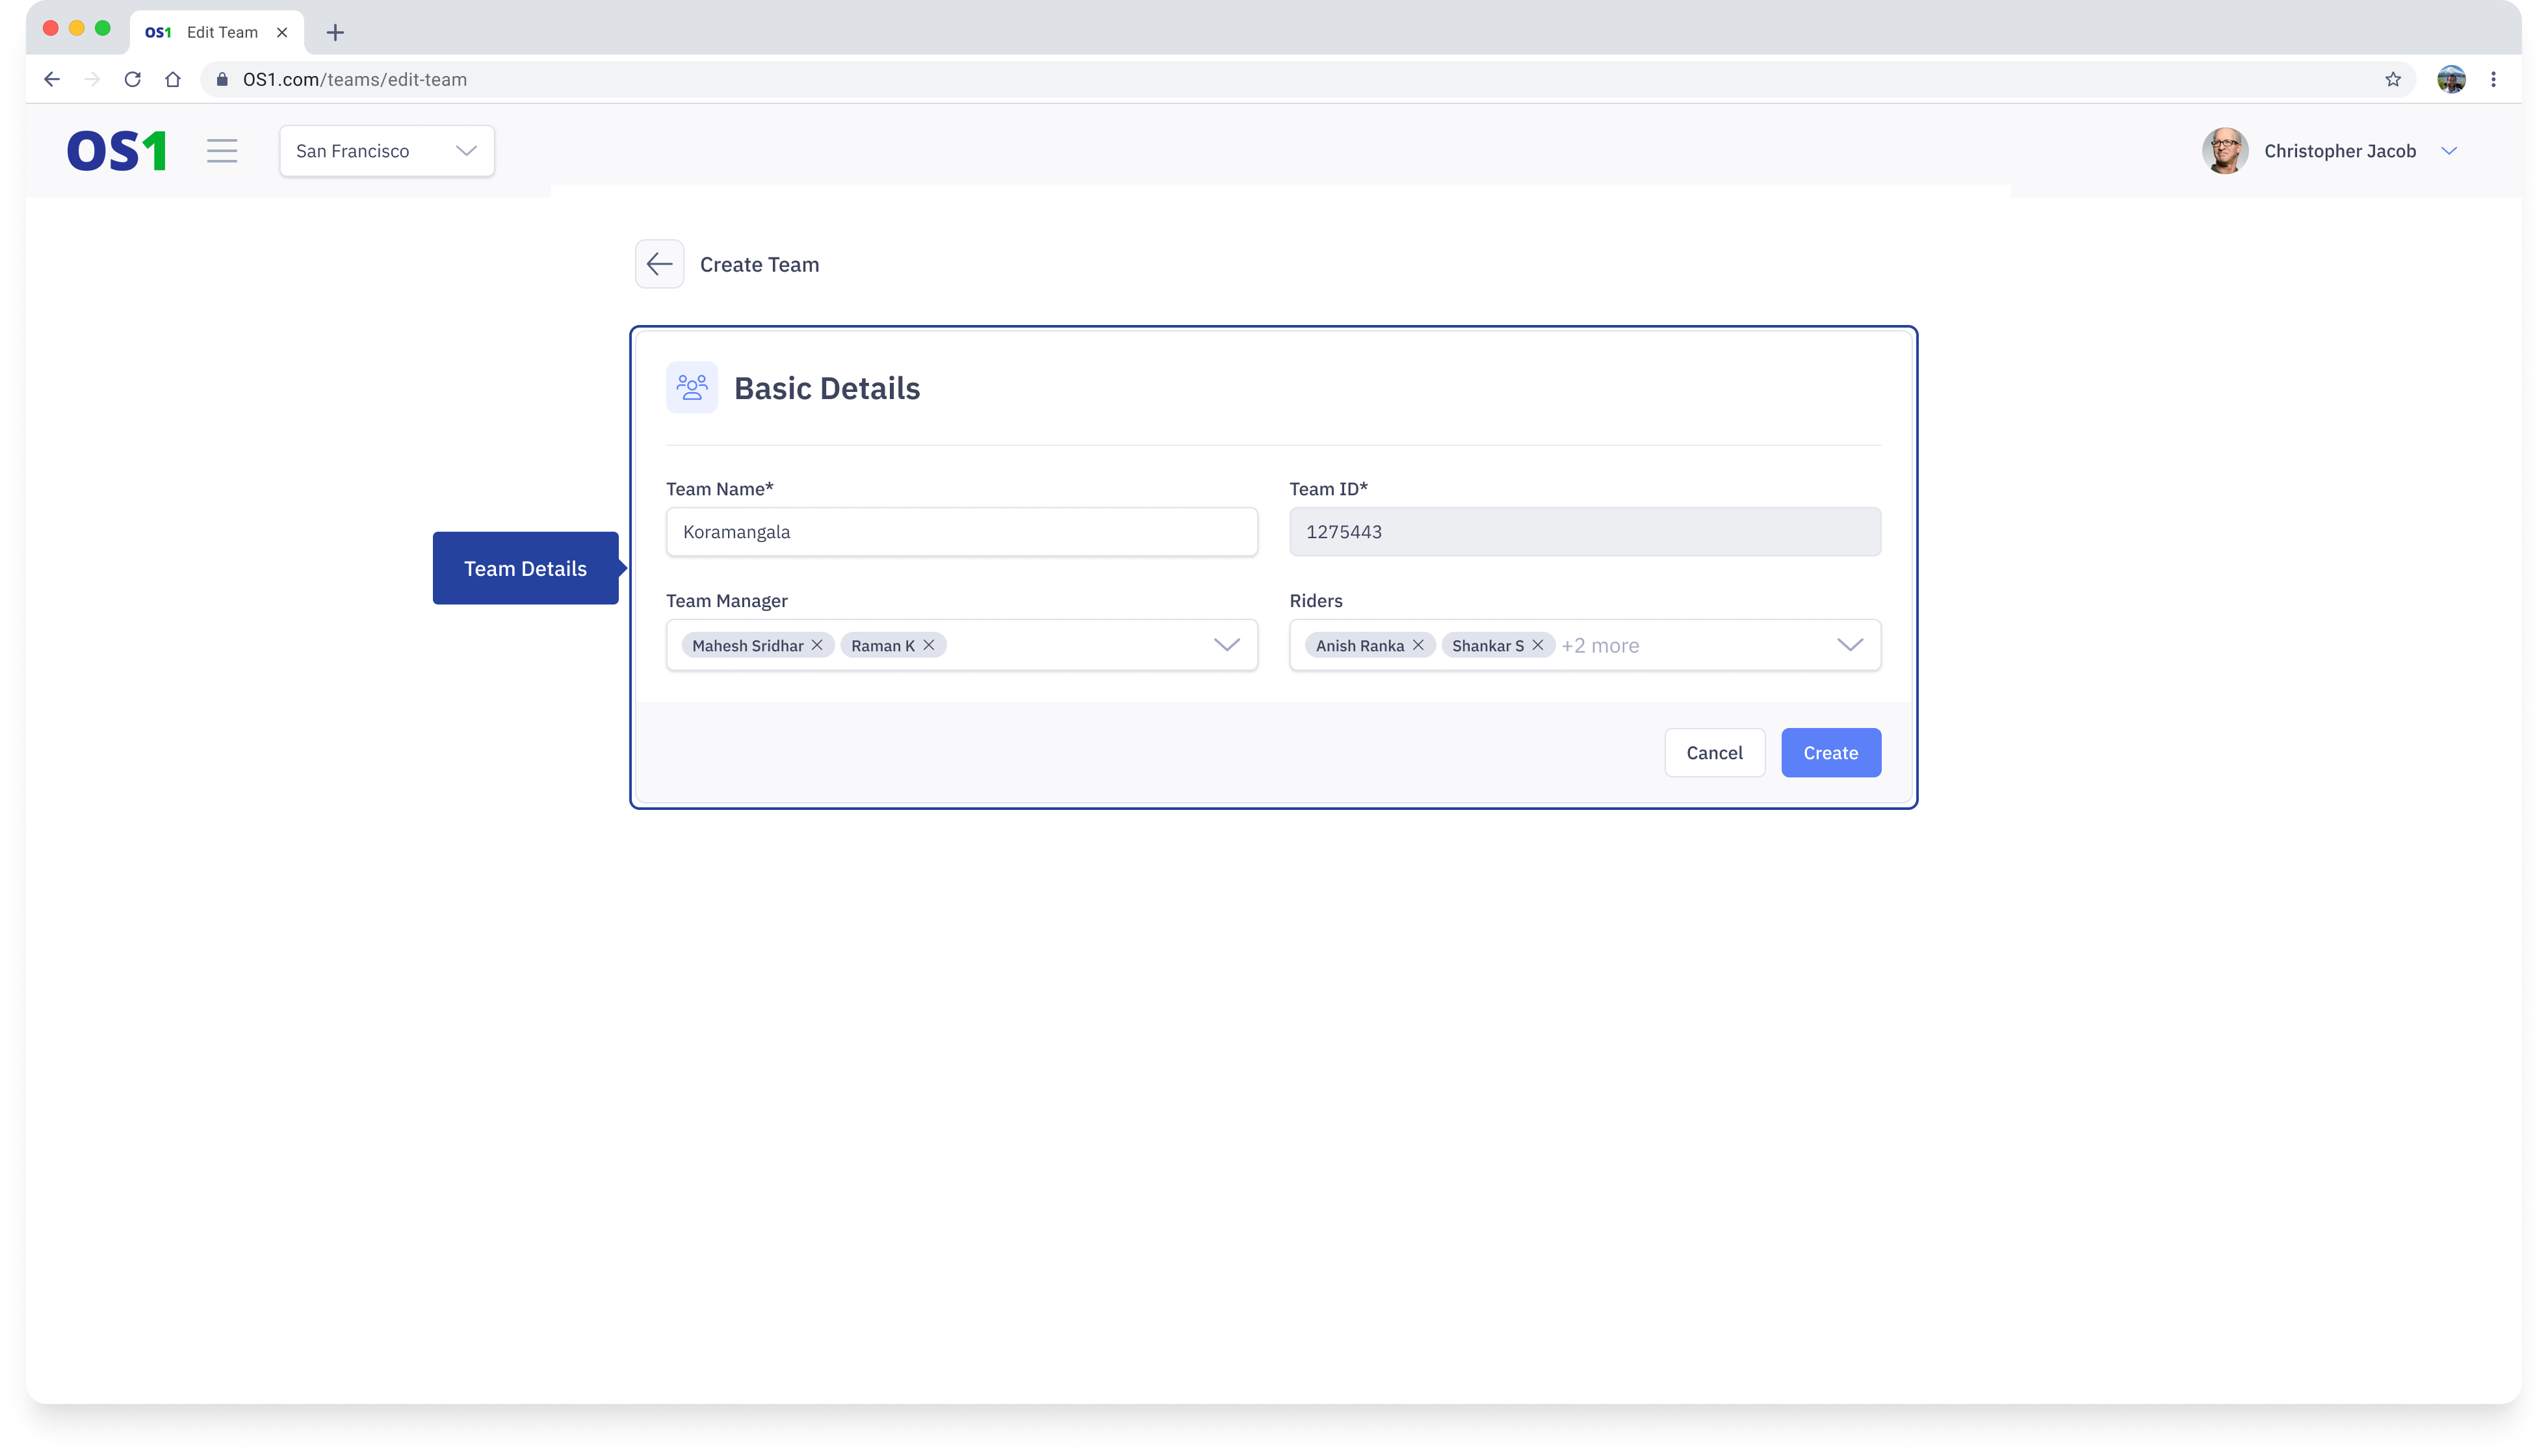
After entering all the required information, you can create the Team by clicking on the "Create" button.
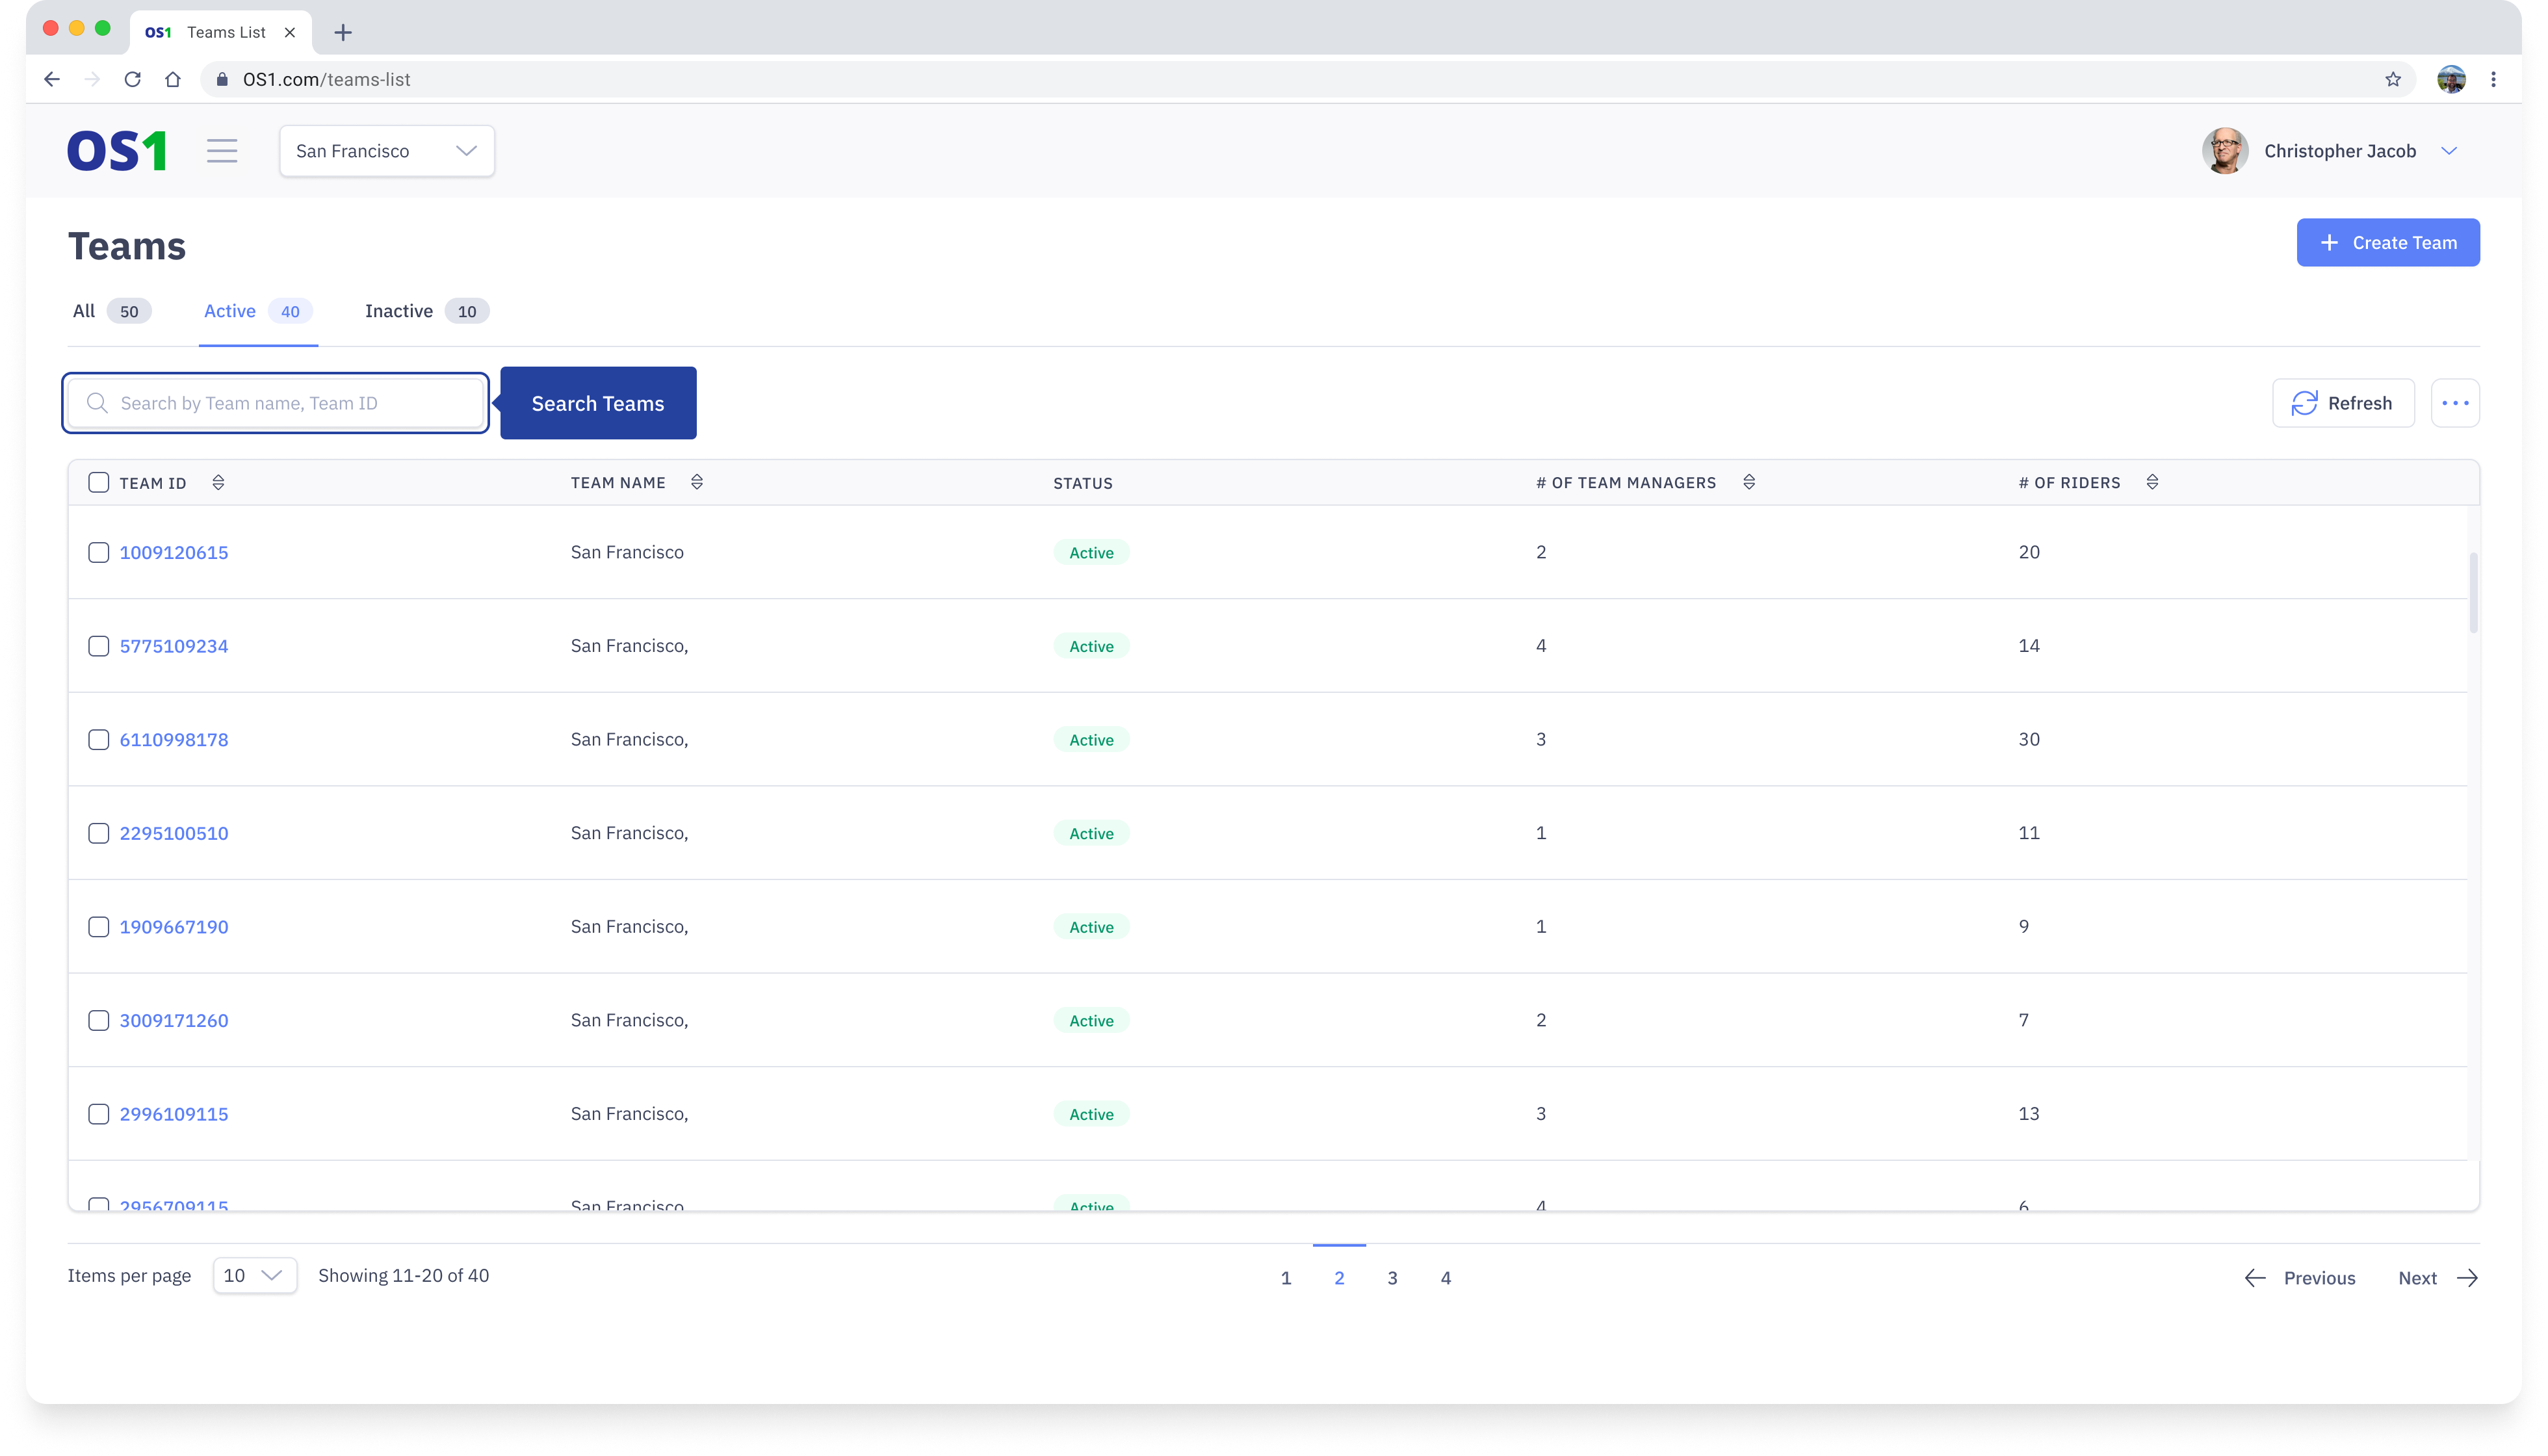
View Teams
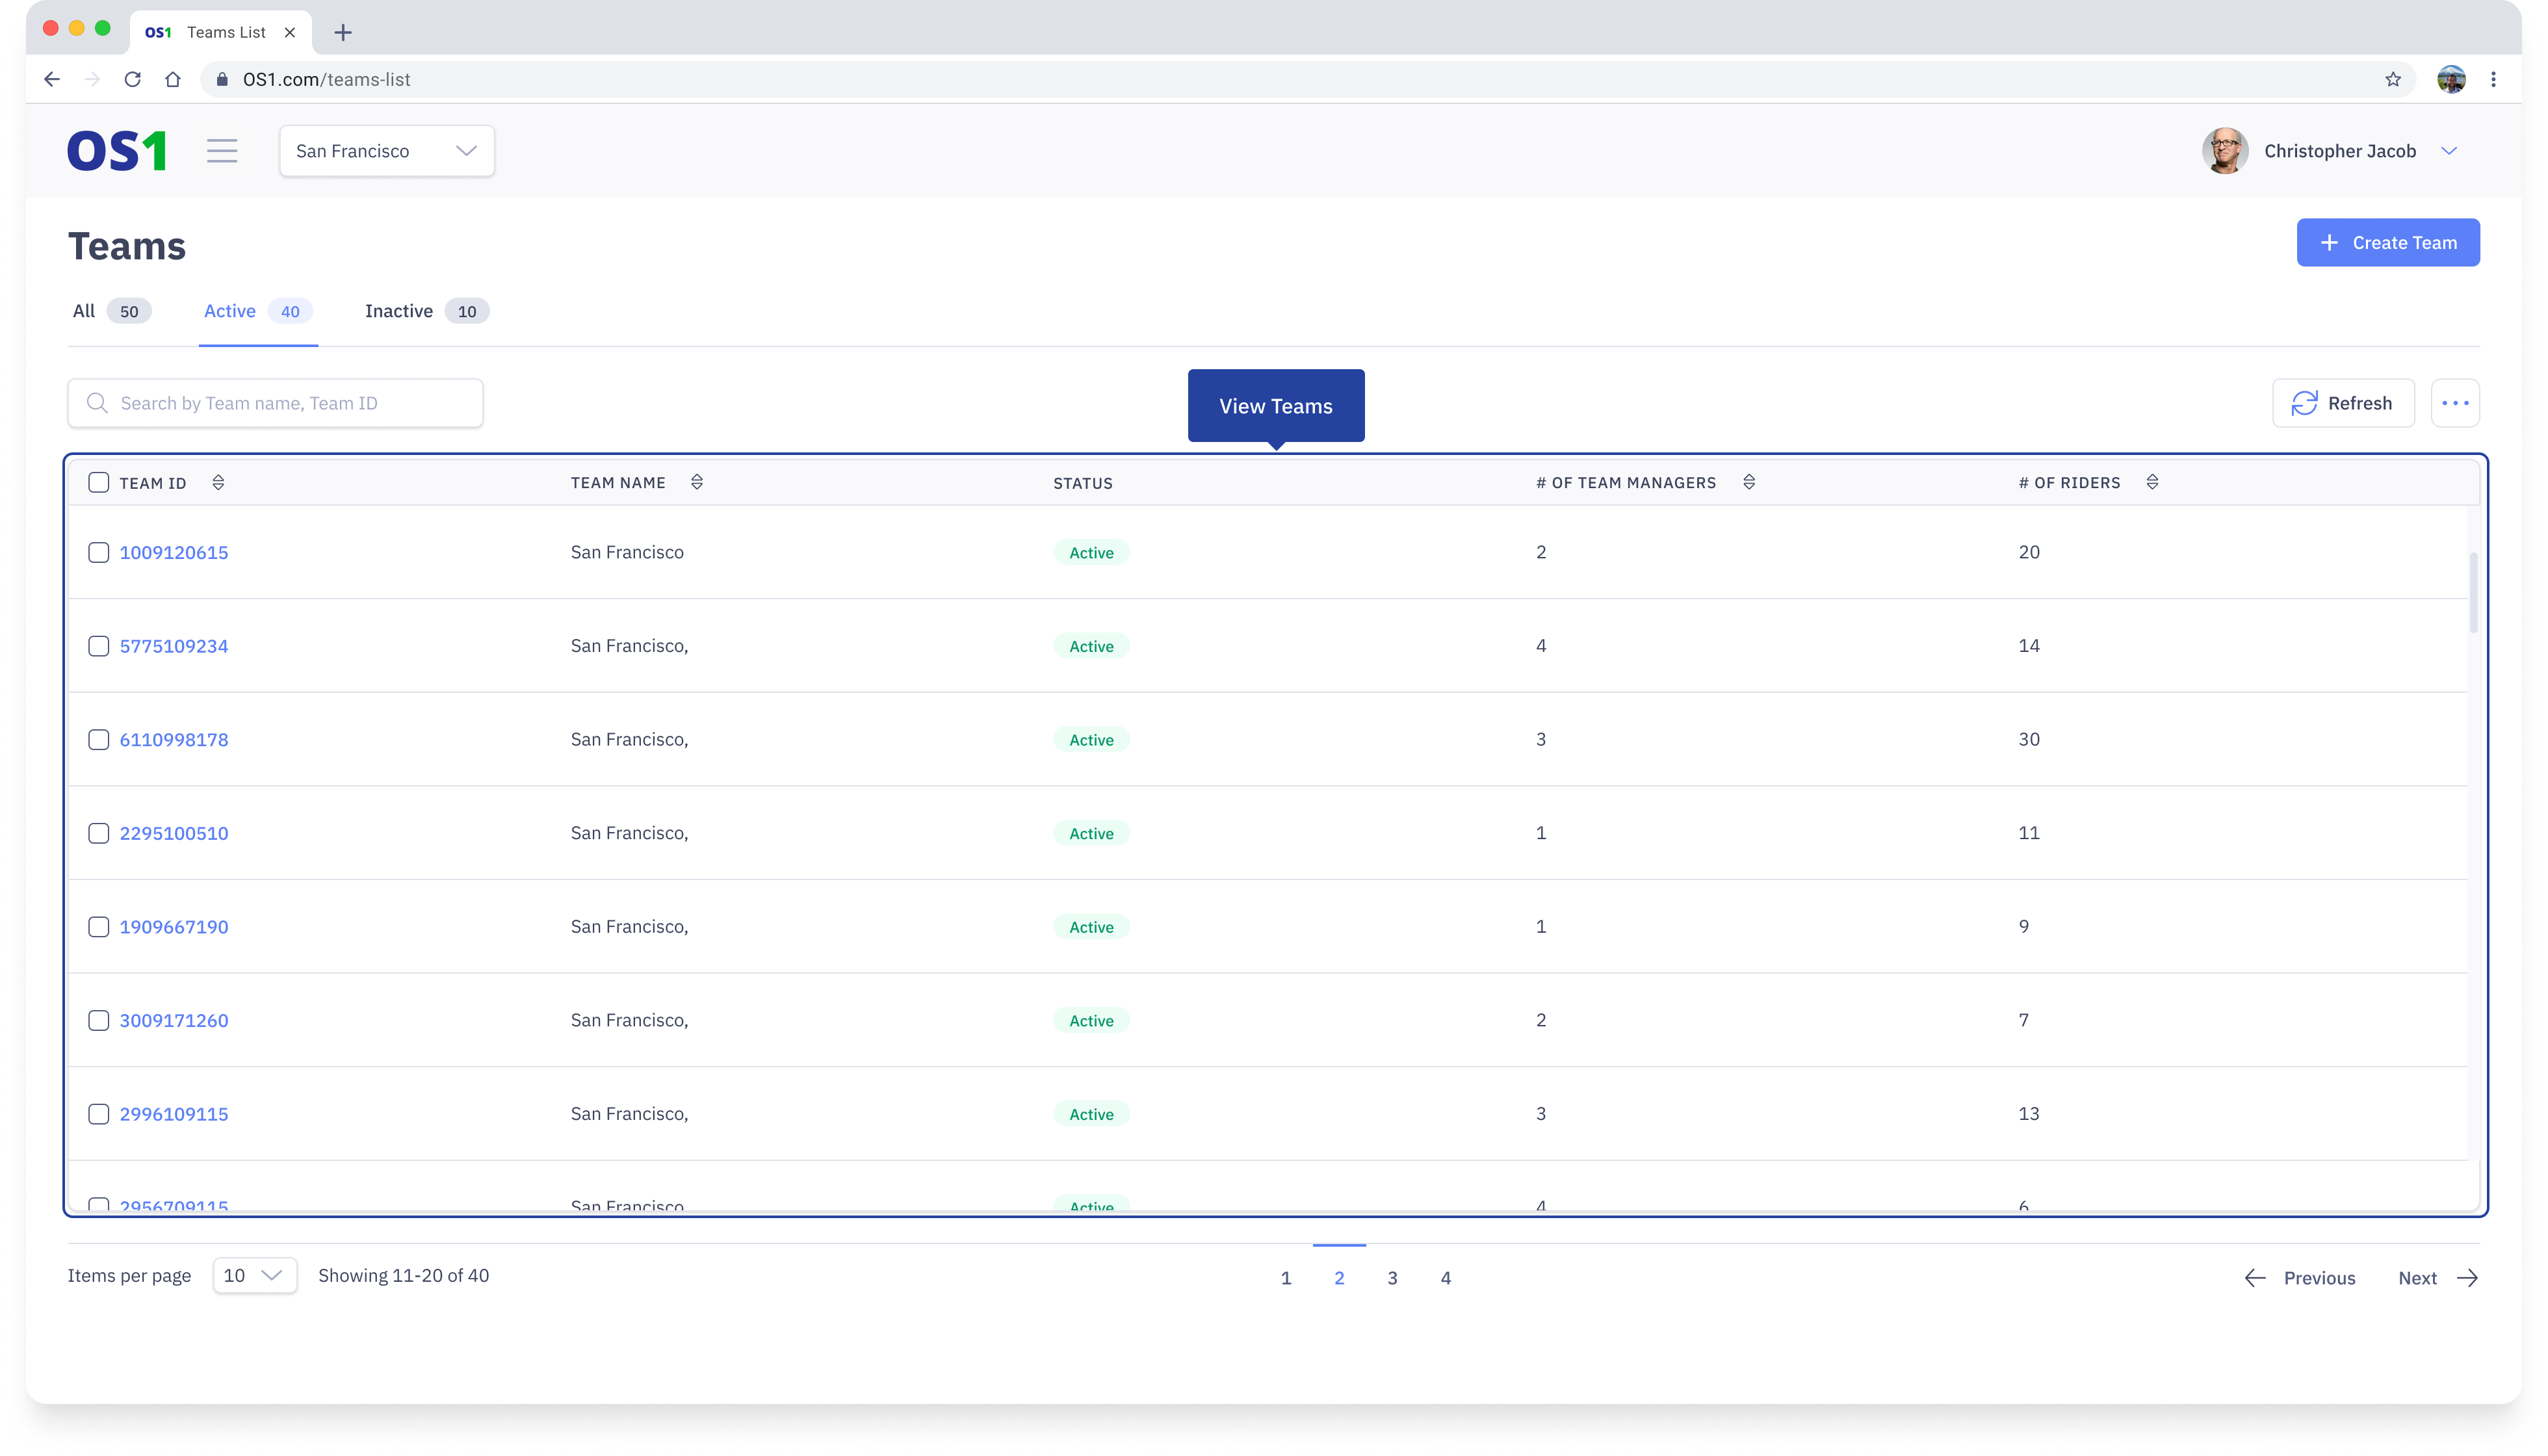
Once you have created a Team, you can see the list of all the created Teams on the Teams Listing page. You can see the following information about each team in the table:
- Team ID
- Team Name
- Status: A Team can be in either “Active” or “Inactive” state
- Number of Team Managers
- Number of Riders
- Created At (hidden by default)
- Updated At (hidden by default)
- Created By (hidden by default)
- Updated By (hidden by default)
To view the full details of any Team, click on the Team ID to go to the Teams Details page.
Edit Teams
To edit a Team, you can either:
- Click on the Edit button in the last column of the Teams Listing page, OR
- Click on the Edit button on the top right corner of the Teams Details page
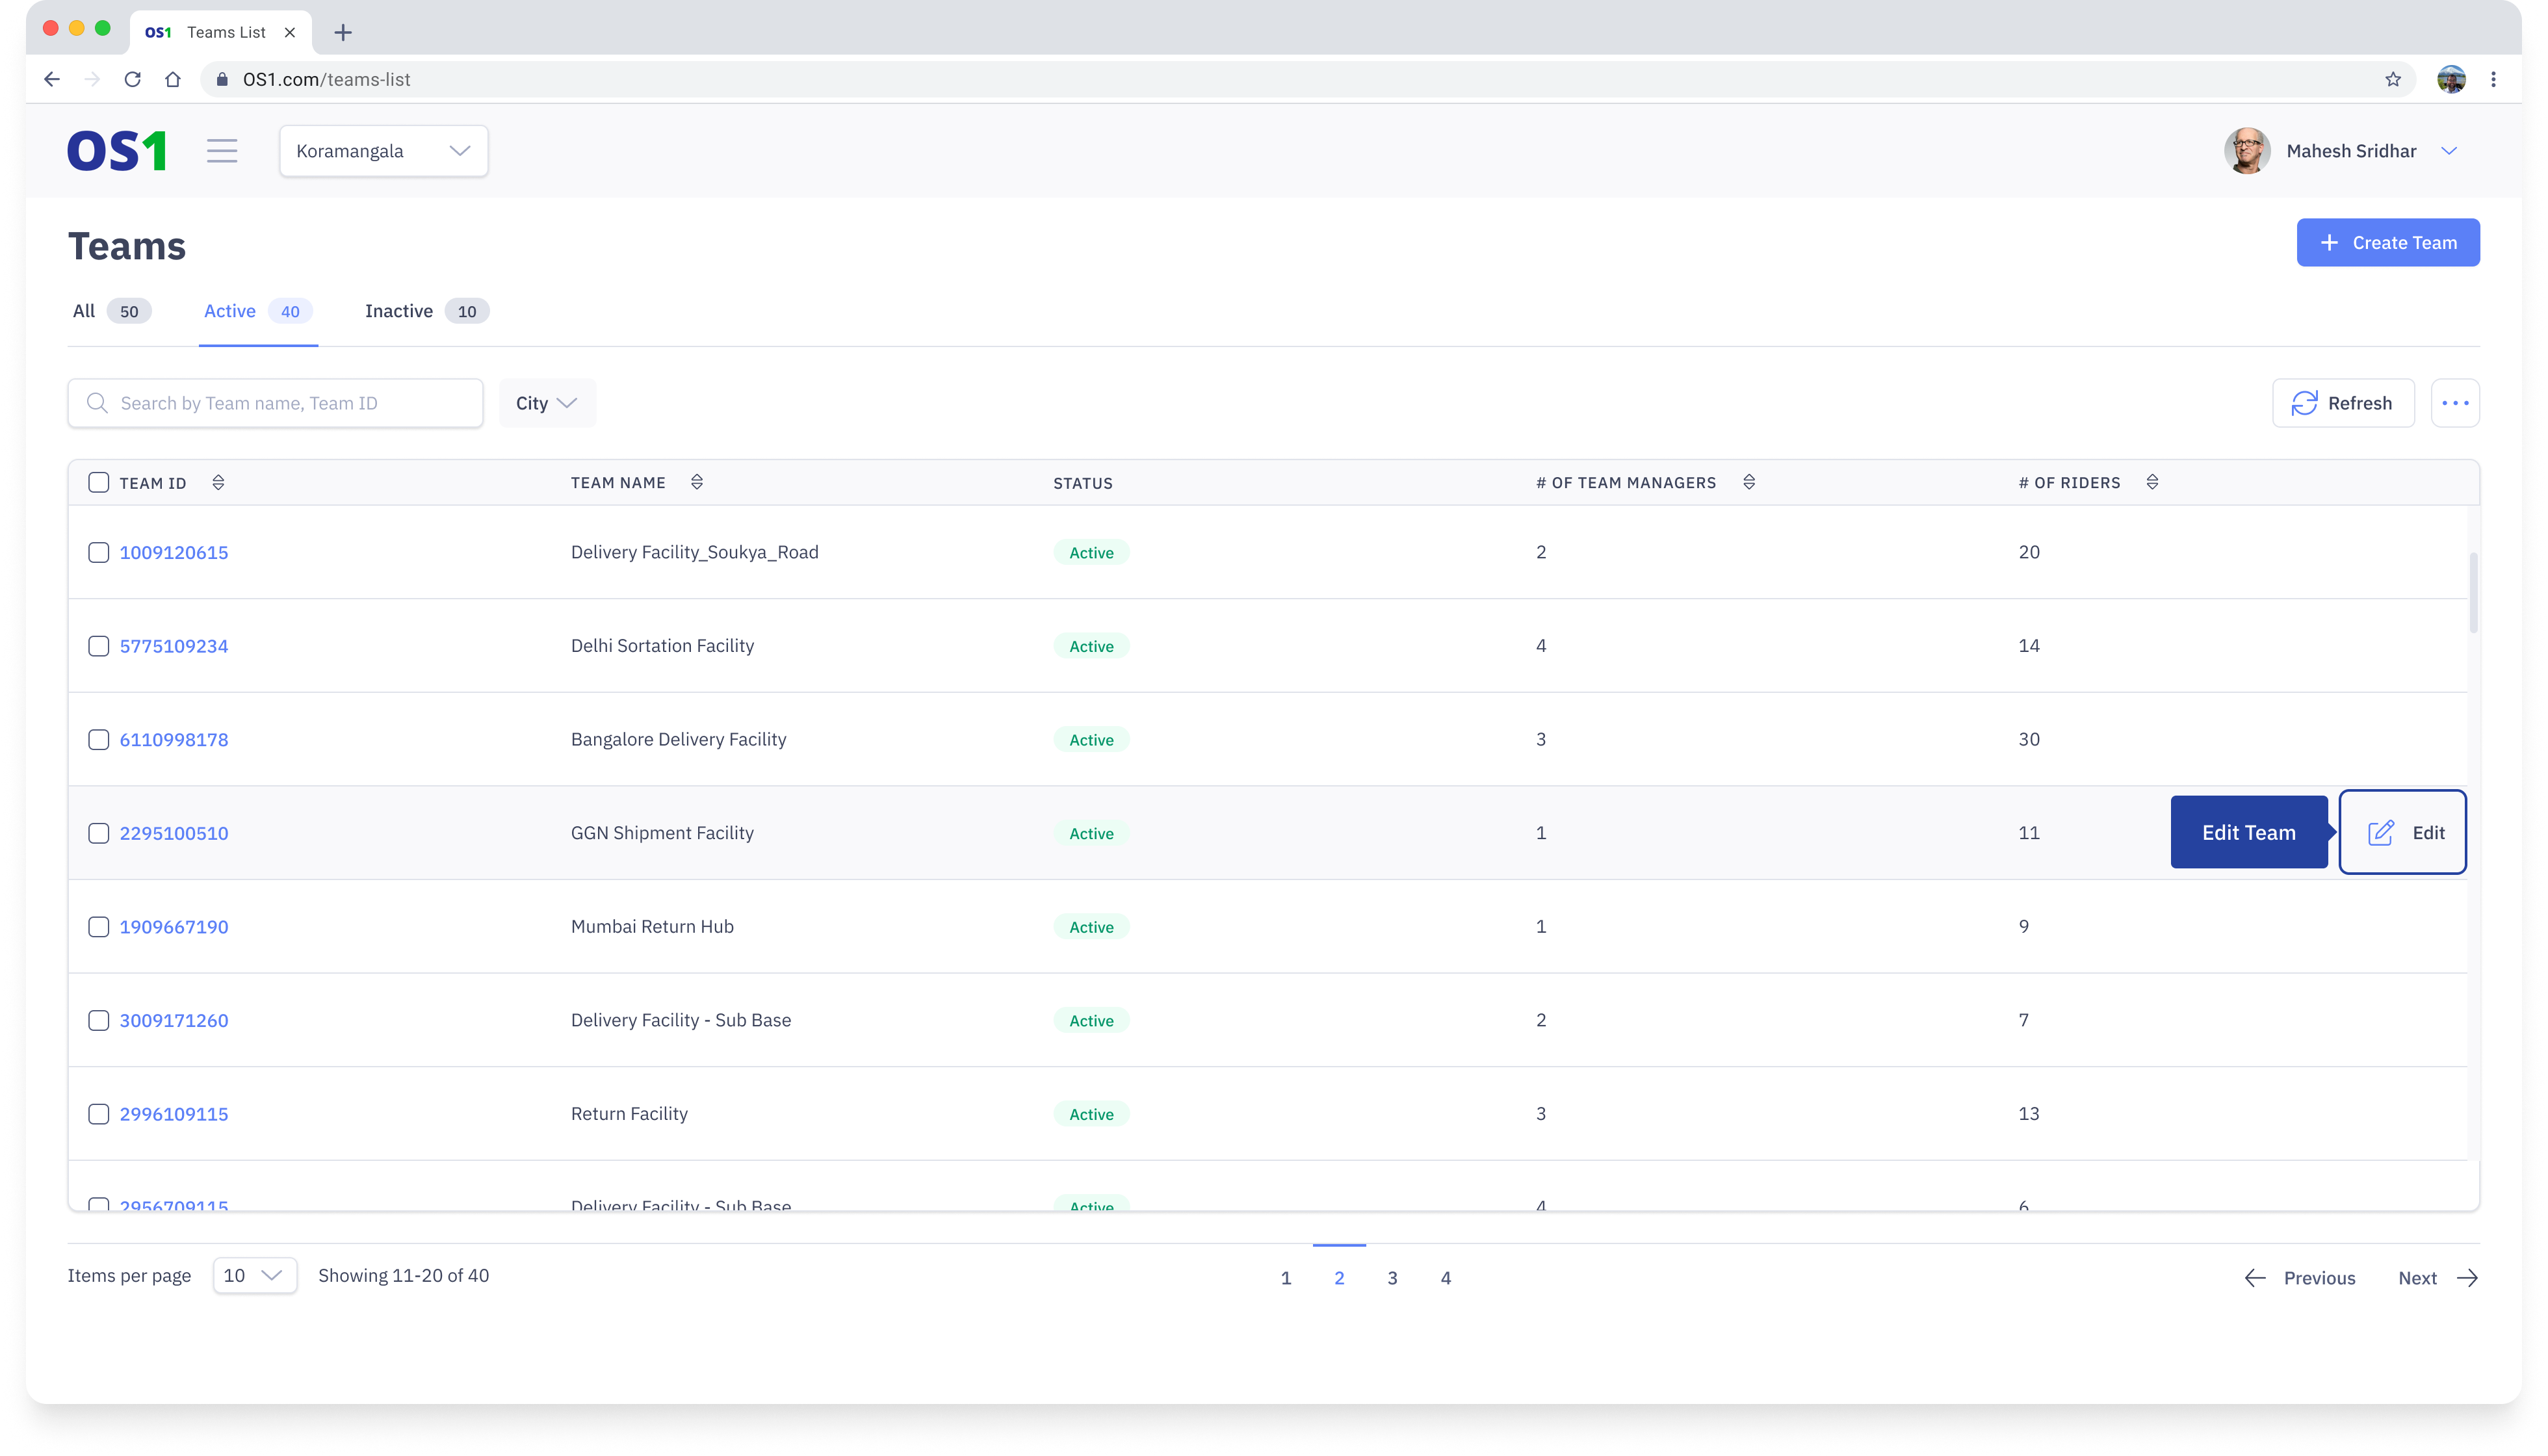
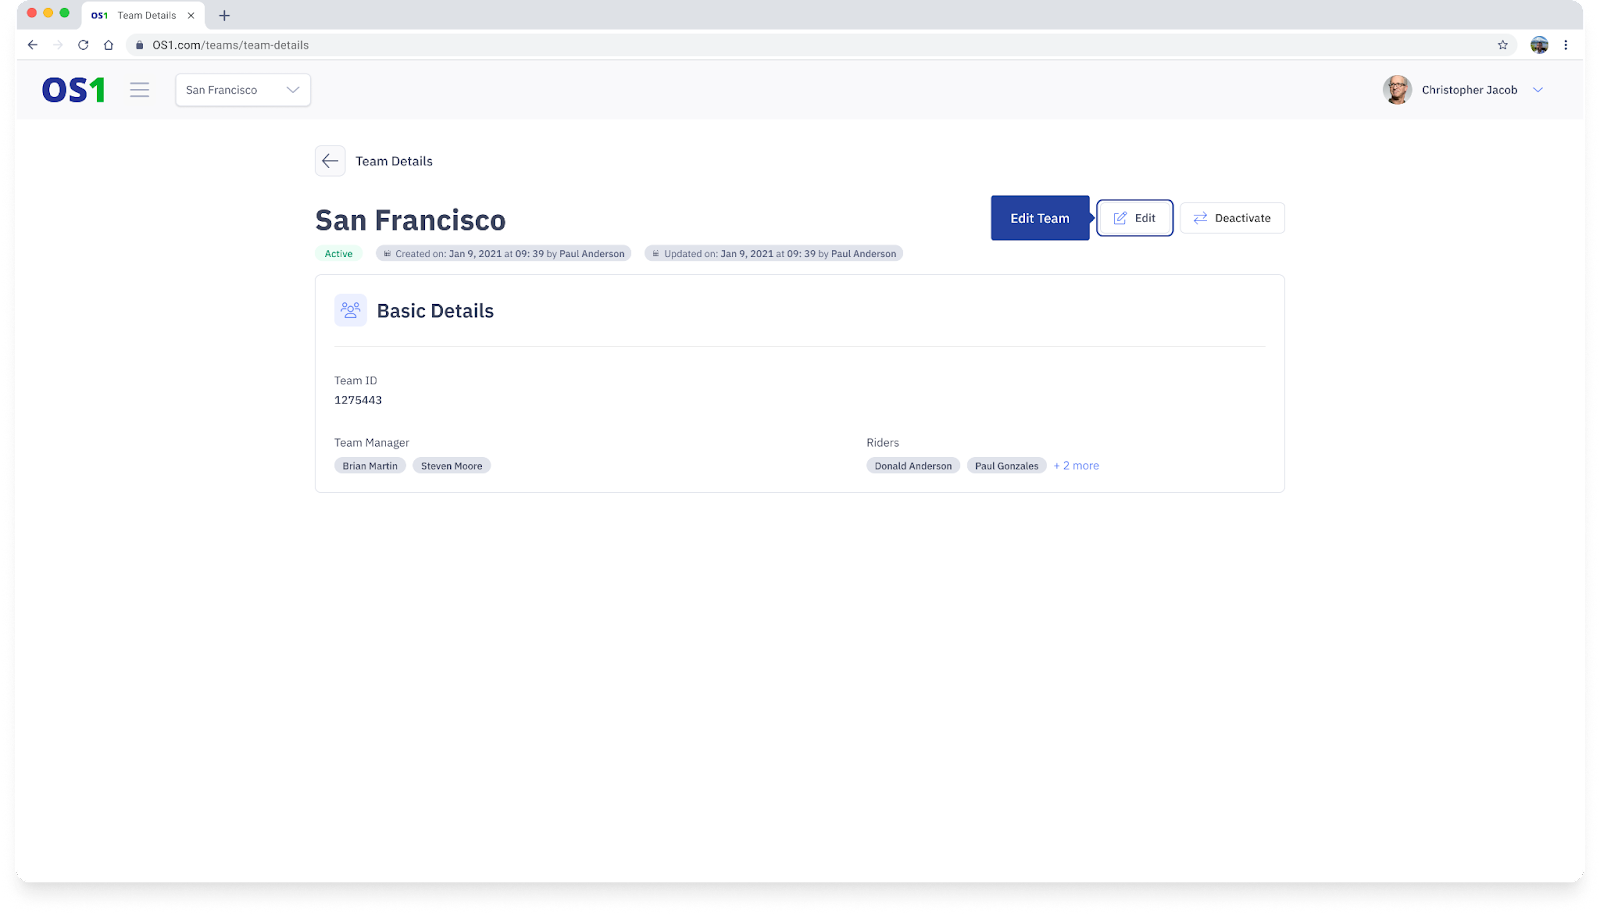
This will navigate you to the Edit Team page where you can make the necessary updates to the team information. After you have made the desired changes, click on the Save button to save and update the Team details.
Search Teams
To search for a Team, enter the Team ID or Team Name in the search bar on the Teams Listing page.
Teams Status Update
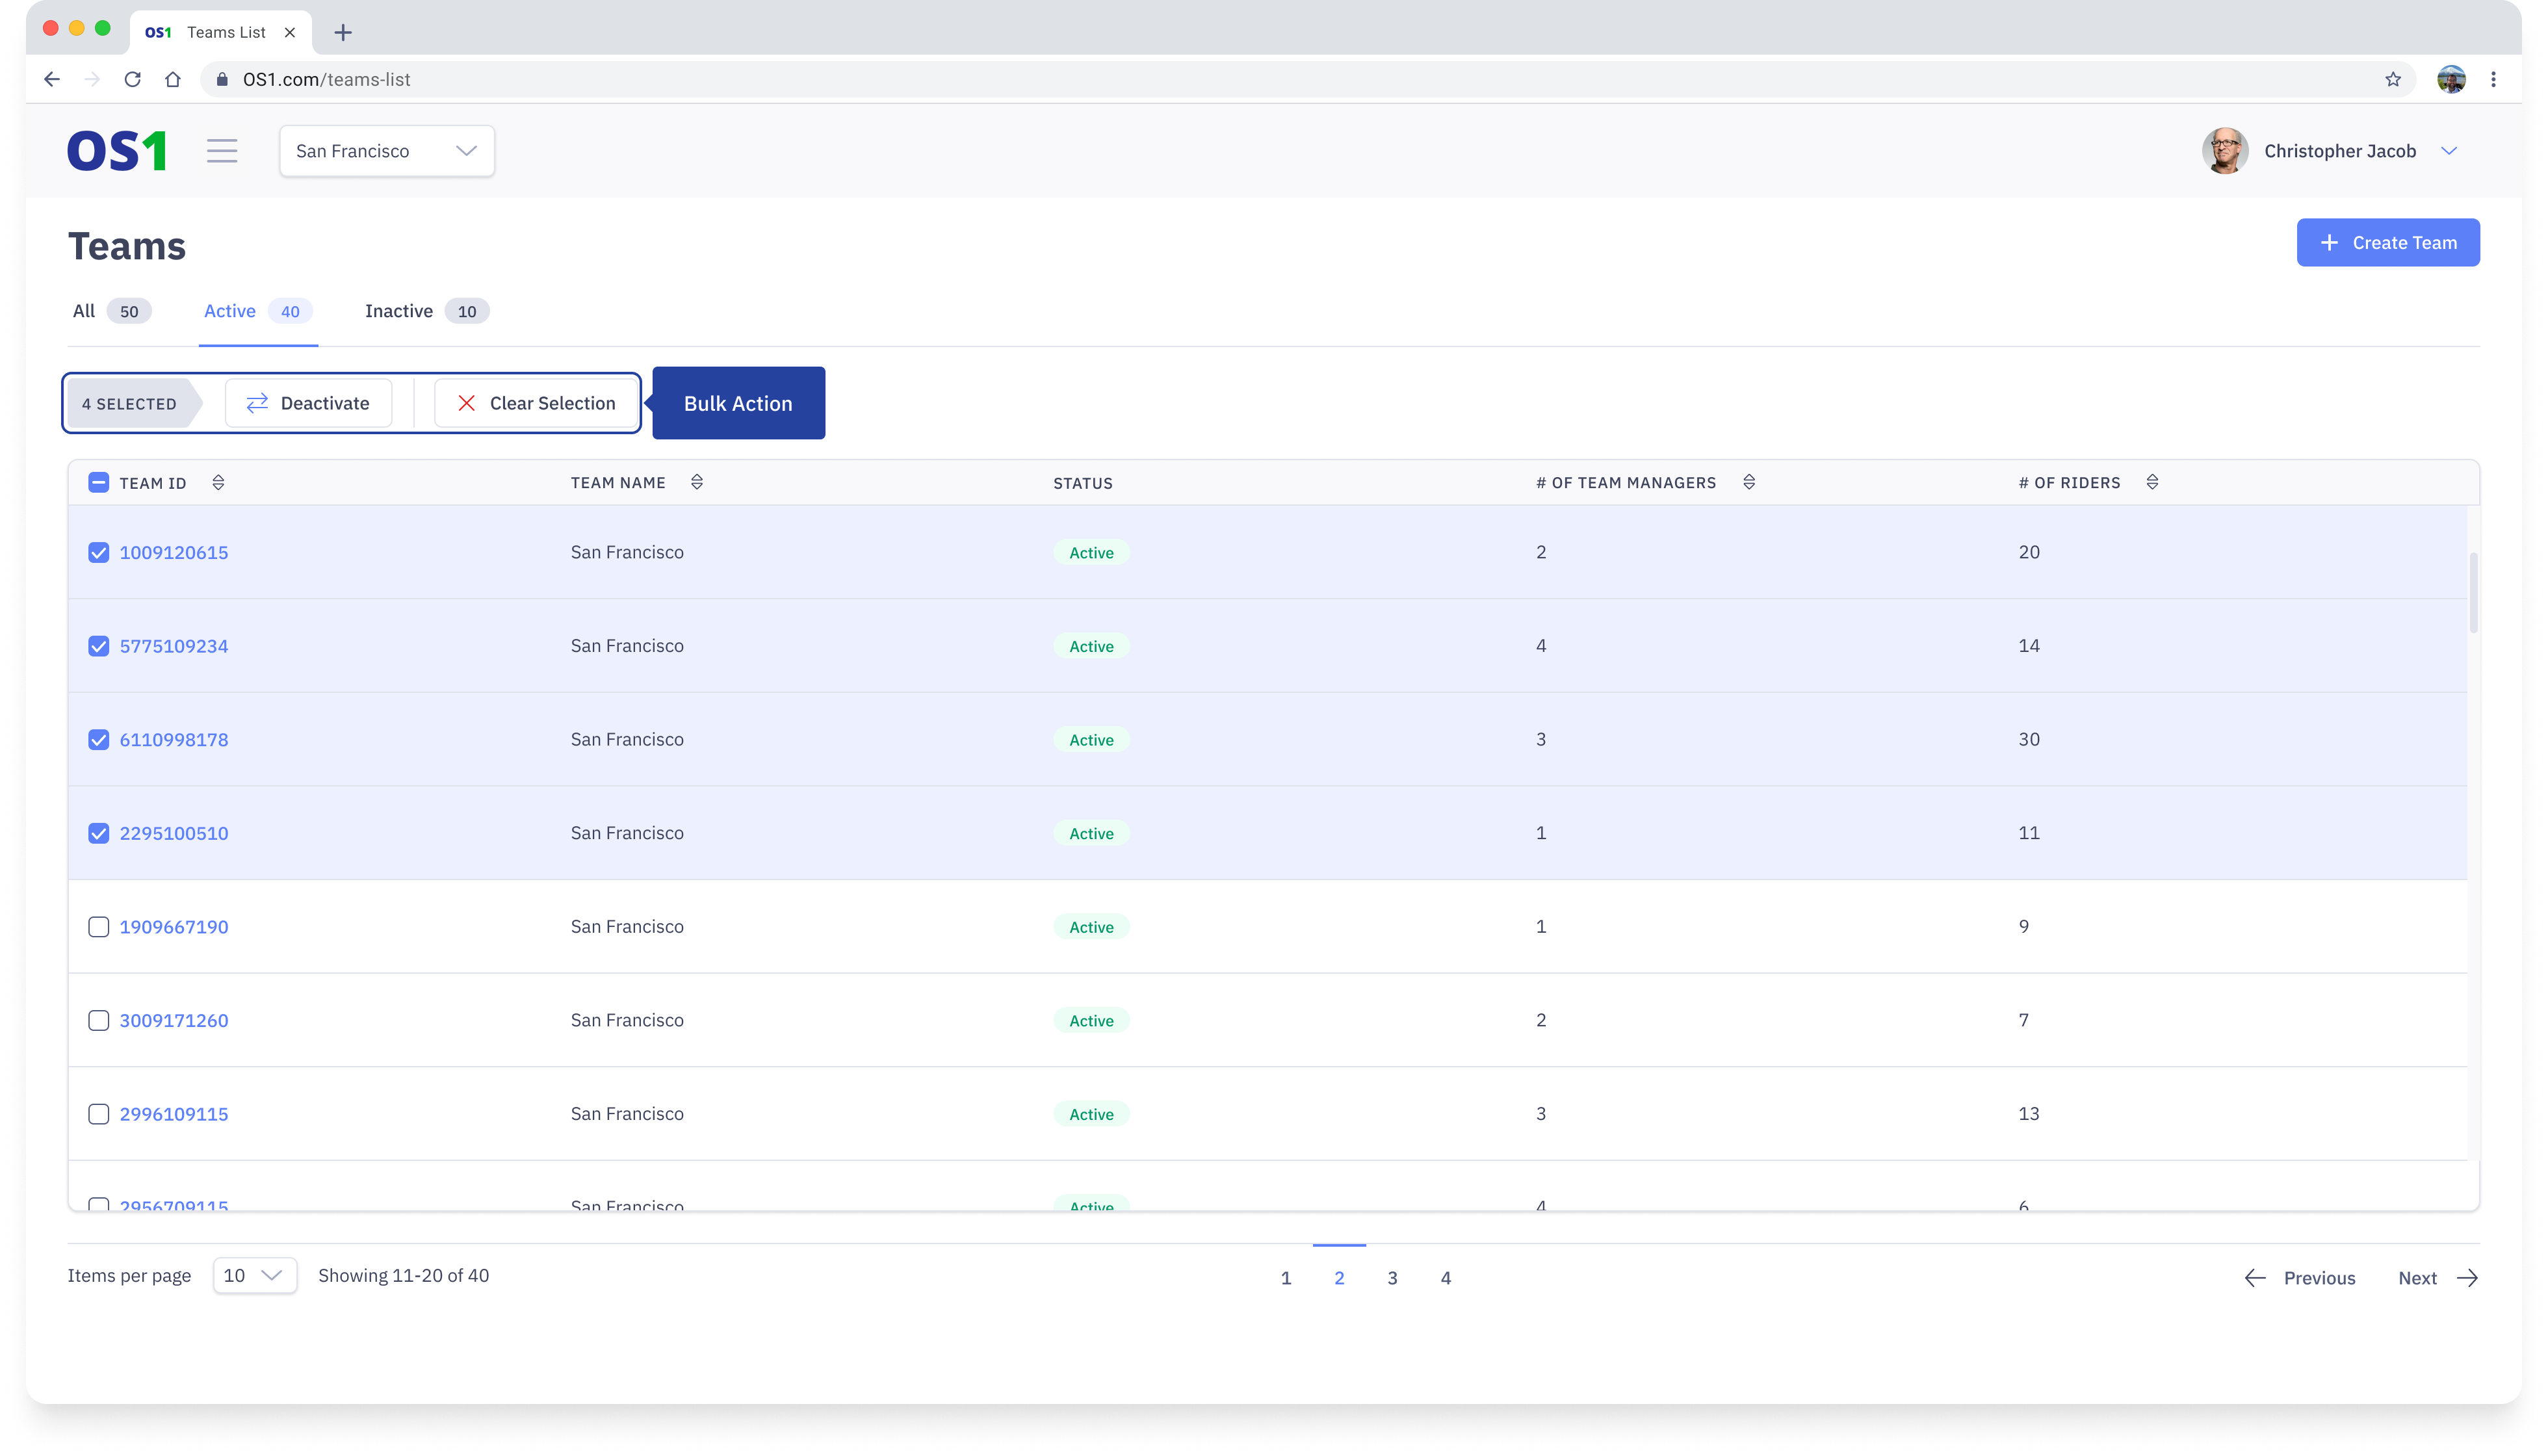
You can also update the status of a single Team or multiple Teams from the Teams Listing page. To do this:
- Select the teams for which you want to change the status (choose one or multiple teams)
- After selecting the teams, an "Activate" or "Deactivate" button will appear above the table, based on the status of the teams selected. Click on it to confirm the status change