
Creating Orders
An order denotes a task or service that necessitates fulfilment. It may involve either the pickup and delivery of an item between locations or the completion of a service request at a specific place.
All actions on DispatchOne revolve primarily around Orders, with the aim of completing them. Thus the first step is to understand how to create a new Order.
Orders can be created through the following methods:
- The Team Manager manually creates the orders using the "Create Order" form
- The Team Manager uploads orders in bulk
Creating orders manually using the "Create Order" form
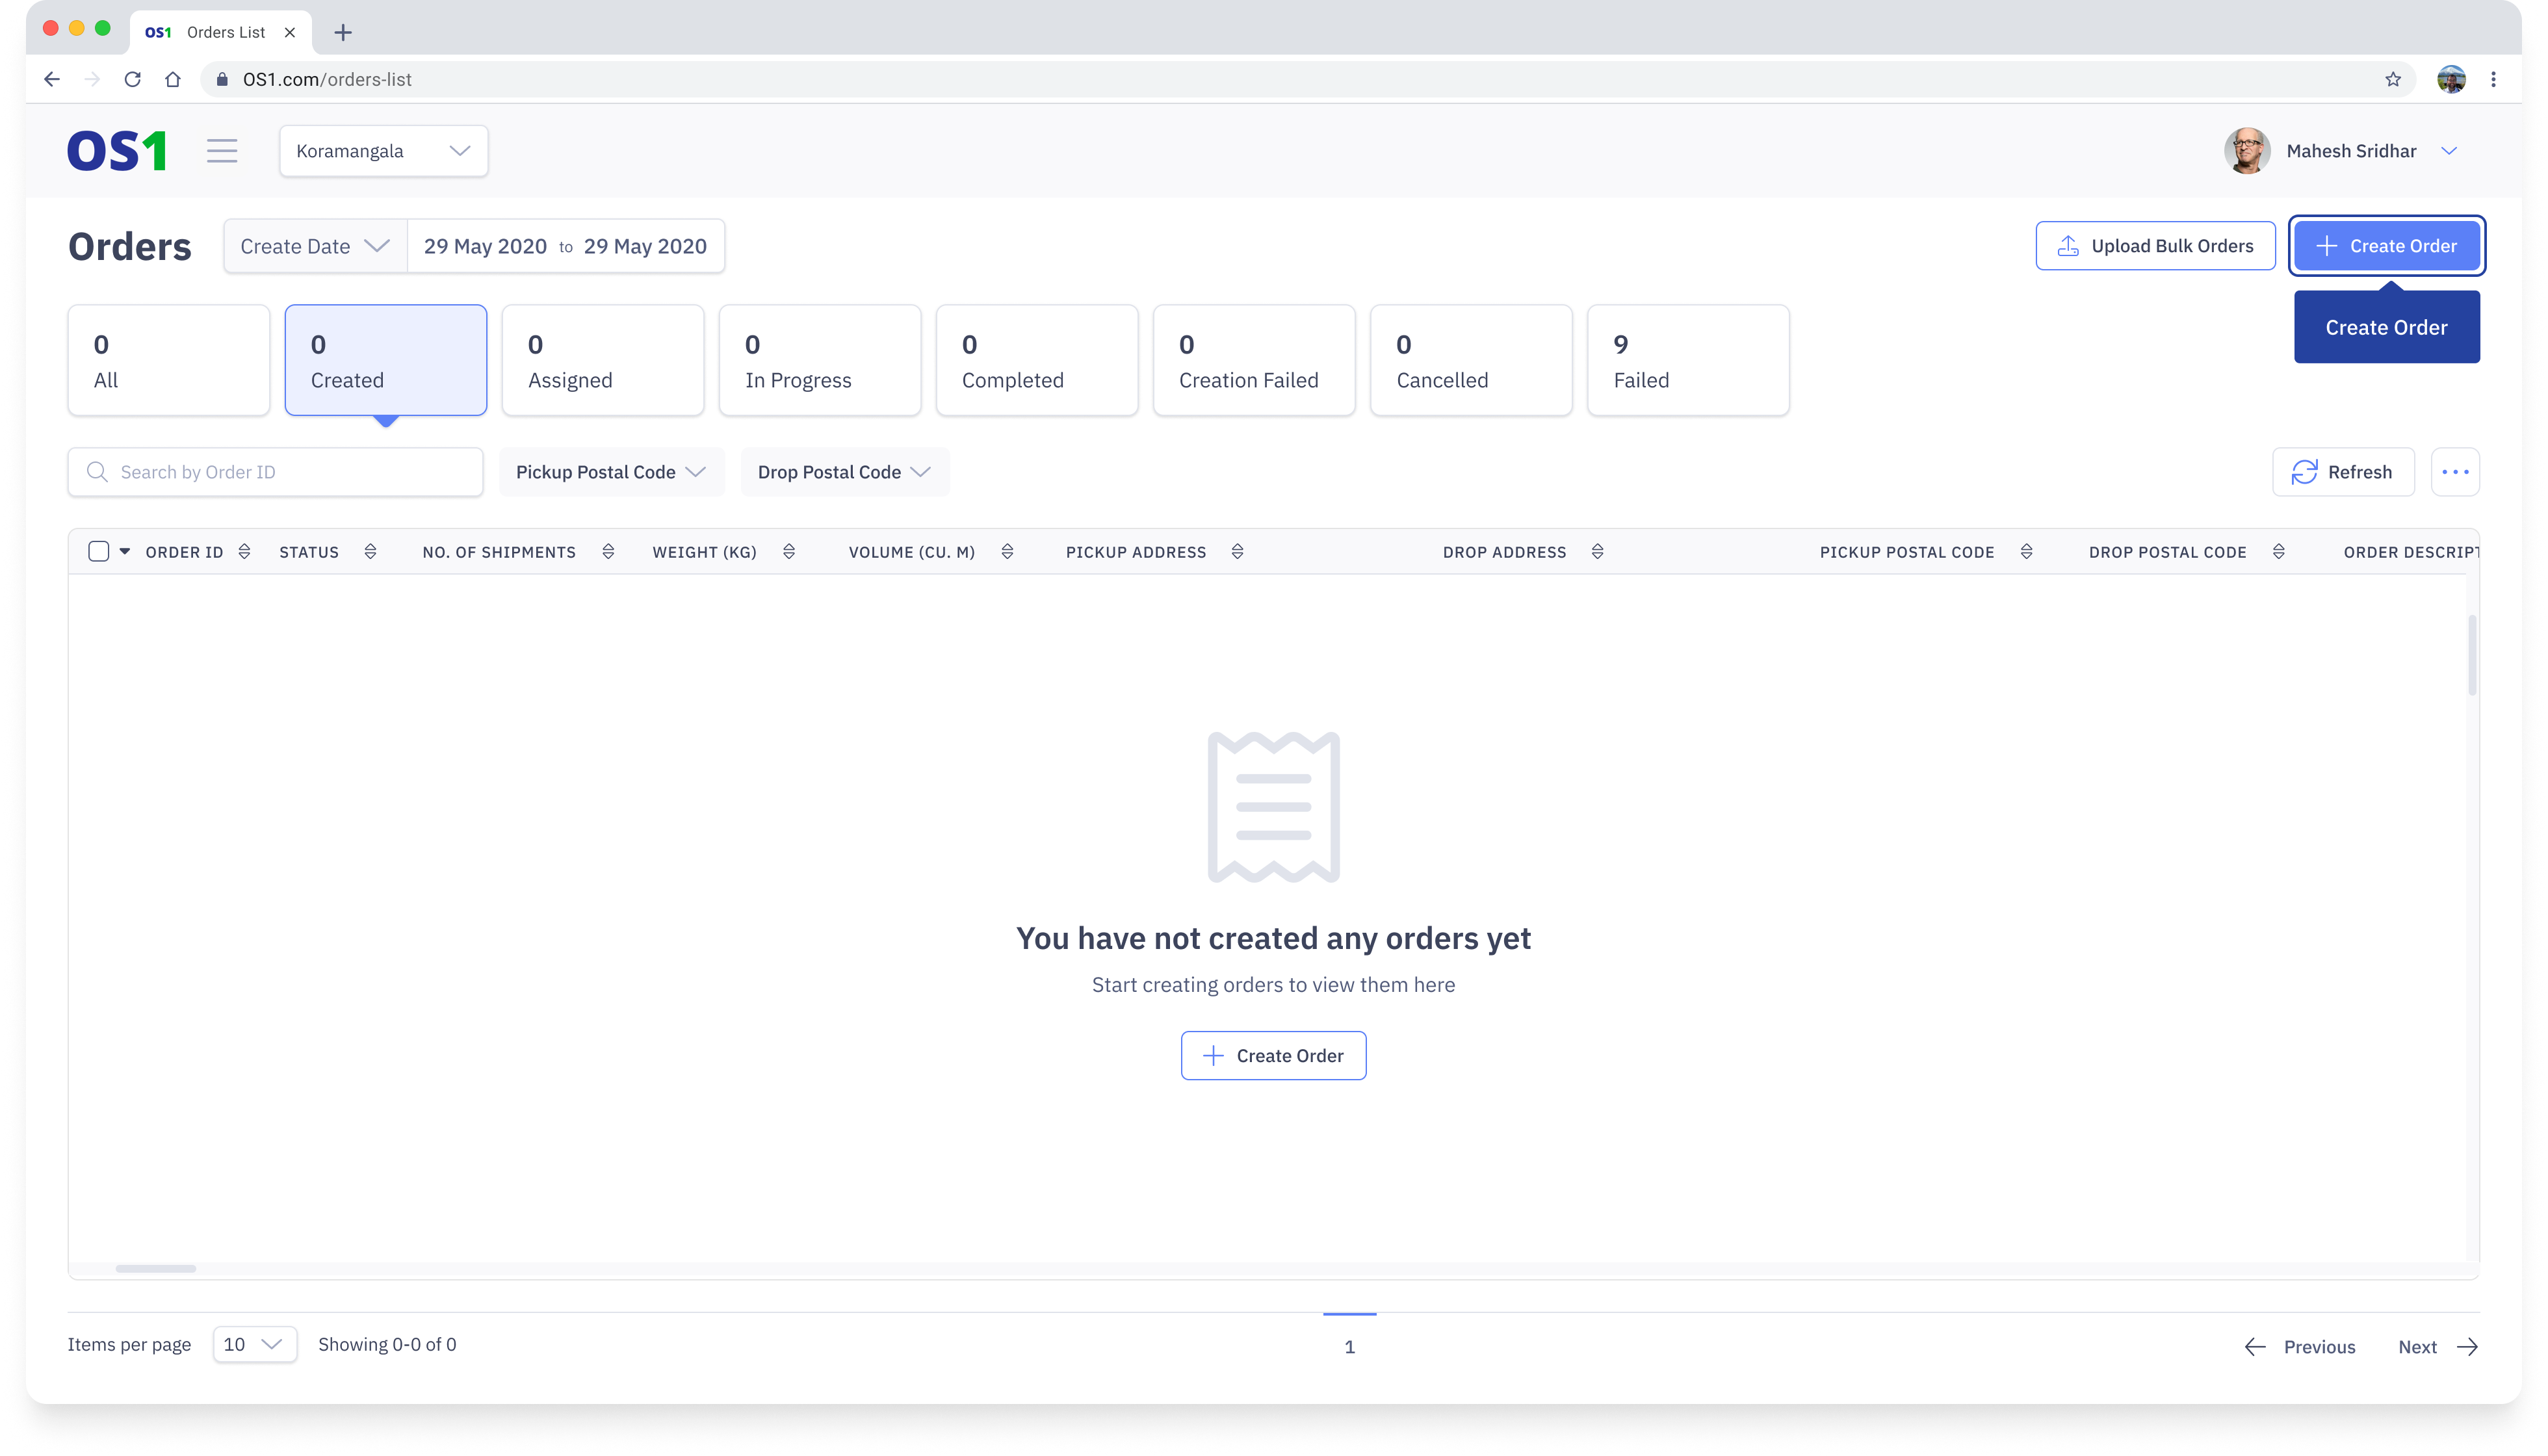
To create an Order on DispatchOne, navigate to the Orders page and click on the "Create Order" button located in the top right corner of the Order Listing page. This will take you to the Create Orders page from where you can create an order.
Once you are on Create Order page, you can proceed to enter the various details of the Order. These details are categorised under 5 sections:
1. Order Details
This section of the Create Order form captures the basic details describing and identifying the order. These details are mandatory:
- Order ID: An Order ID is a unique identifier assigned to each order for tracking and identification purposes. As an organization, you can define your series of Order IDs. Please ensure the Order IDs are between 3 and 128 characters in length and are unique
- Order Description: The Order Description provides details about the contents of the order, such as groceries, computer peripherals, etc. The description must be less than 250 characters
- Team: Select the Team to which the order should be assigned. By default, the team the Team Manager creating the order belongs to will be pre-populated.
2. Shipment Details
This section captures the details of the order that will be used to optimize the dispatches better
- Shipment ID: Enter the unique ID of the shipment you want to ship. By default, this will be the same as the Order ID but can be modified if required
- Description: Enter the description of the shipment being shipped. This will add more context to what is being shipped
- Weight (KG): Enter the total weight of the shipment. This will be used by the Route Optimizer to come up with optimized routes. This is an optional field.
- Volume (CU.M): Enter the total volume of the shipment. This will be used by the Route Optimizer to come up with optimized routes
- Dimensions (CM): Enter the dimensions of the shipment. The volume will be calculated based on the dimensions entered in case volume is not entered
3. Pickup and Drop Details
The Pickup and Drop details are any location from where the driver can pick up and drop an order. These addresses are geocoded by DispatchOne to improve the accuracy of pickup and drop.
To enter the details for both pickup and drop follow the below:
- Select Pickup Details or Drop Details, this will open up a modal where you can enter the details
- Under "Select Type Of Addres" choose "Facility" if you want to pick up or drop orders from/to a facility or a store stored on DispatchOne. If you have a custom address from where you want to pick up or drop orders, then choose "Custom Address"
- If you have selected "Facility" under "Select Type of Address" then you can select the facility from the "Select A Facility/Store" list. If you have selected "Custom Address" then this field will be disabled
- Provide the "Contact Name" and "Phone Number" of the person the driver should contact for pickup or drop
- If you have selected a Facility, then the address details are prefilled and the fields are disabled. If you want to enter a custom address, then the below fields are mandatory.
- Postal Code - Enter the postal code of the address you want to enter
- Country - Country is prepopulated based on organization settings and cannot be modified
- Address Line 1 - Enter your civic number, street address, and the building or apartment number
- Address Line 2 - This field is optional and enter if you want to enter more details
- State - State is auto populated based on the Postal Code entered
- City - City is auto populated based on the Postal Code entered
- Select the Pickup Date/ Drop Date. Select the date on which you want the order to be picked up or dropped
- Select the Pickup Slot/ Drop Slot. Select the start time and end time by when the order should be picked up or dropped by the driver
Once all the details are entered, click on "Save".
4. Payment Details
The Payment details will help the driver know whether to collect money while delivering the order.
- Payment Type: This field determines how the payment for the order will be made or if it has already been made. You can select either select "Collect at Delivery" or "Prepaid"
- Order Amount: This field is only required if the Payment Type is "Collect at Delhivery". This field represents the amount to be collected by the driver while delivering the order
Once you have entered all the necessary details, click on "Create" to initiate the creation of your order. After creating the order, you will be directed to the View Orders page.
Note: Click the refresh button on the Order Listing Page to refresh the order table if you are not able to see the newly created orders

Upload orders in bulk
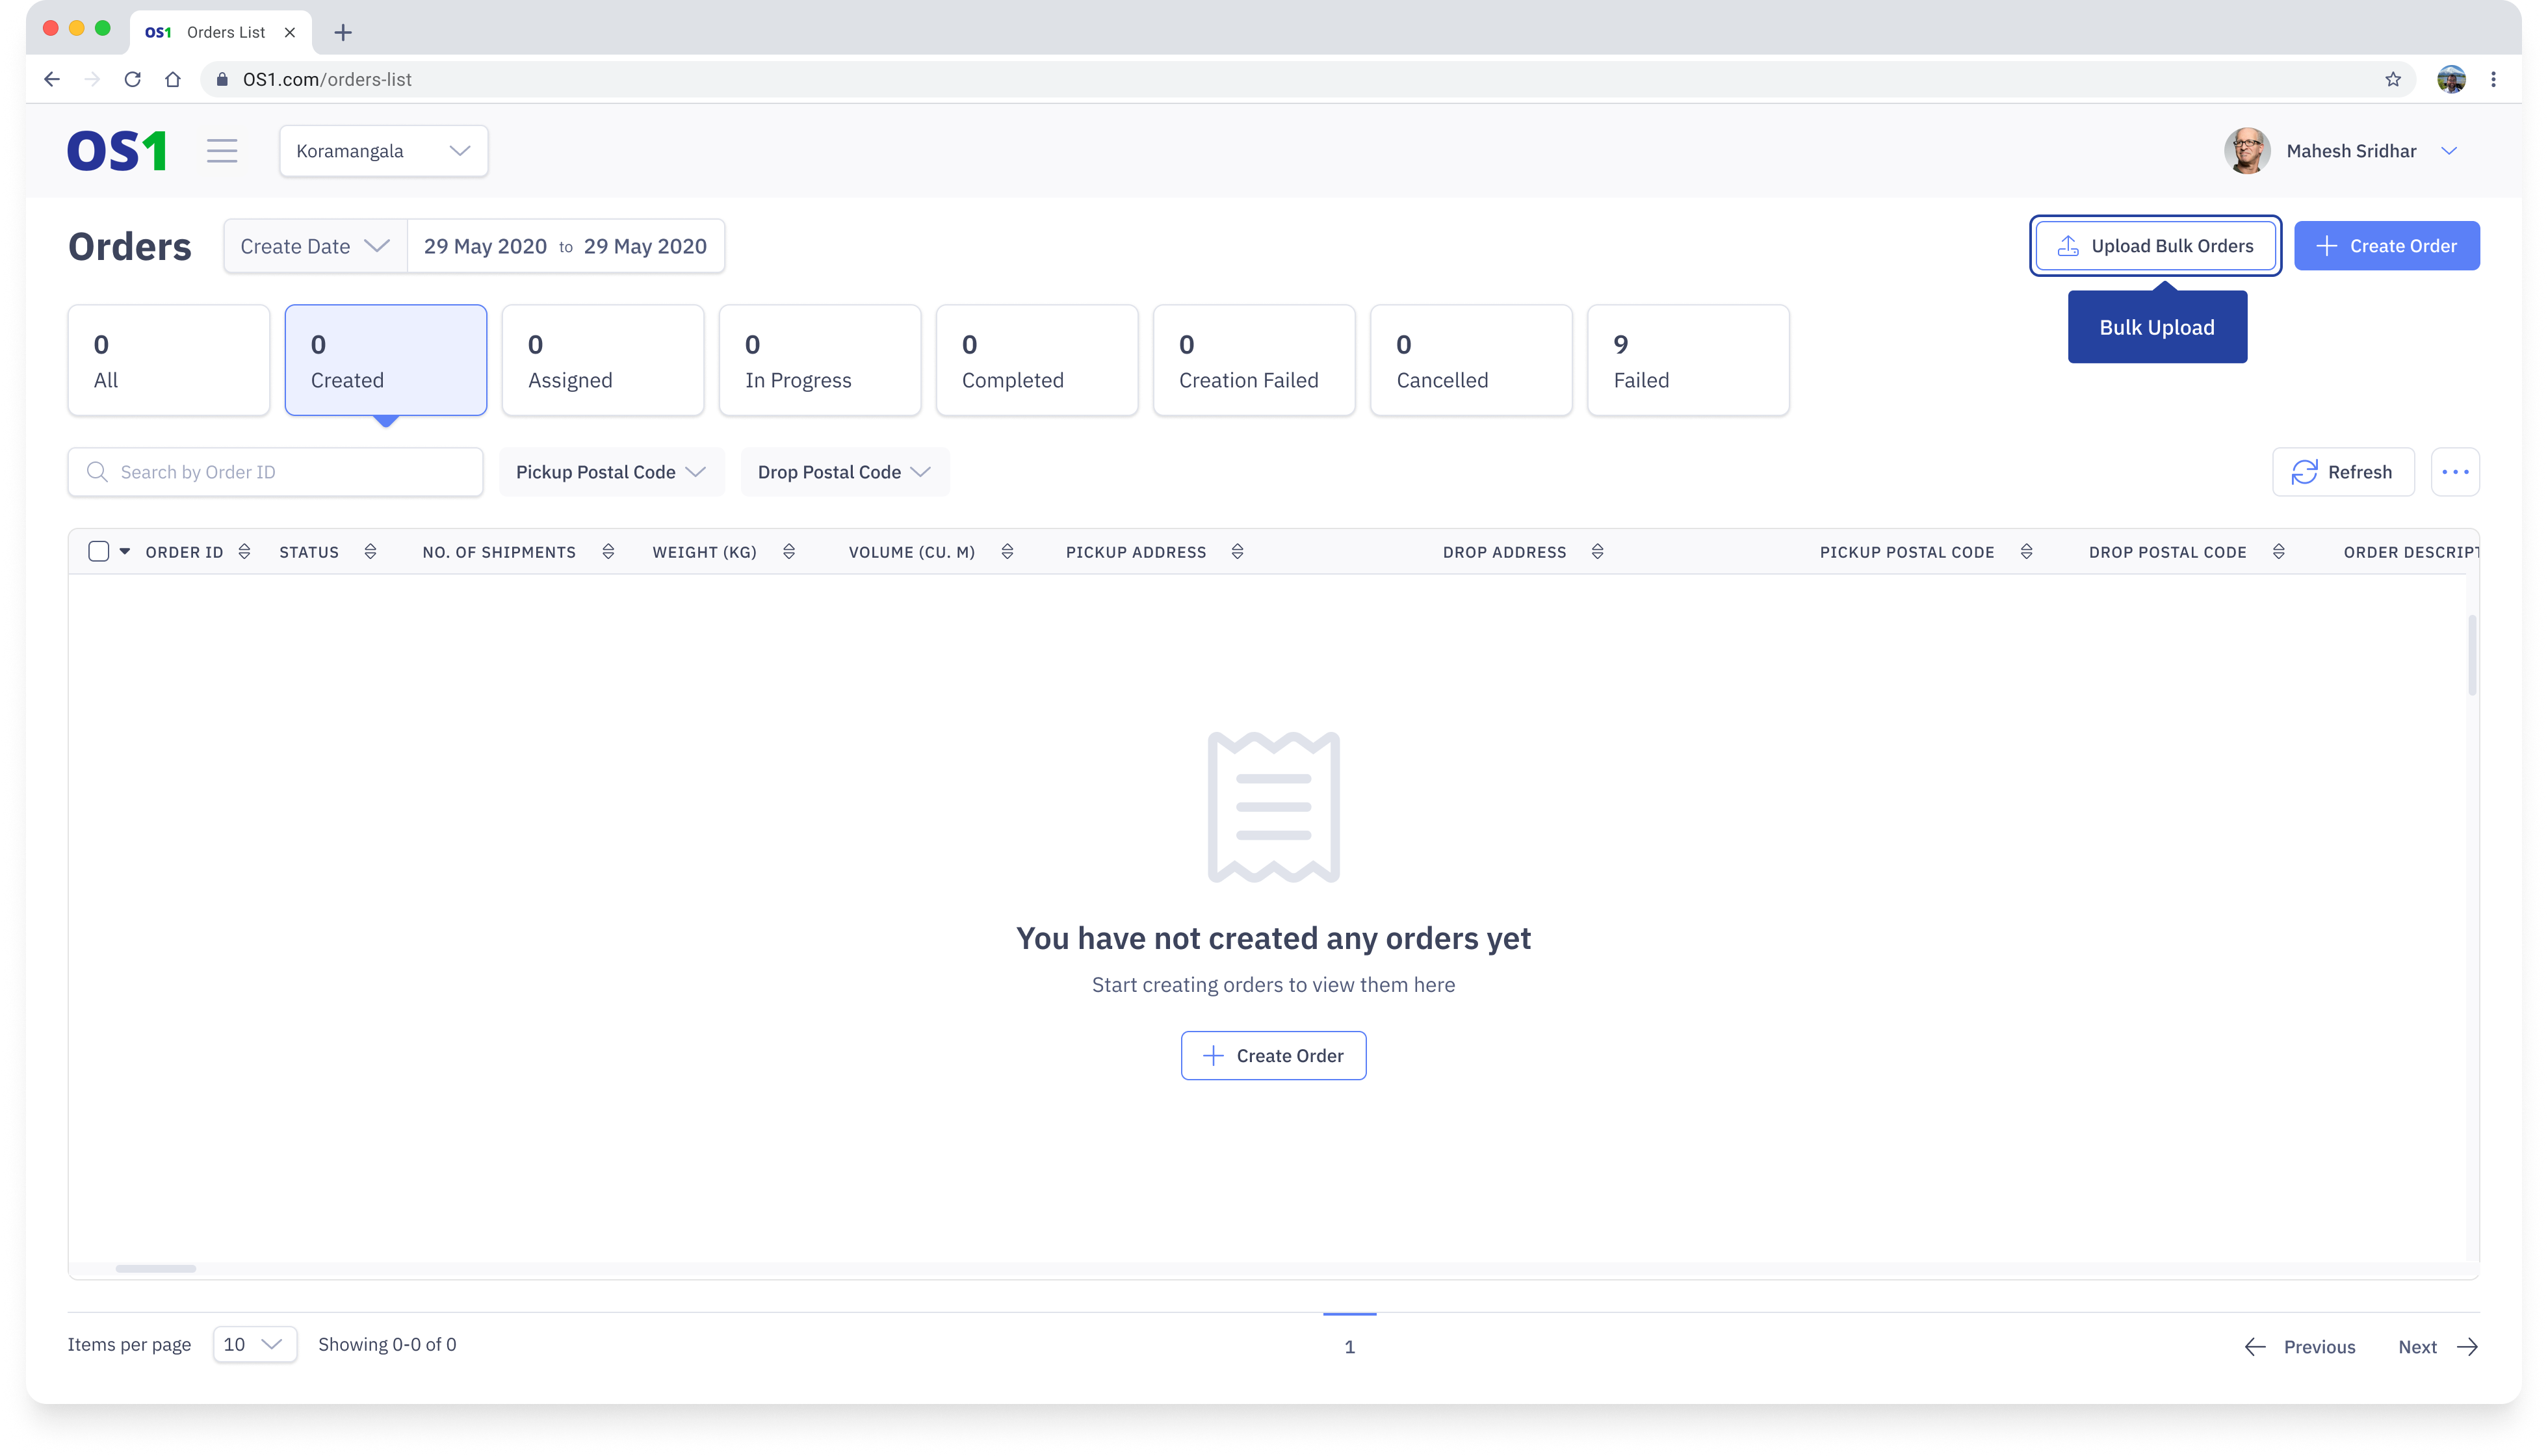
To create multiple orders on DispatchOne it is easier to use the Bulk Upload option. To use this, navigate to the Orders page and click on the "Upload Bulk Orders" button located in the top right corner of the Order Listing page. This will open up the Bulk Upload modal from where you can create the orders.
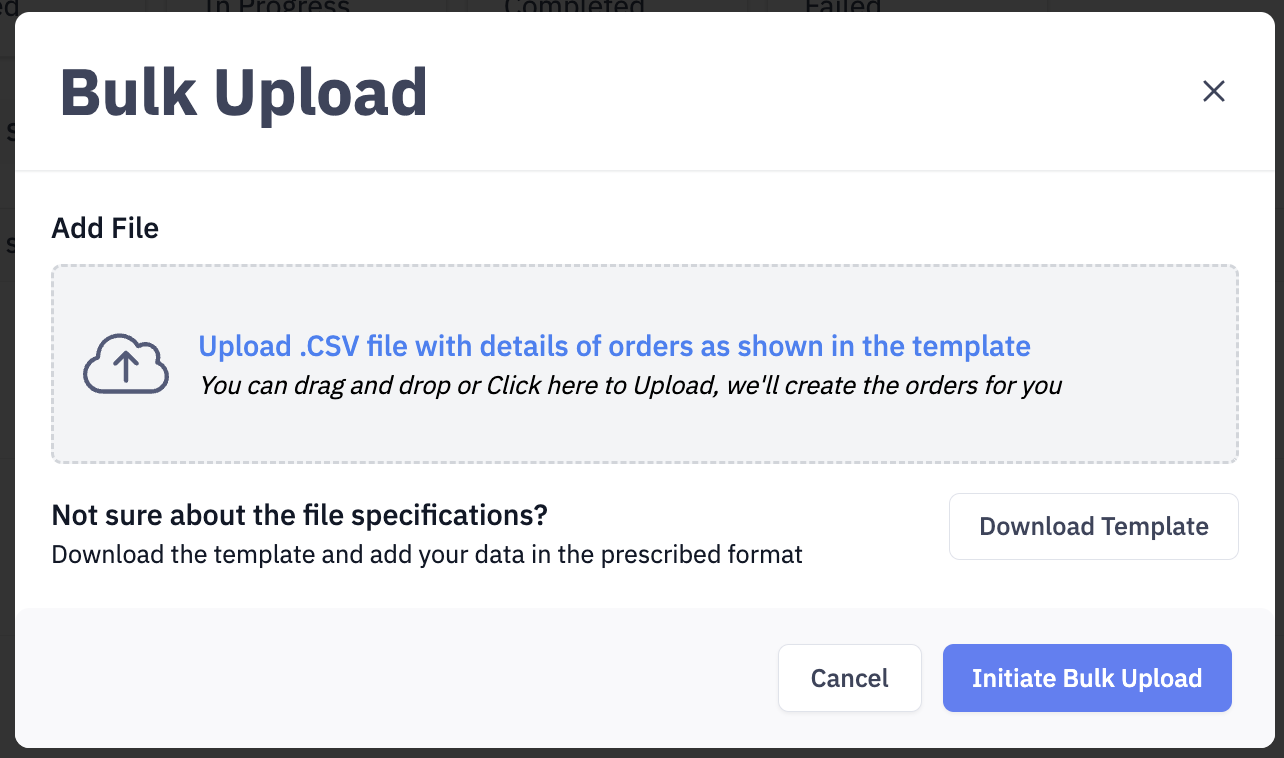
You can click on "Download Template" to download the sample .csv file that you can use to upload data. Ensure the format of the file should be the same to upload the orders.
Ensure the following data are accurate before uploading the data:
- Use IDs and not names for Team ID and Facility ID
- Ensure the Team ID and Facility IDs are already created before uploading
- Ensure Order IDs and Shipment IDs are unique and haven't been used before
- Ensure the country code is "+91" for India
Once the file is ready click on "Upload .CSV file with details of orders as shown in the template" and select the right .csv file. Once the file is selected, click on "Initiate Bulk Upload"
If the file format is accurate, you will see the below modal.
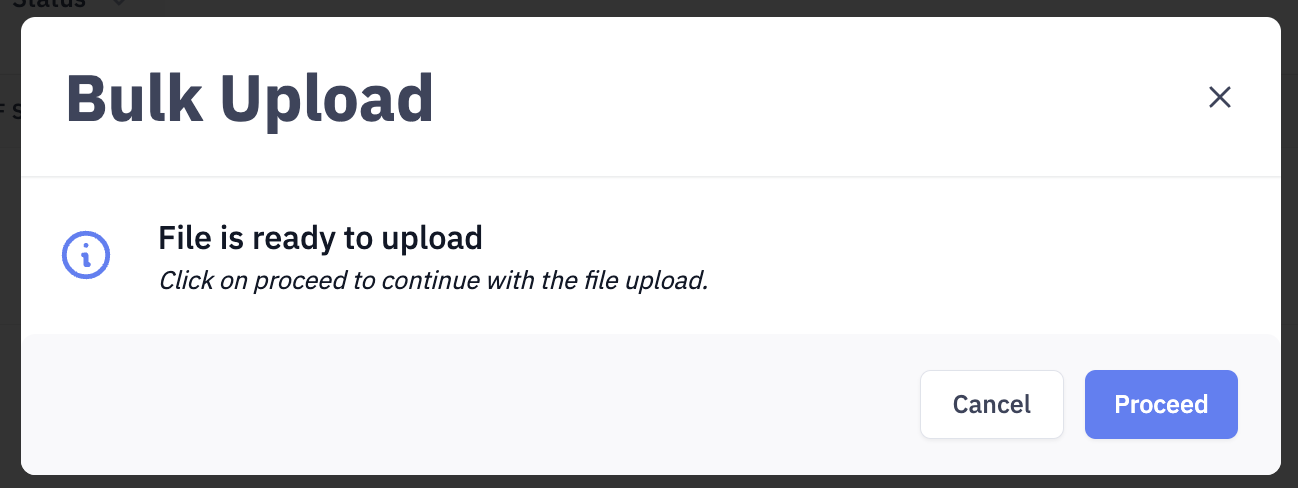
Click on "Proceed"
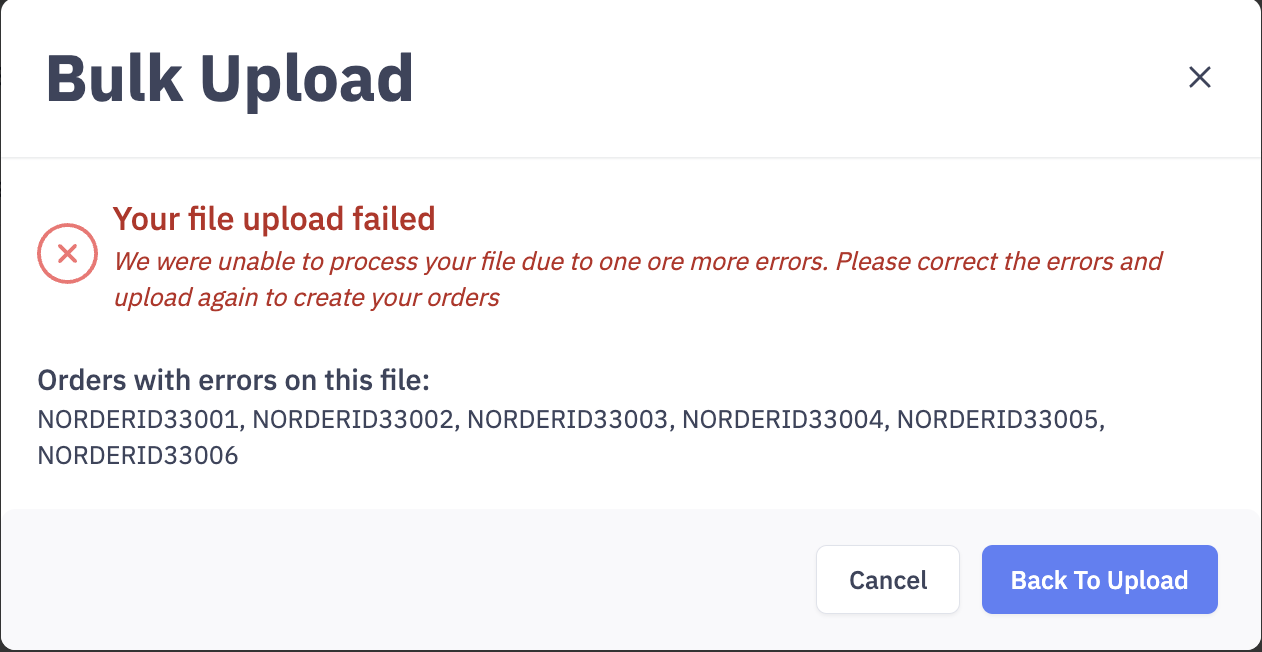
If there are validation errors then the below message will be shown. In this case, check the rows where the errors are and reupload the file.
If there are no errors, then you will see a "File Uploaded Successfully" toast.
Ensure to refresh the page the see the new orders on the screen.