Creating Optimized Routes using Route Optimizer
In the logistics universe, planning is an essential step for completing tasks in a timely and efficient manner. As the number of tasks increases, it becomes impractical to plan them manually. Furthermore, when multiple constraints, such as weight, volume, and time slots, are added to the equation, it becomes increasingly difficult to identify the most efficient sequence of tasks.
By using the Route Optimizer add-on businesses can optimize their delivery or service operations, reduce fuel costs, and improve their customer service levels. It also allows drivers to spend less time on the road and more time completing their tasks, which can improve their overall job satisfaction.
Creating Optimized Routes
After creating orders, you can create optimized routes by passing on the order details, vehicle details, and other constraints to the Route Optimizer. With this information, the Route Optimizer create the most optimized routes so that the overall distance and cost are optimized.
In order to create these routes, follow the below steps:
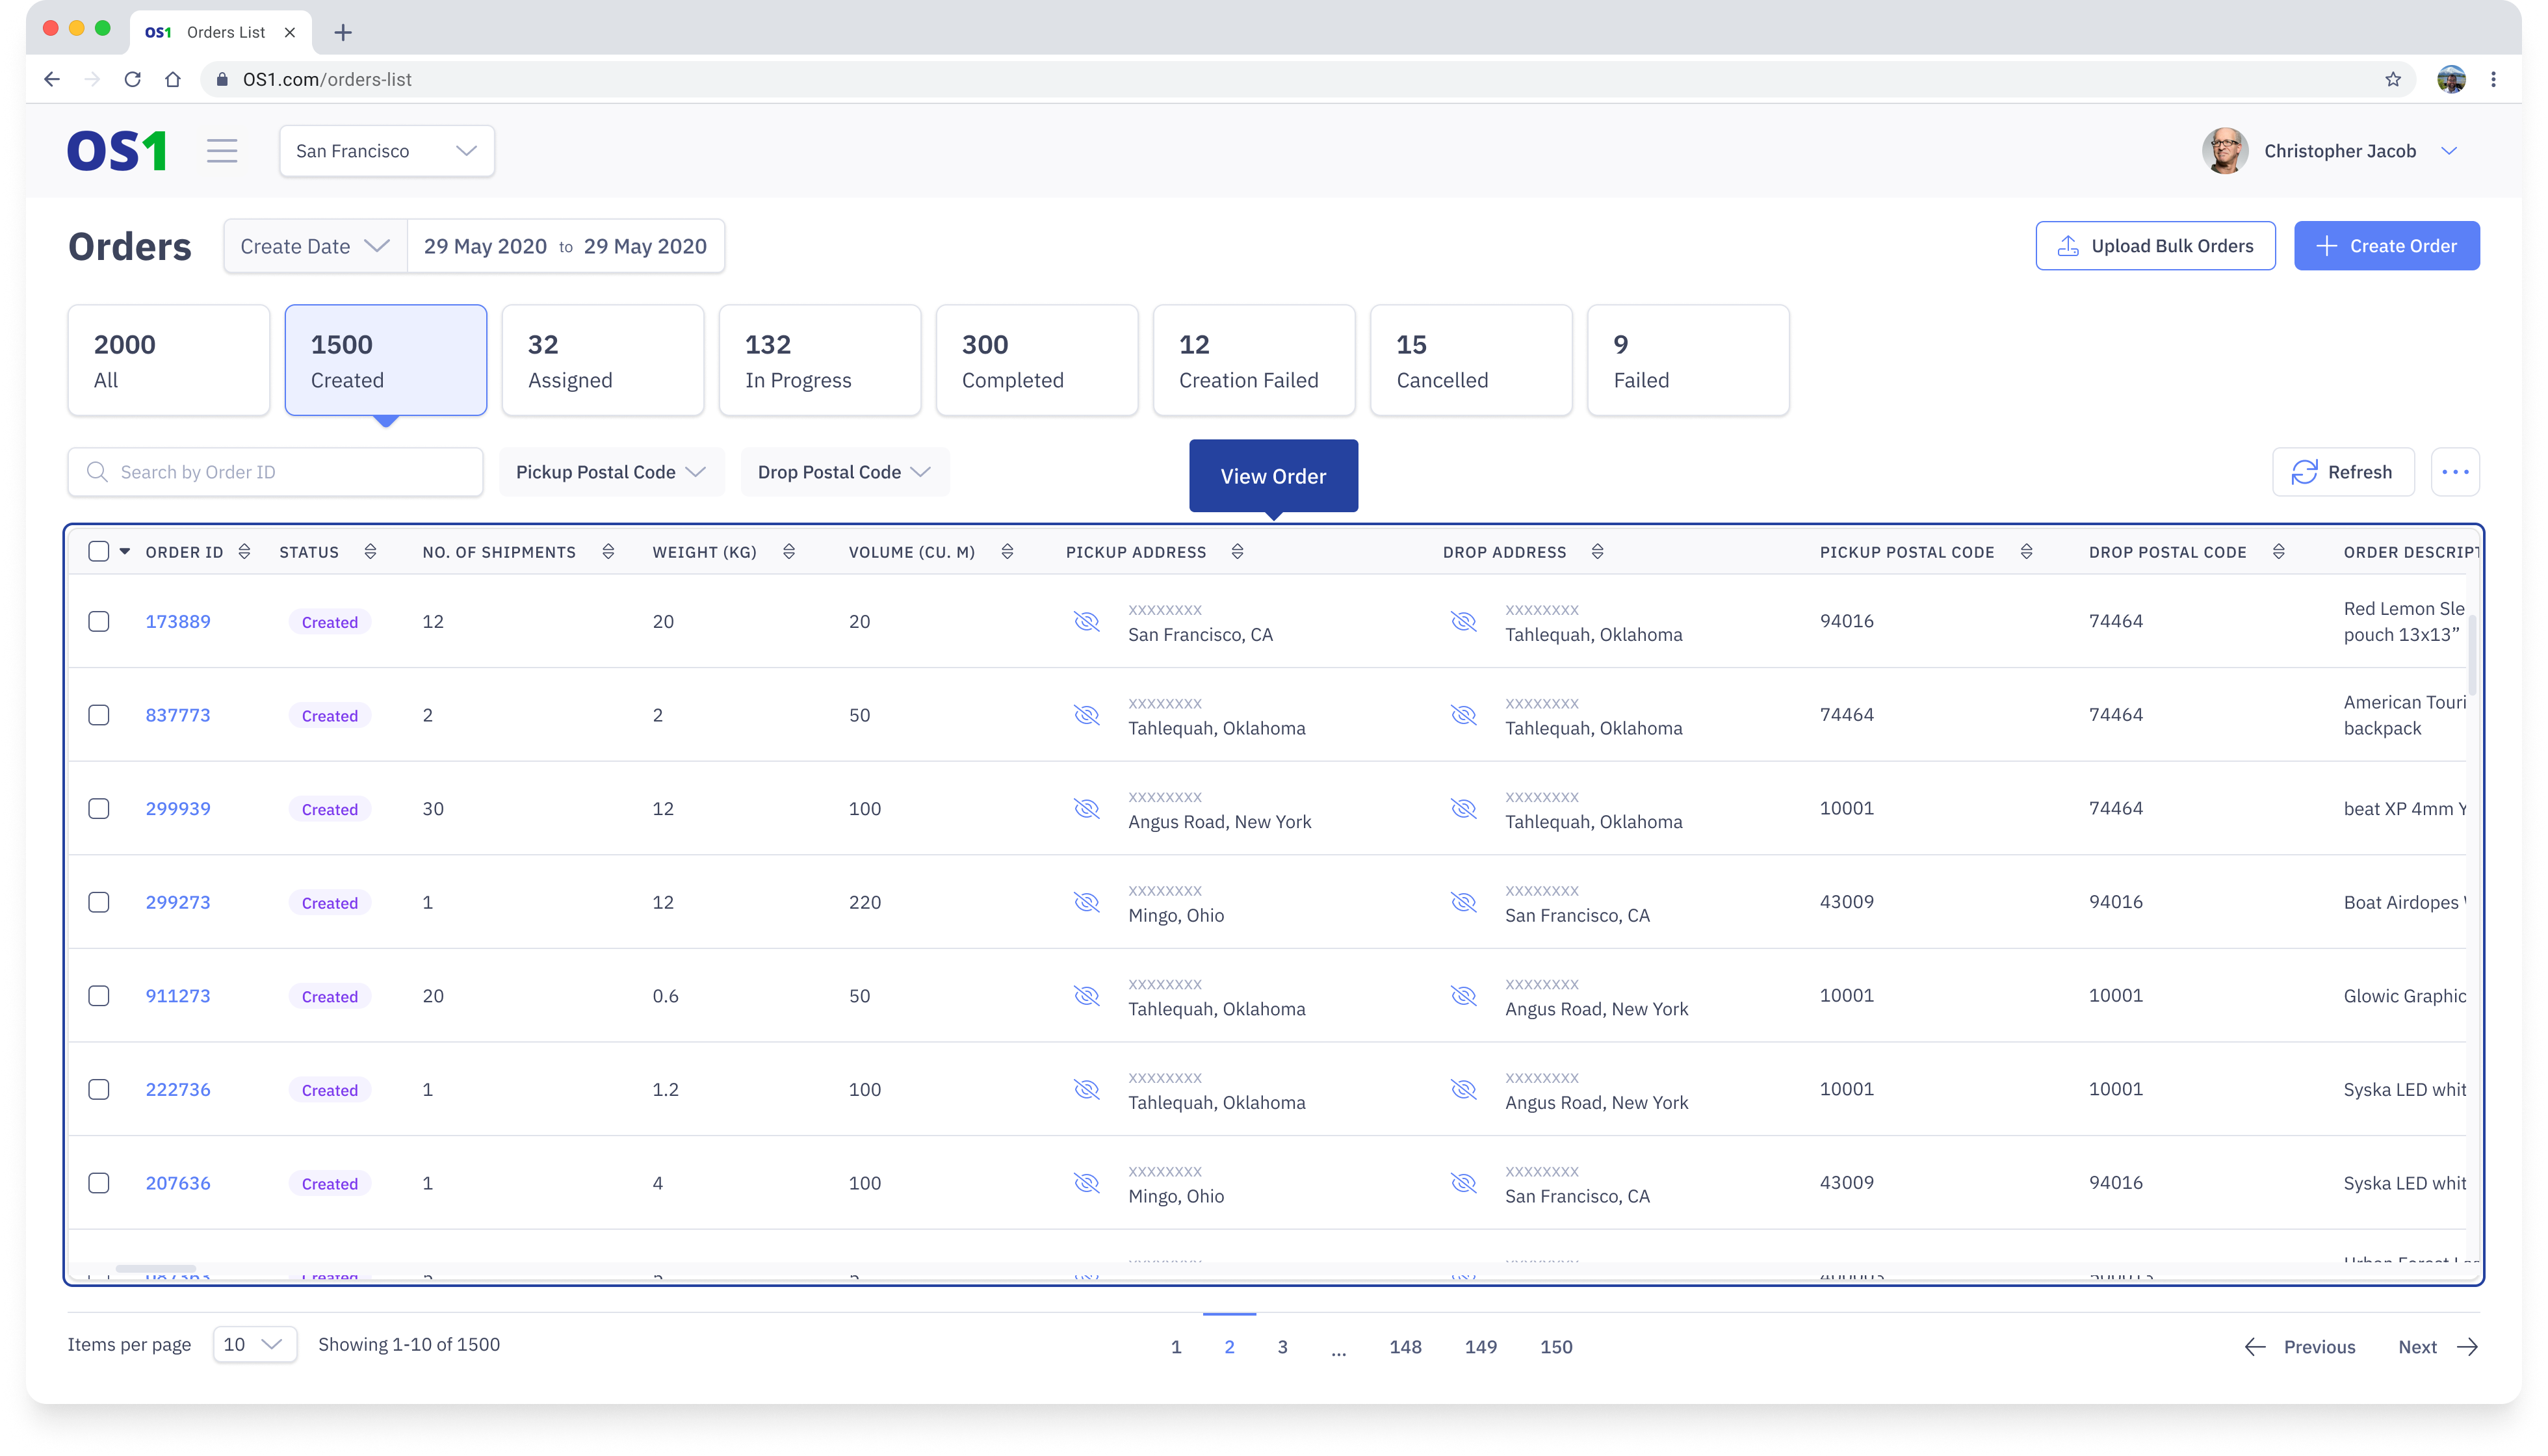
1. Click on "Orders" from the leftnav
2. Select all the orders that you want to fulfil from the order table. This can be done in three ways:
- Select the checkboxes against the order
- "Select All on this page" from the checkbox on the header (left of "Order ID") - this will select all the orders on the current page
- "Select All across pages" from the checkbox on the header (left of "Order ID") - this will select all the remaining orders
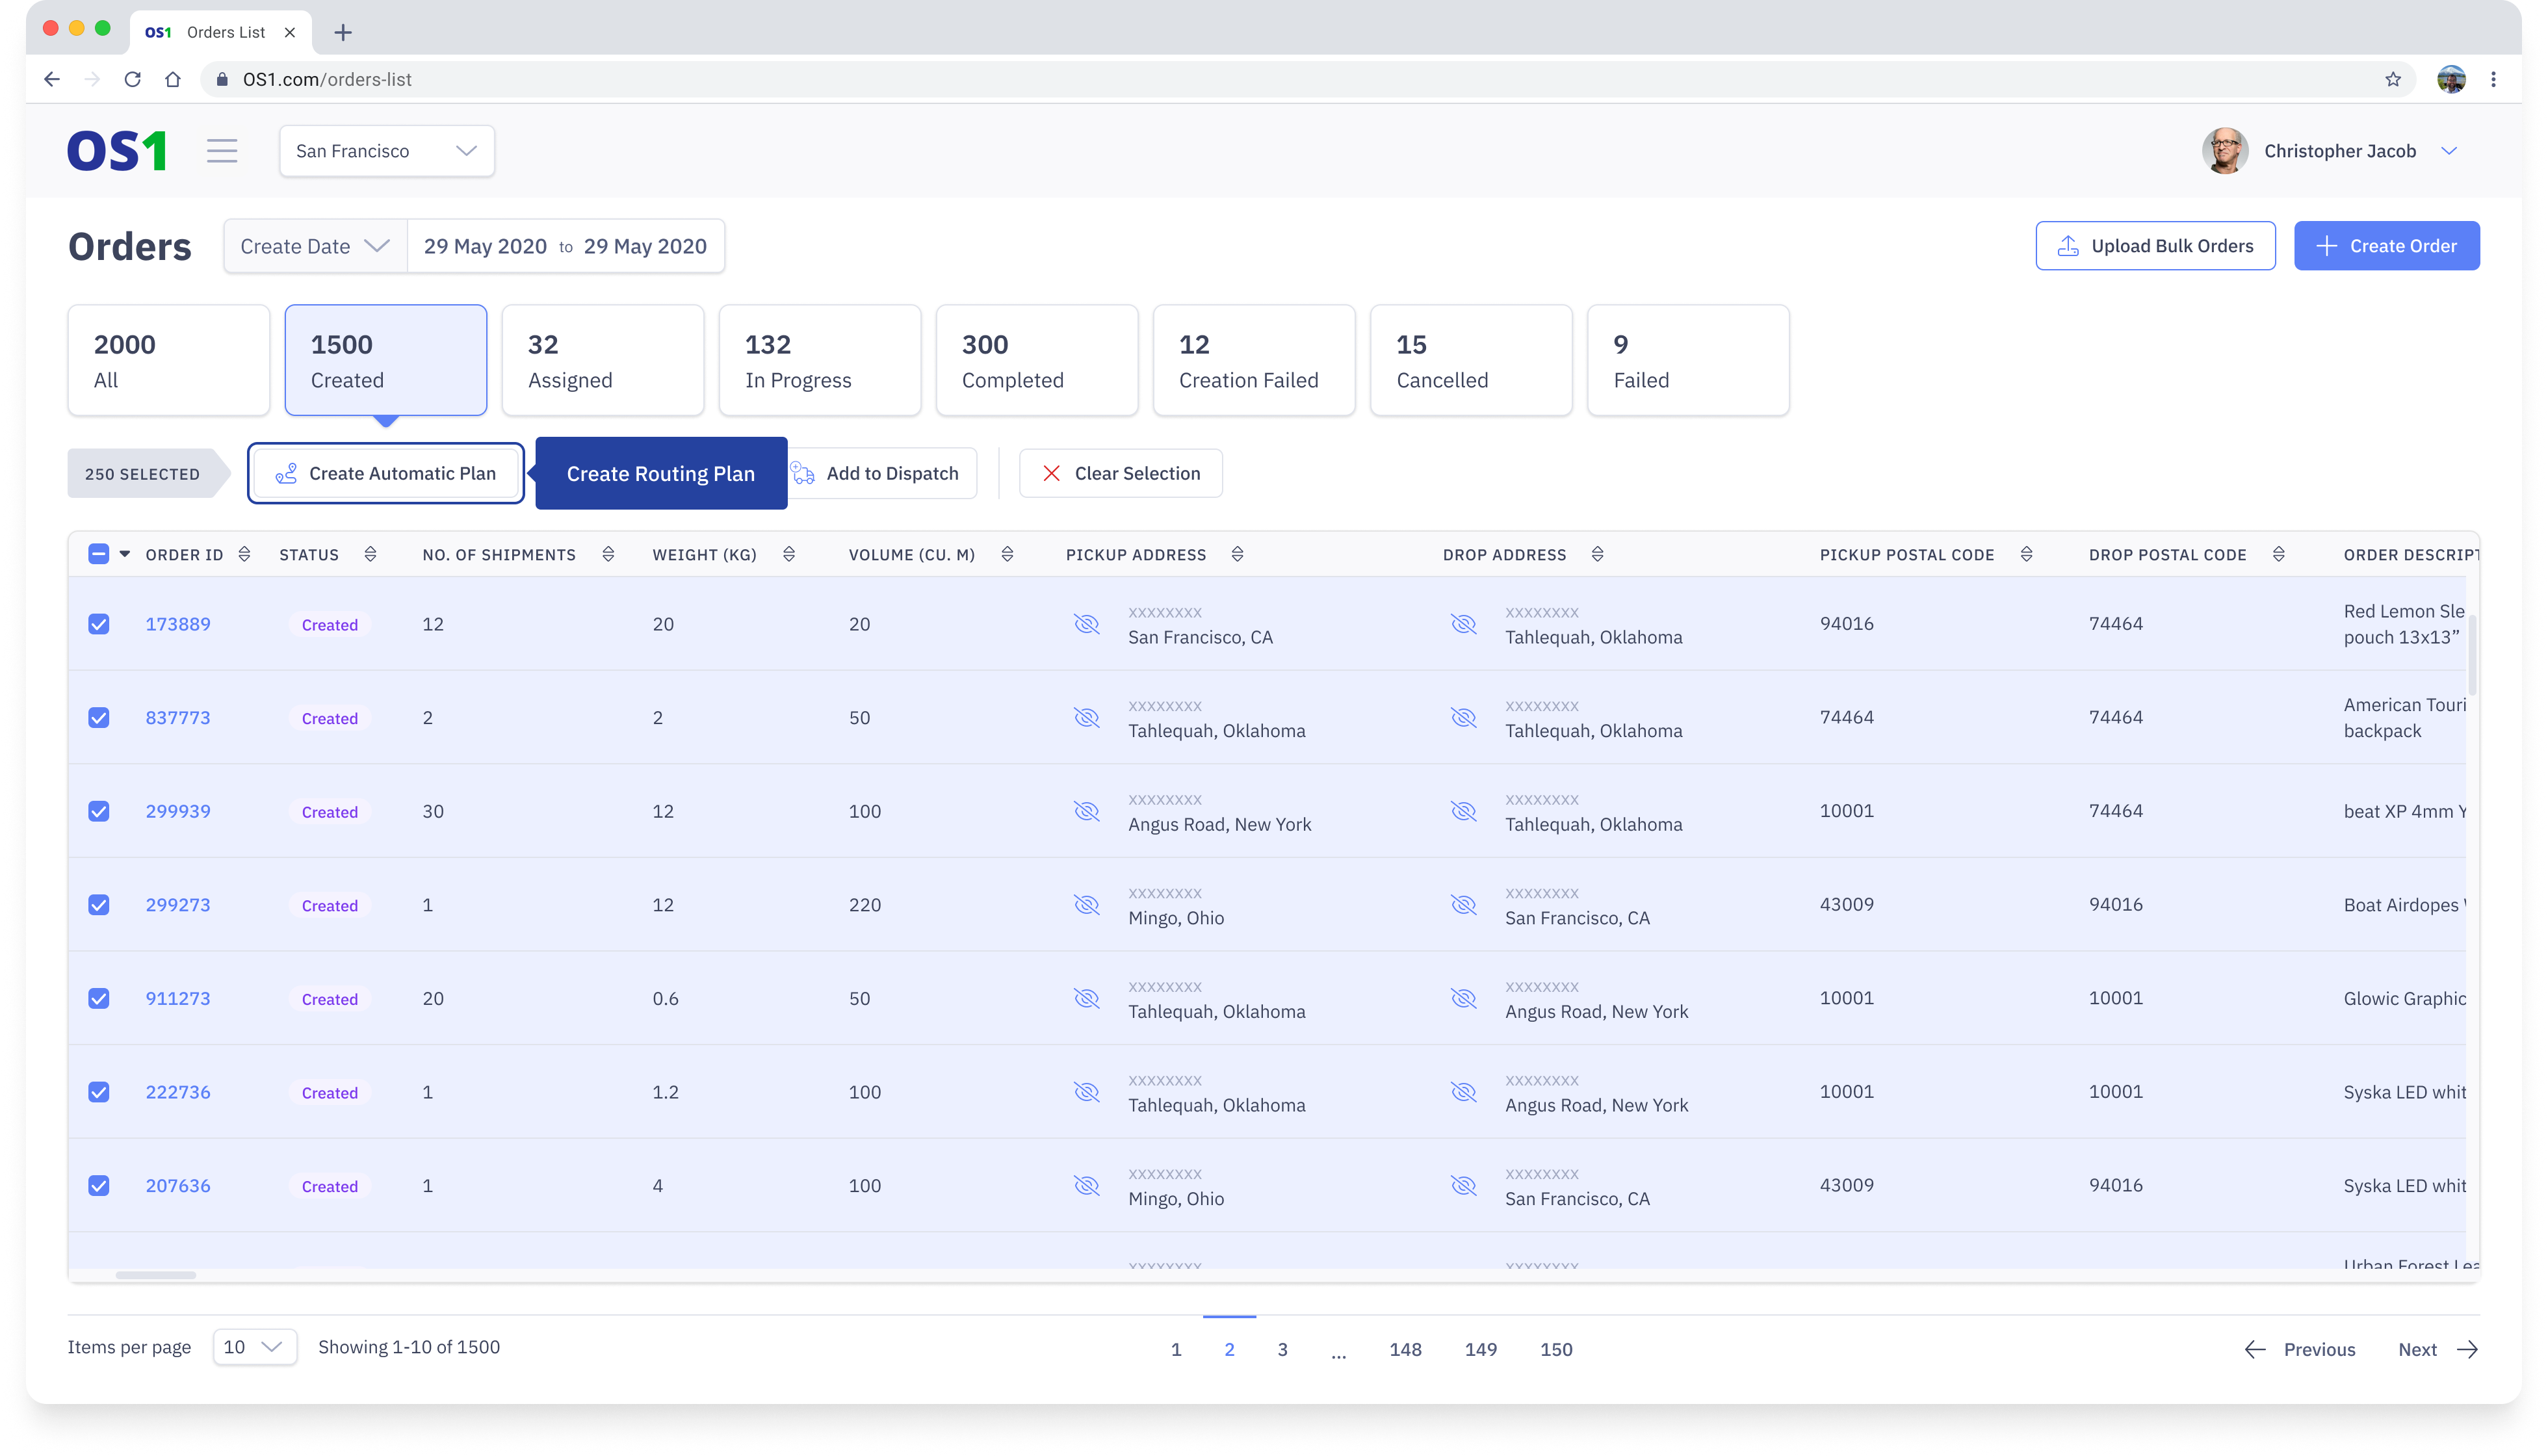
3. Once the required orders are selected, click on "Create Automatic Plan". Once this is selected DispatchOne will initiate the planning process with a Route Optimizer
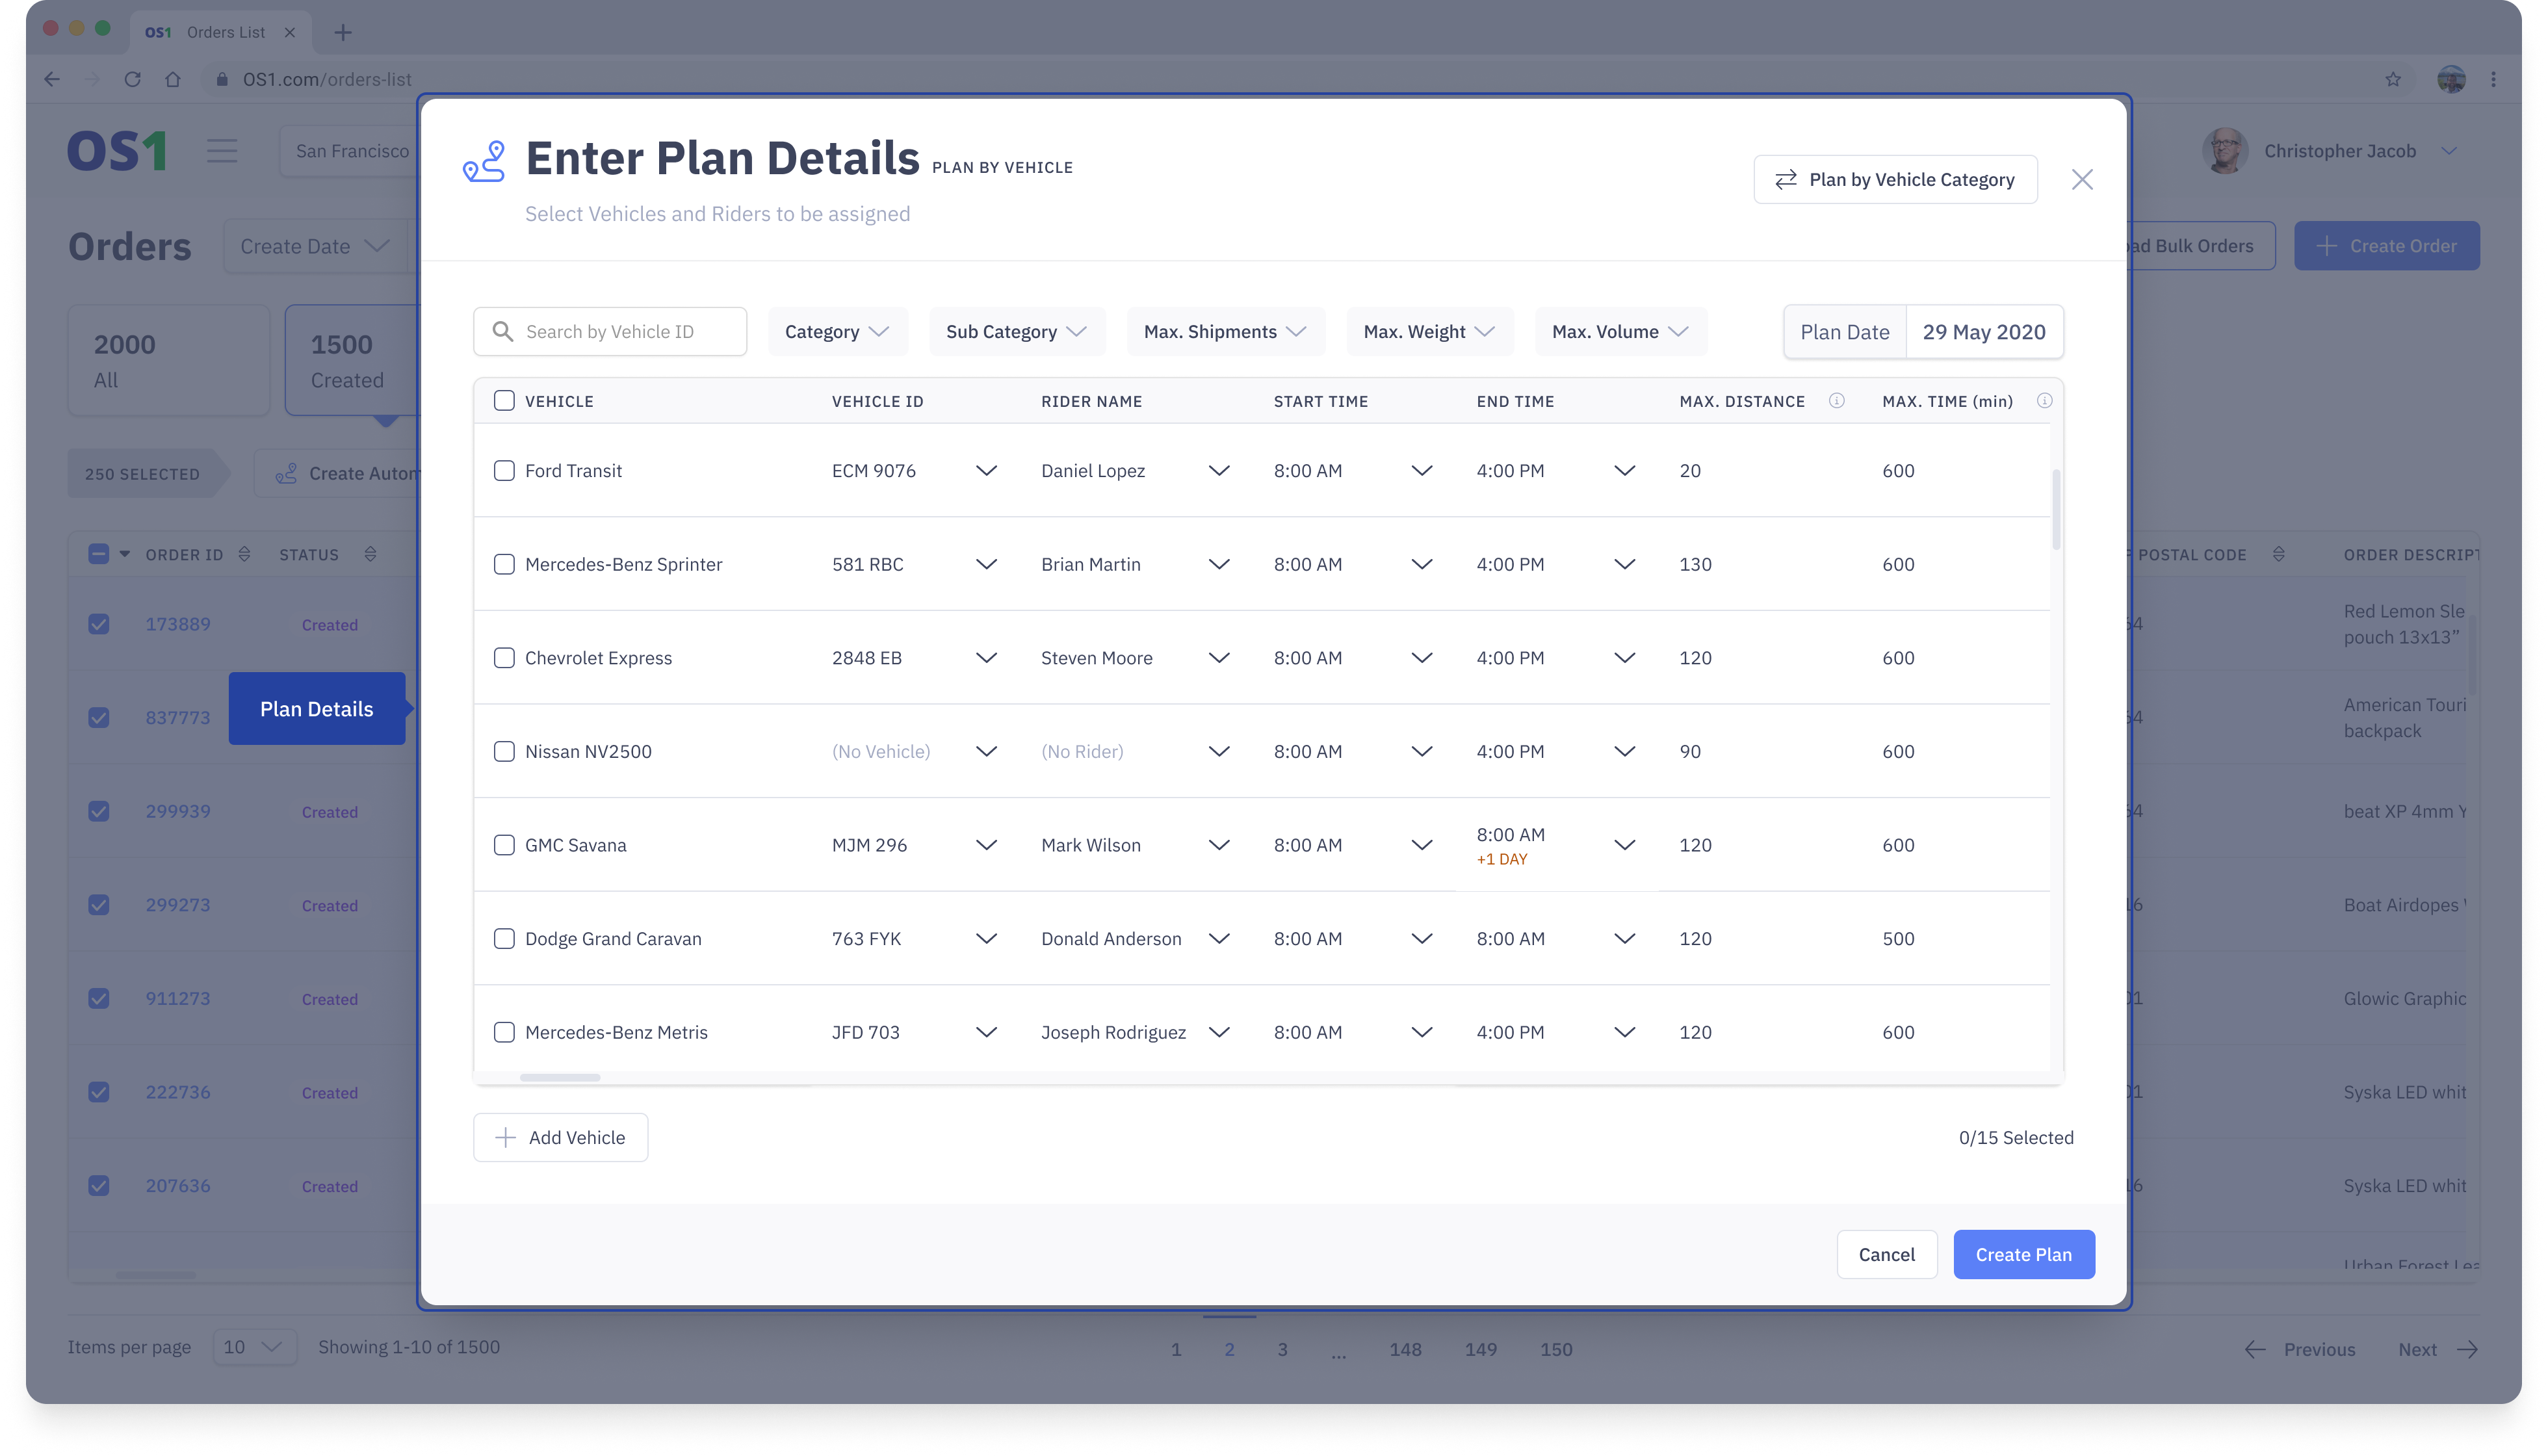
4. The Route Optimizer will now open up the "Resource Allocation" modal. This modal will allow you to list out the available vehicles and their constraints. You can either choose to enter the exact vehicle details if you are aware of it during the planning phase or you can just enter the vehicle model and the number of vehicles associates with the model
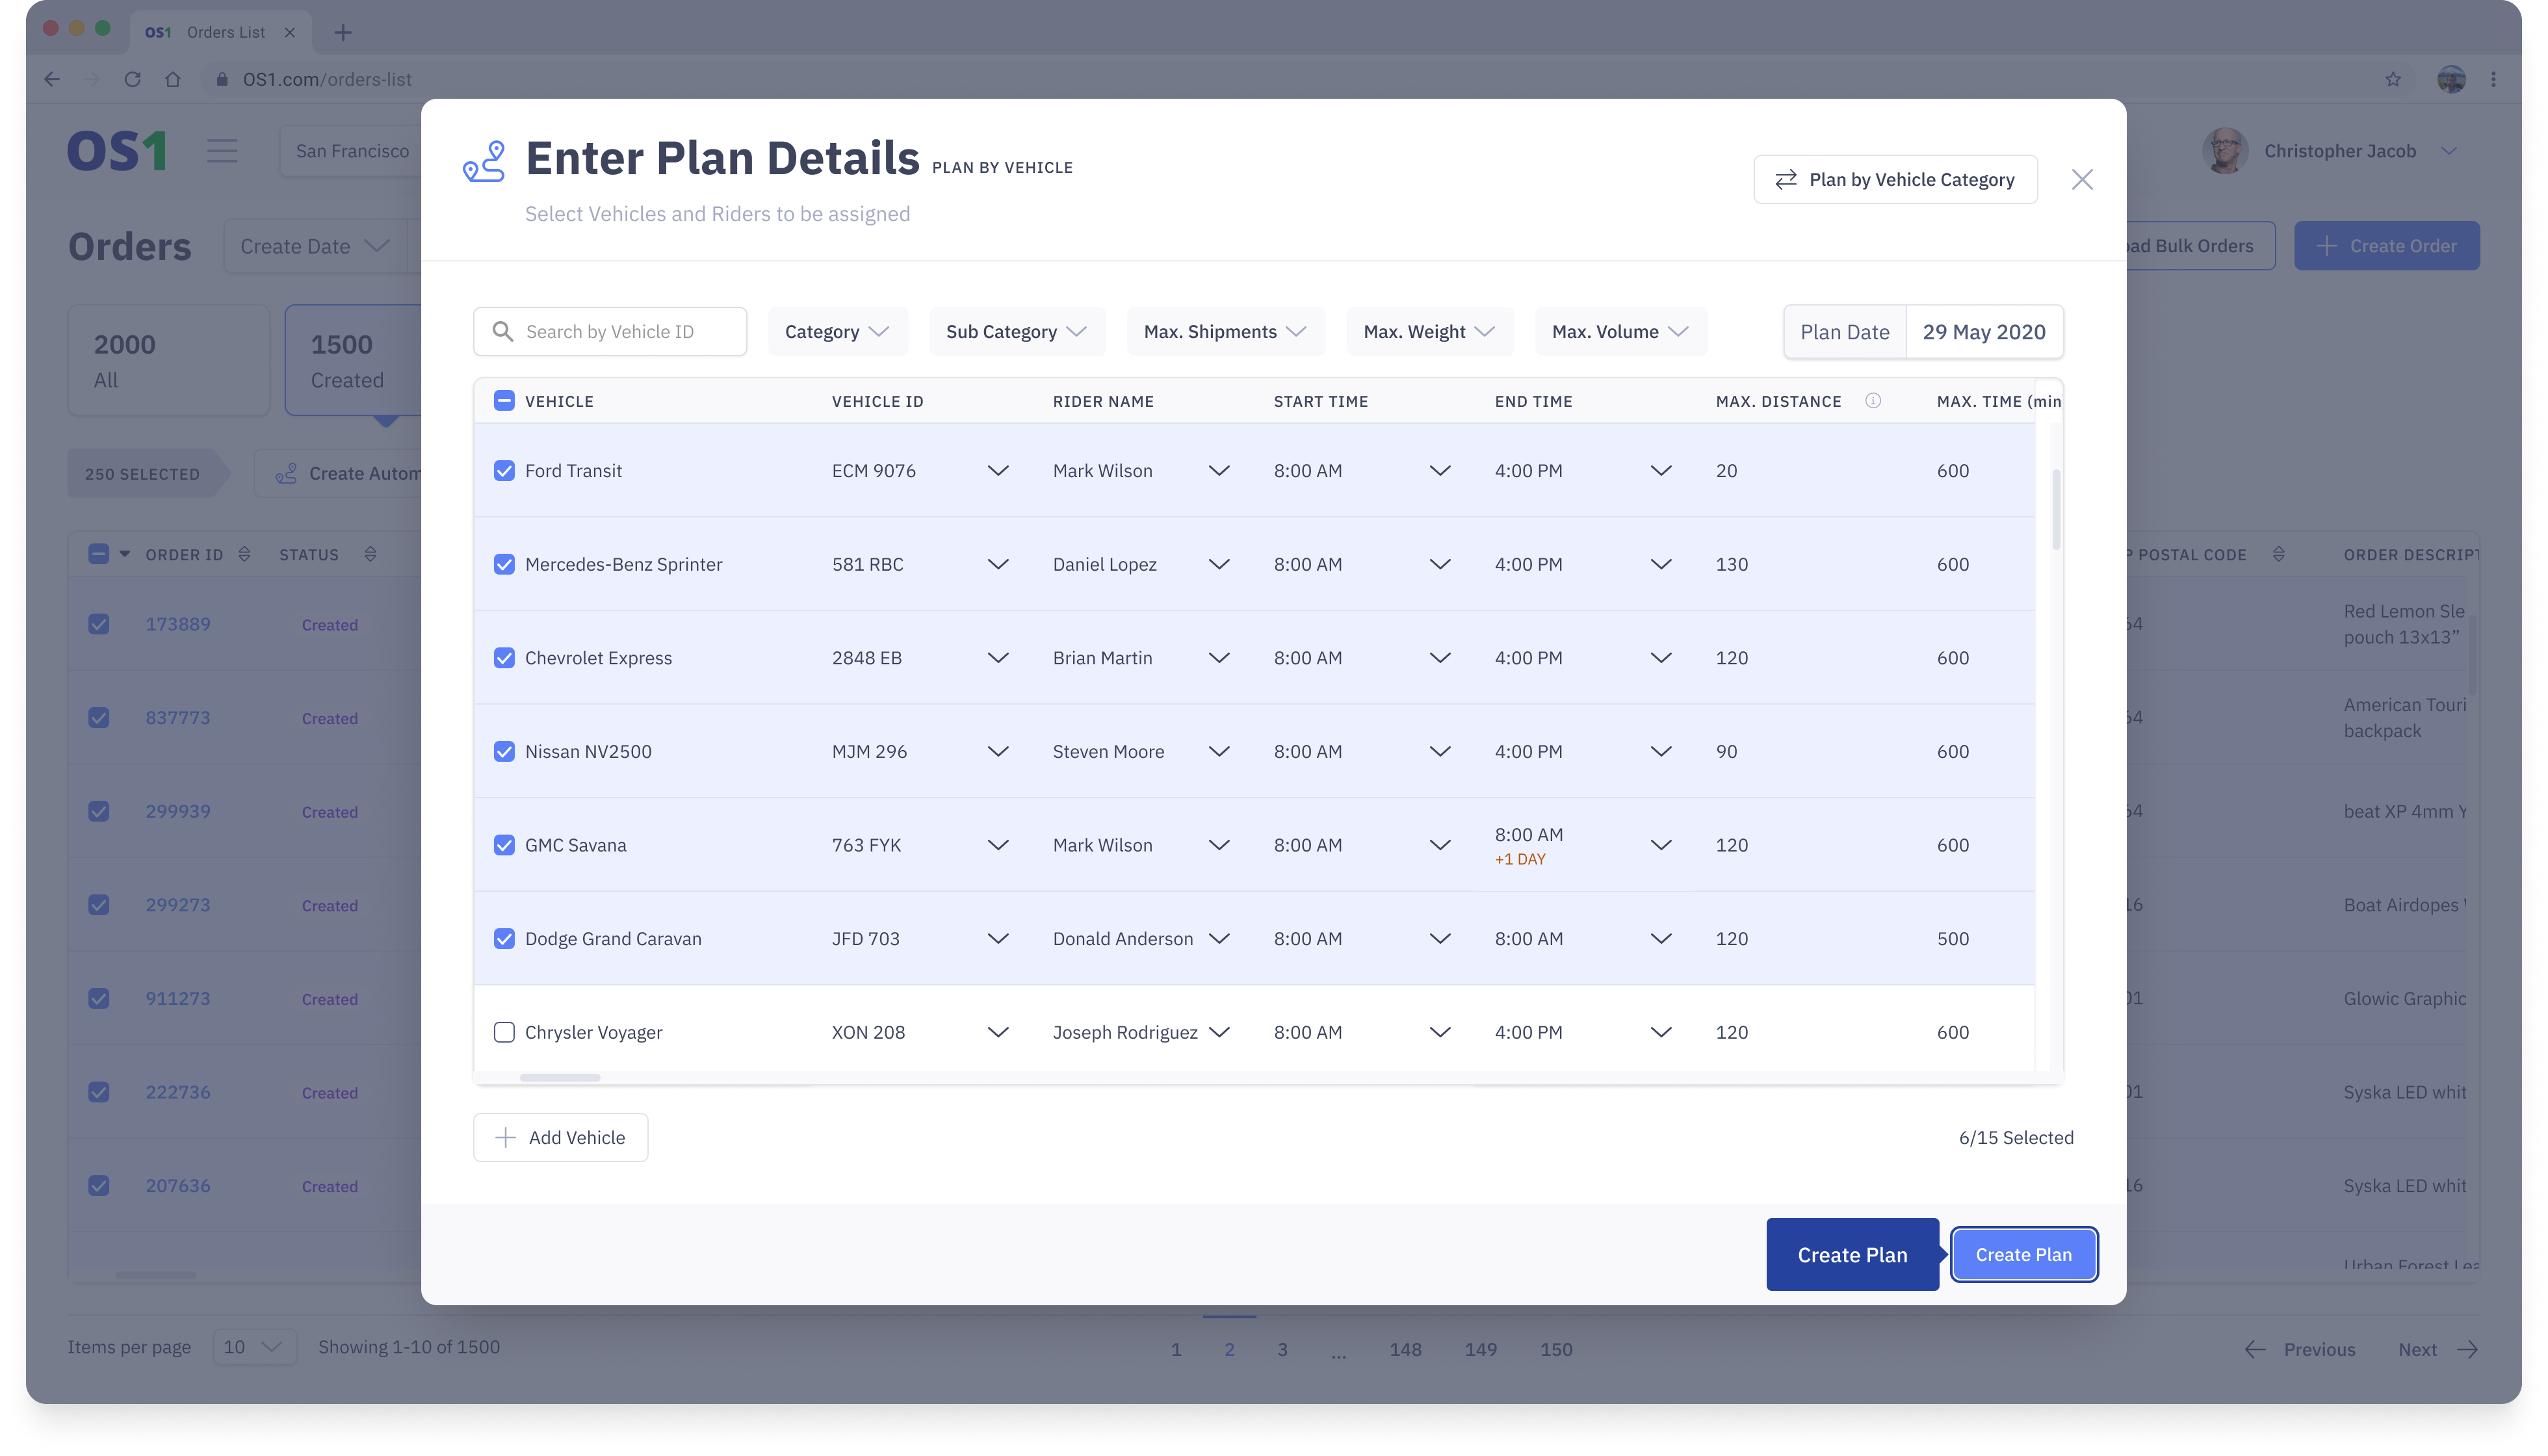
- Follow the below when you know the exact vehicle details - here you specify the available vehicles and their associated drivers. By default, the modal is enabled to accept vehicle details. Incase you want to enter vehicle models then click on "Plan by Vehicle Category" on the right corner of the modal. Here you can select the vehicles you want along with the various constraints
- the table shows all the available vehicles with their models. You can use the filters above the table to narrow down the vehicles you want
- select a driver from a Rider Name dropdown for each vehicle
- you can edit the Start Time and End Time. These are the operating time of the vehicle
- additionally, you can also enter the constraints such as maximum weight, maximum volume, maximum number of shipments, maximum distance travelled, and maximum time travelled. These constraints will be used to optimize the routes.
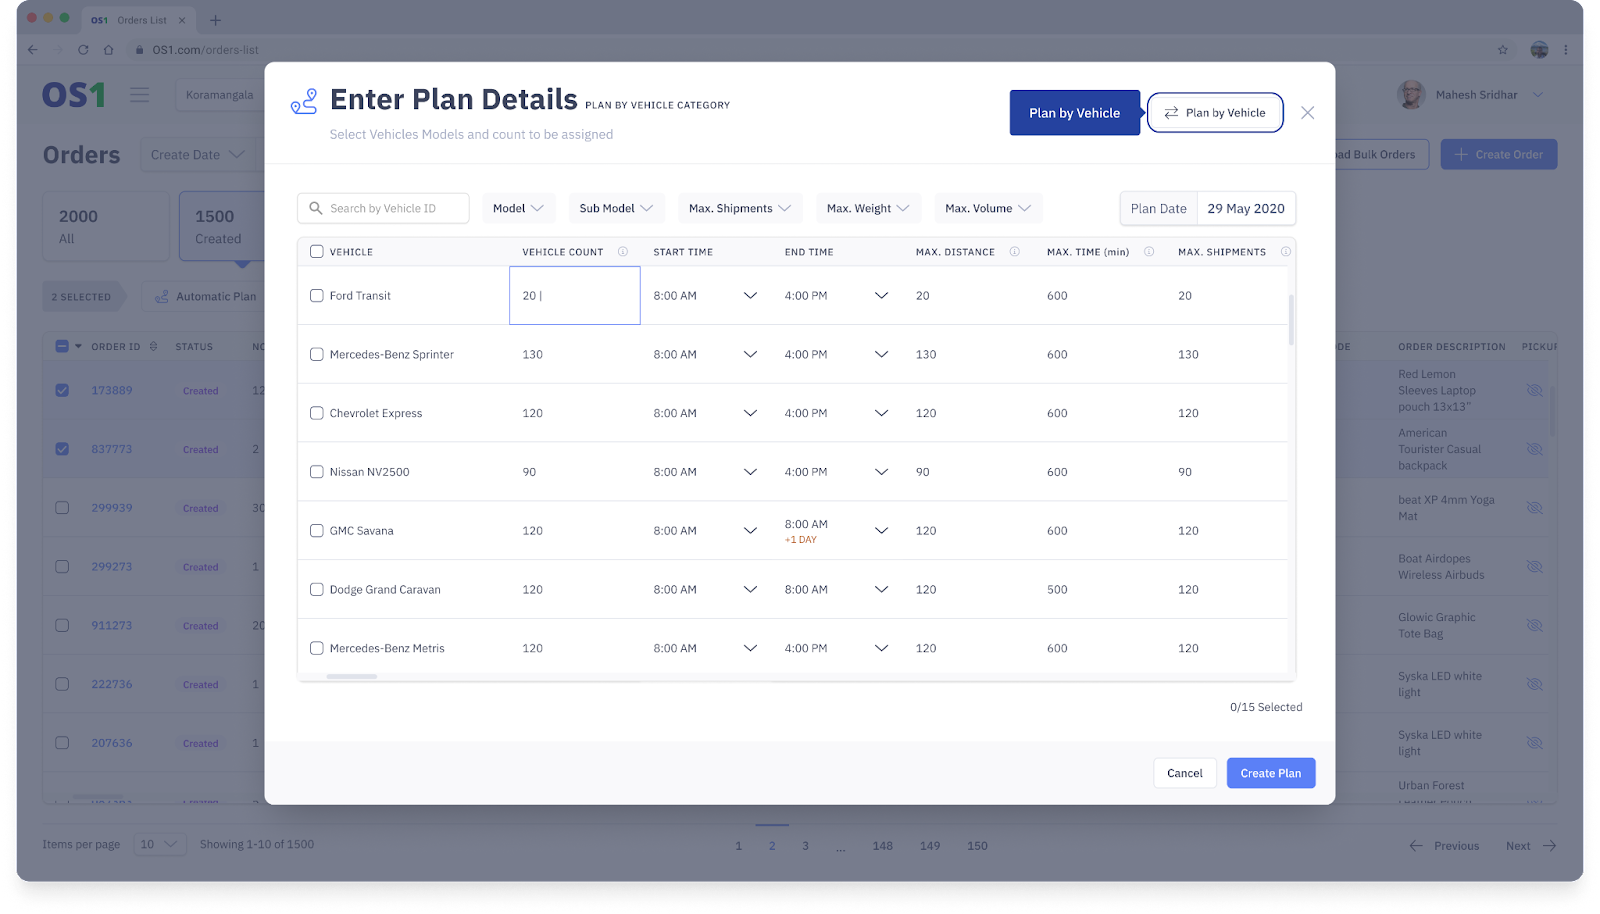
- Follow the below when you know vehicle model and the number of vehicles - here you specify the total number of vehicles available against their model. By default, the modal is enabled to accept vehicle details but to enter vehicle models then click on "Plan by Vehicle Category" on the right corner of the modal. Here you can enter the required details
- the table shows all the list of vehicle models. You can enter the number of vehicles available for each of the vehicle models you want to use under the "Vehicle Count" field
- you can edit the Start Time and End Time. These are the operating time of the vehicle
- additionally, you can also enter the constraints such as maximum weight, maximum volume, maximum number of shipments, maximum distance travelled, and maximum time travelled. These constraints will be used to optimize the routes.
5. Once the details are entered, select all the vehicle/vehicle models you want the Route Optimizer to use for fulfilling the orders on that day
6. Once you have selected the resources, you can click on the "Create Plan" button located at the bottom of the modal to create the optimized routes. Once you click "Create Plan" you should see the below screen.
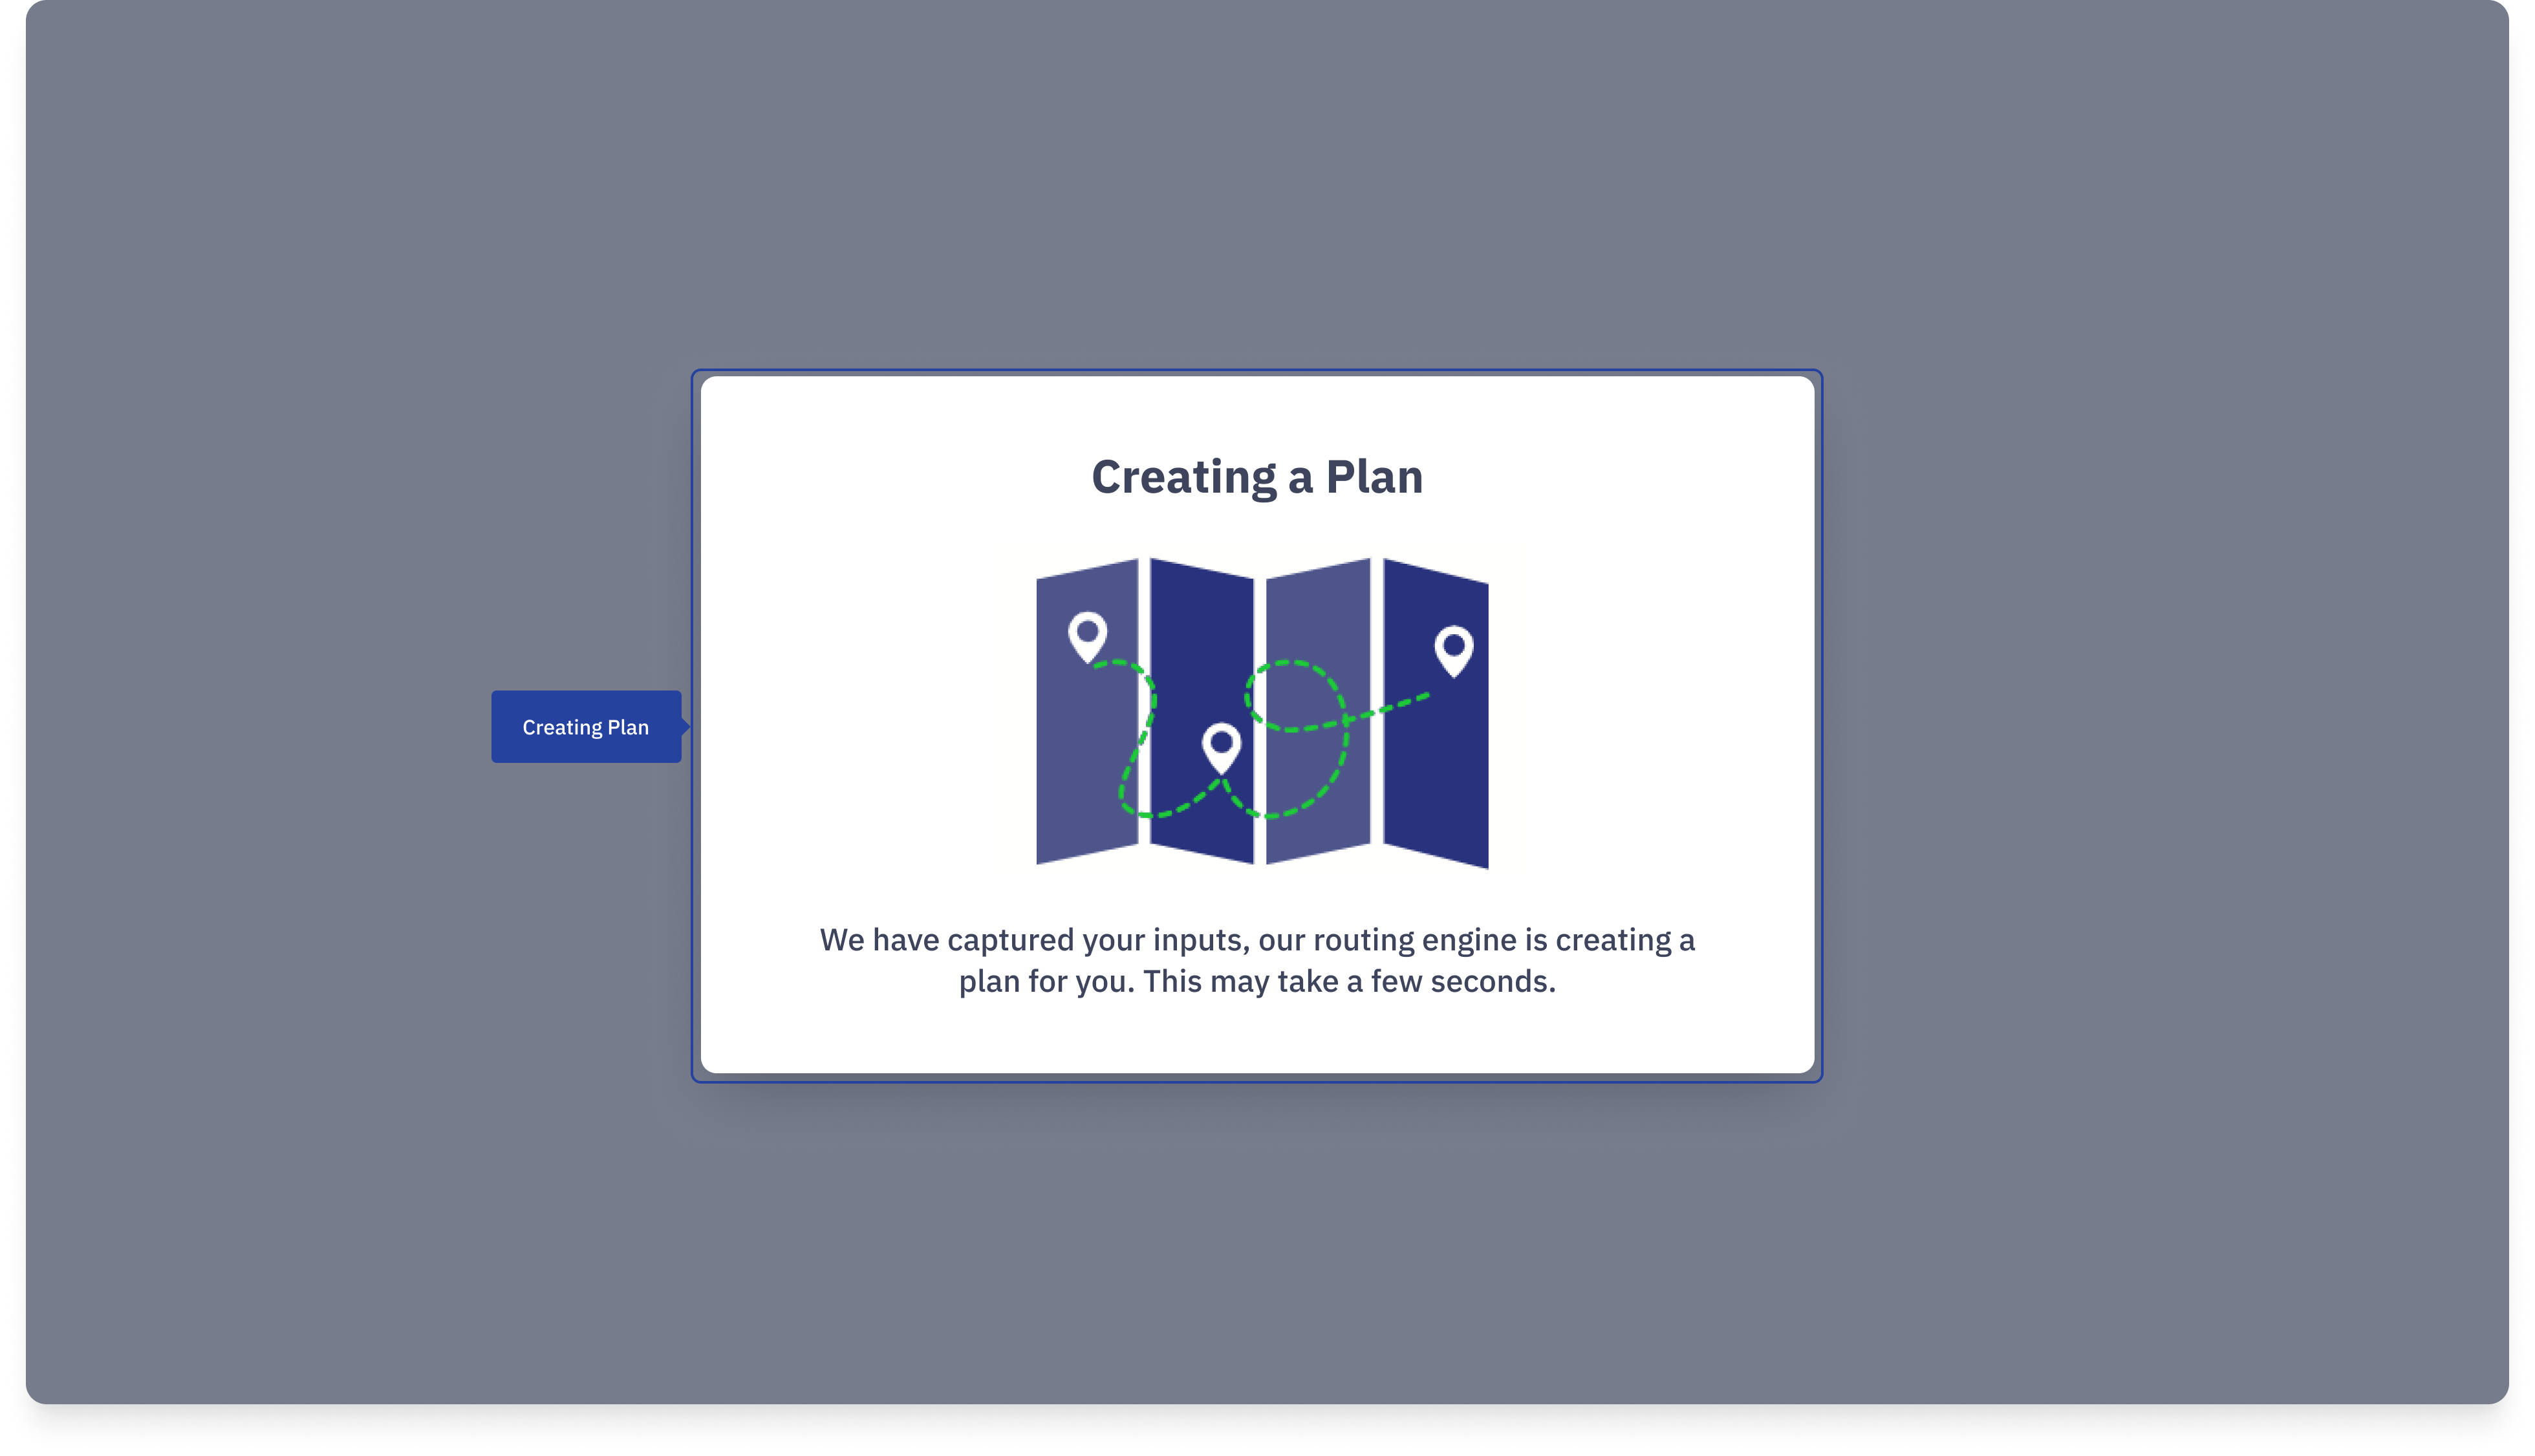
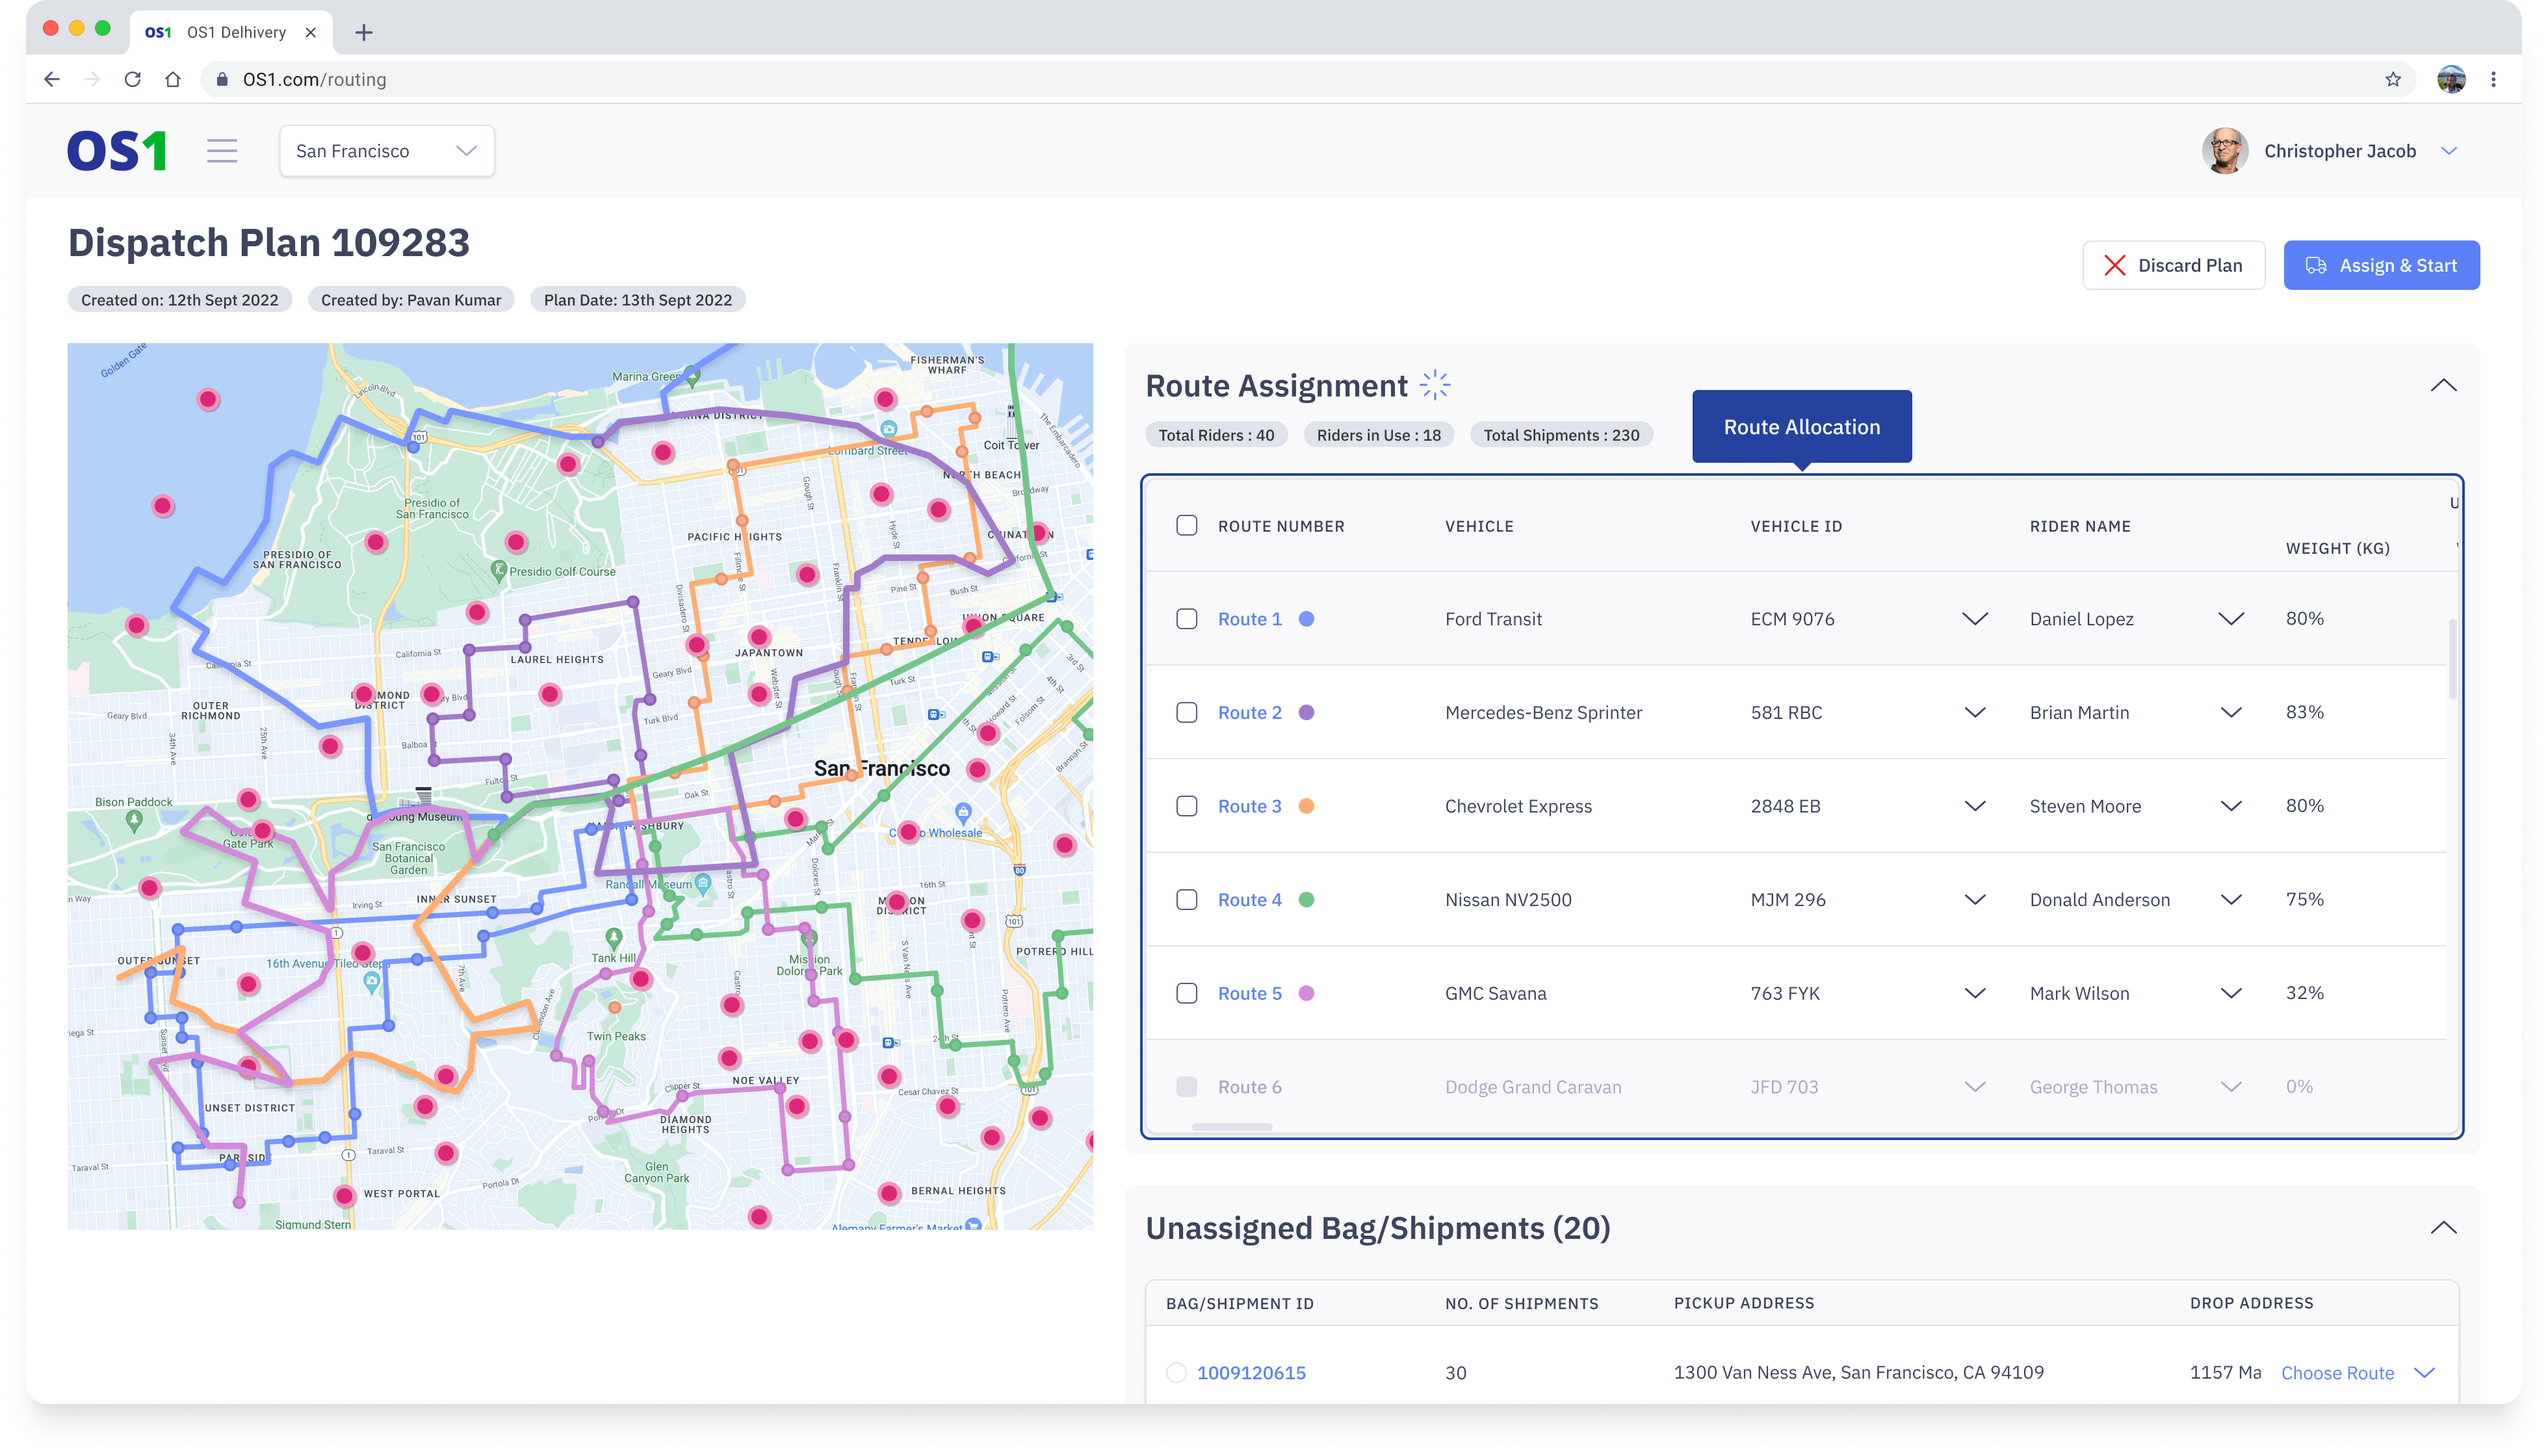
7. After a few seconds, you should you the Route Plan Screen that shows the most optimised routes for you. If you are happy with the routes, click on "Accept & Start" so that the dispatches are created and the tasks are published to the drivers.
Modifying and managing the routes created
When the routes are generated orders are vehicles are automatically allocated to the route and the sequence in which the orders to picked up or dropped are mentioned.
Once the Routes are created, you can perform manual operations to finalize the routes in the following ways:
1. Assign/Edit a vehicle or driver: Click on the Edit against the vehicle ID or the Rider. From the modal you can choose a driver or the vehicle
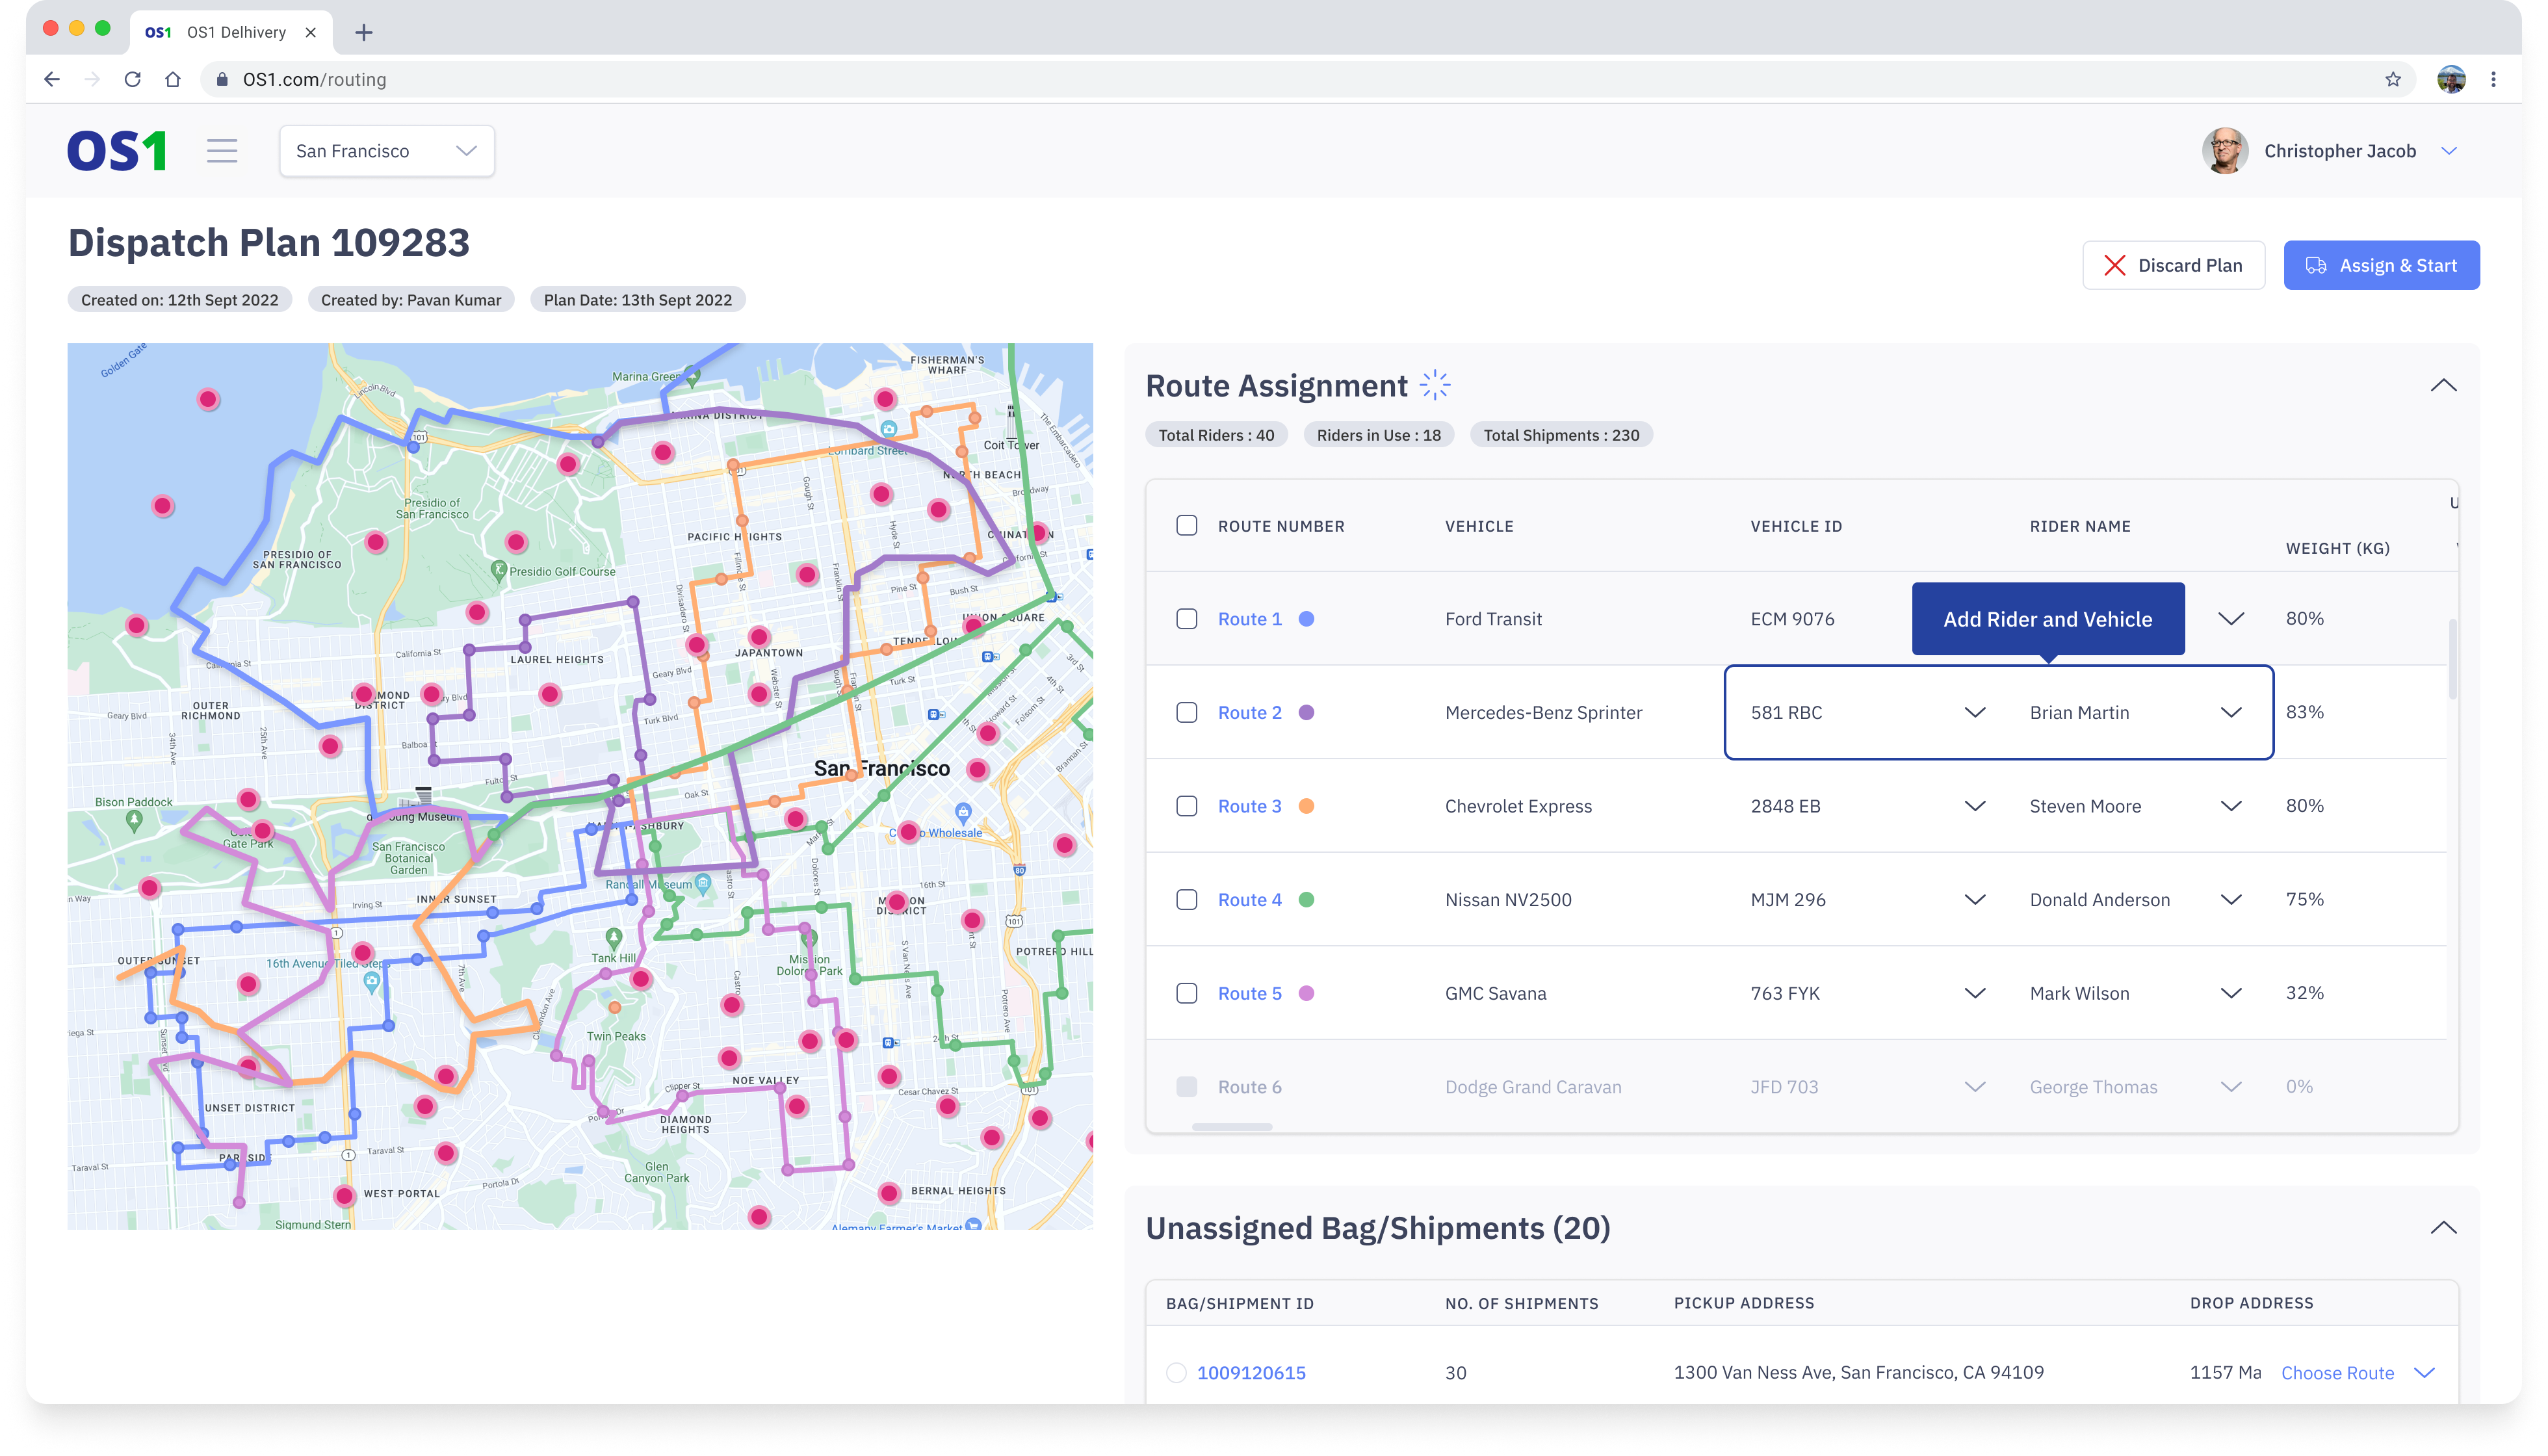
2. Assign the unassigned orders: The Route Optimizer will try to allocate all the orders to a route but based on the constrains there may be few orders that cannot be allocated to any of the routes. In such cases, you can manually add these orders to any of the routes or even remove them from the plan
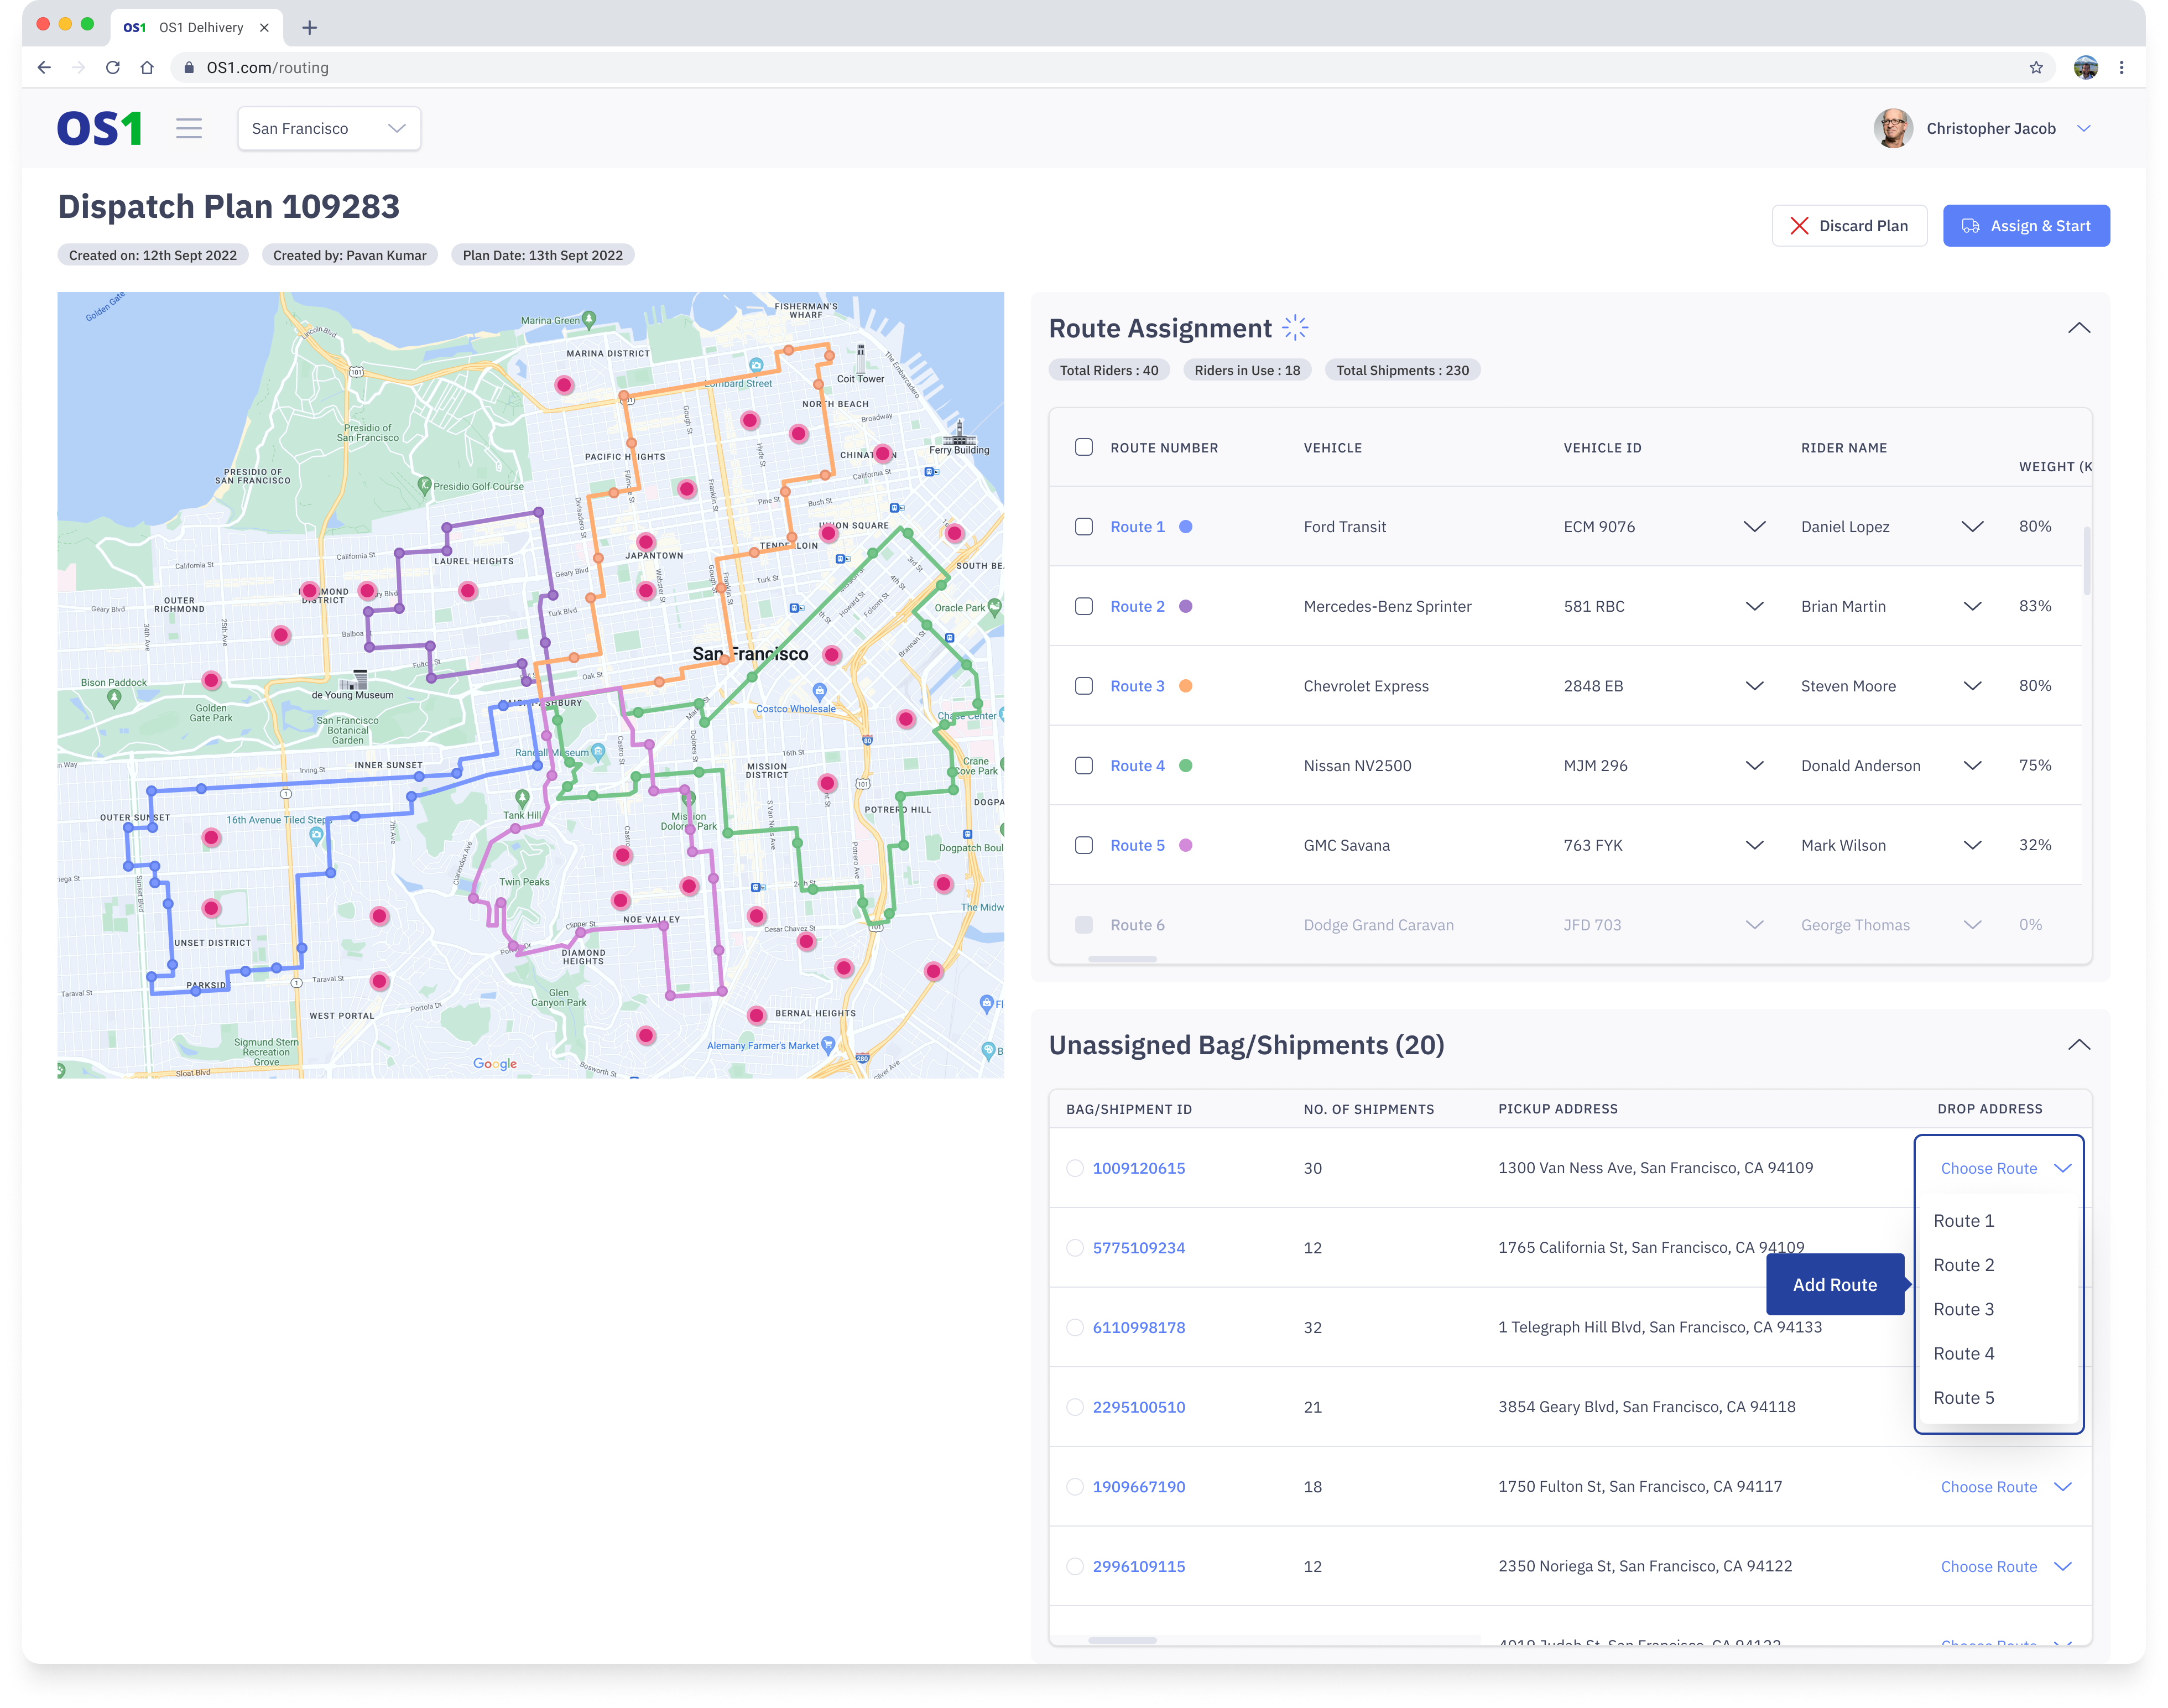
You can allocate the orders to a route on the Unassigned Order Table:
- you can see all the unassigned orders and against each order you have the "Choose Route" option
- you can select a route to assign to the unassigned order by clicking on "Choose Route" and selecting one of the routes from the list
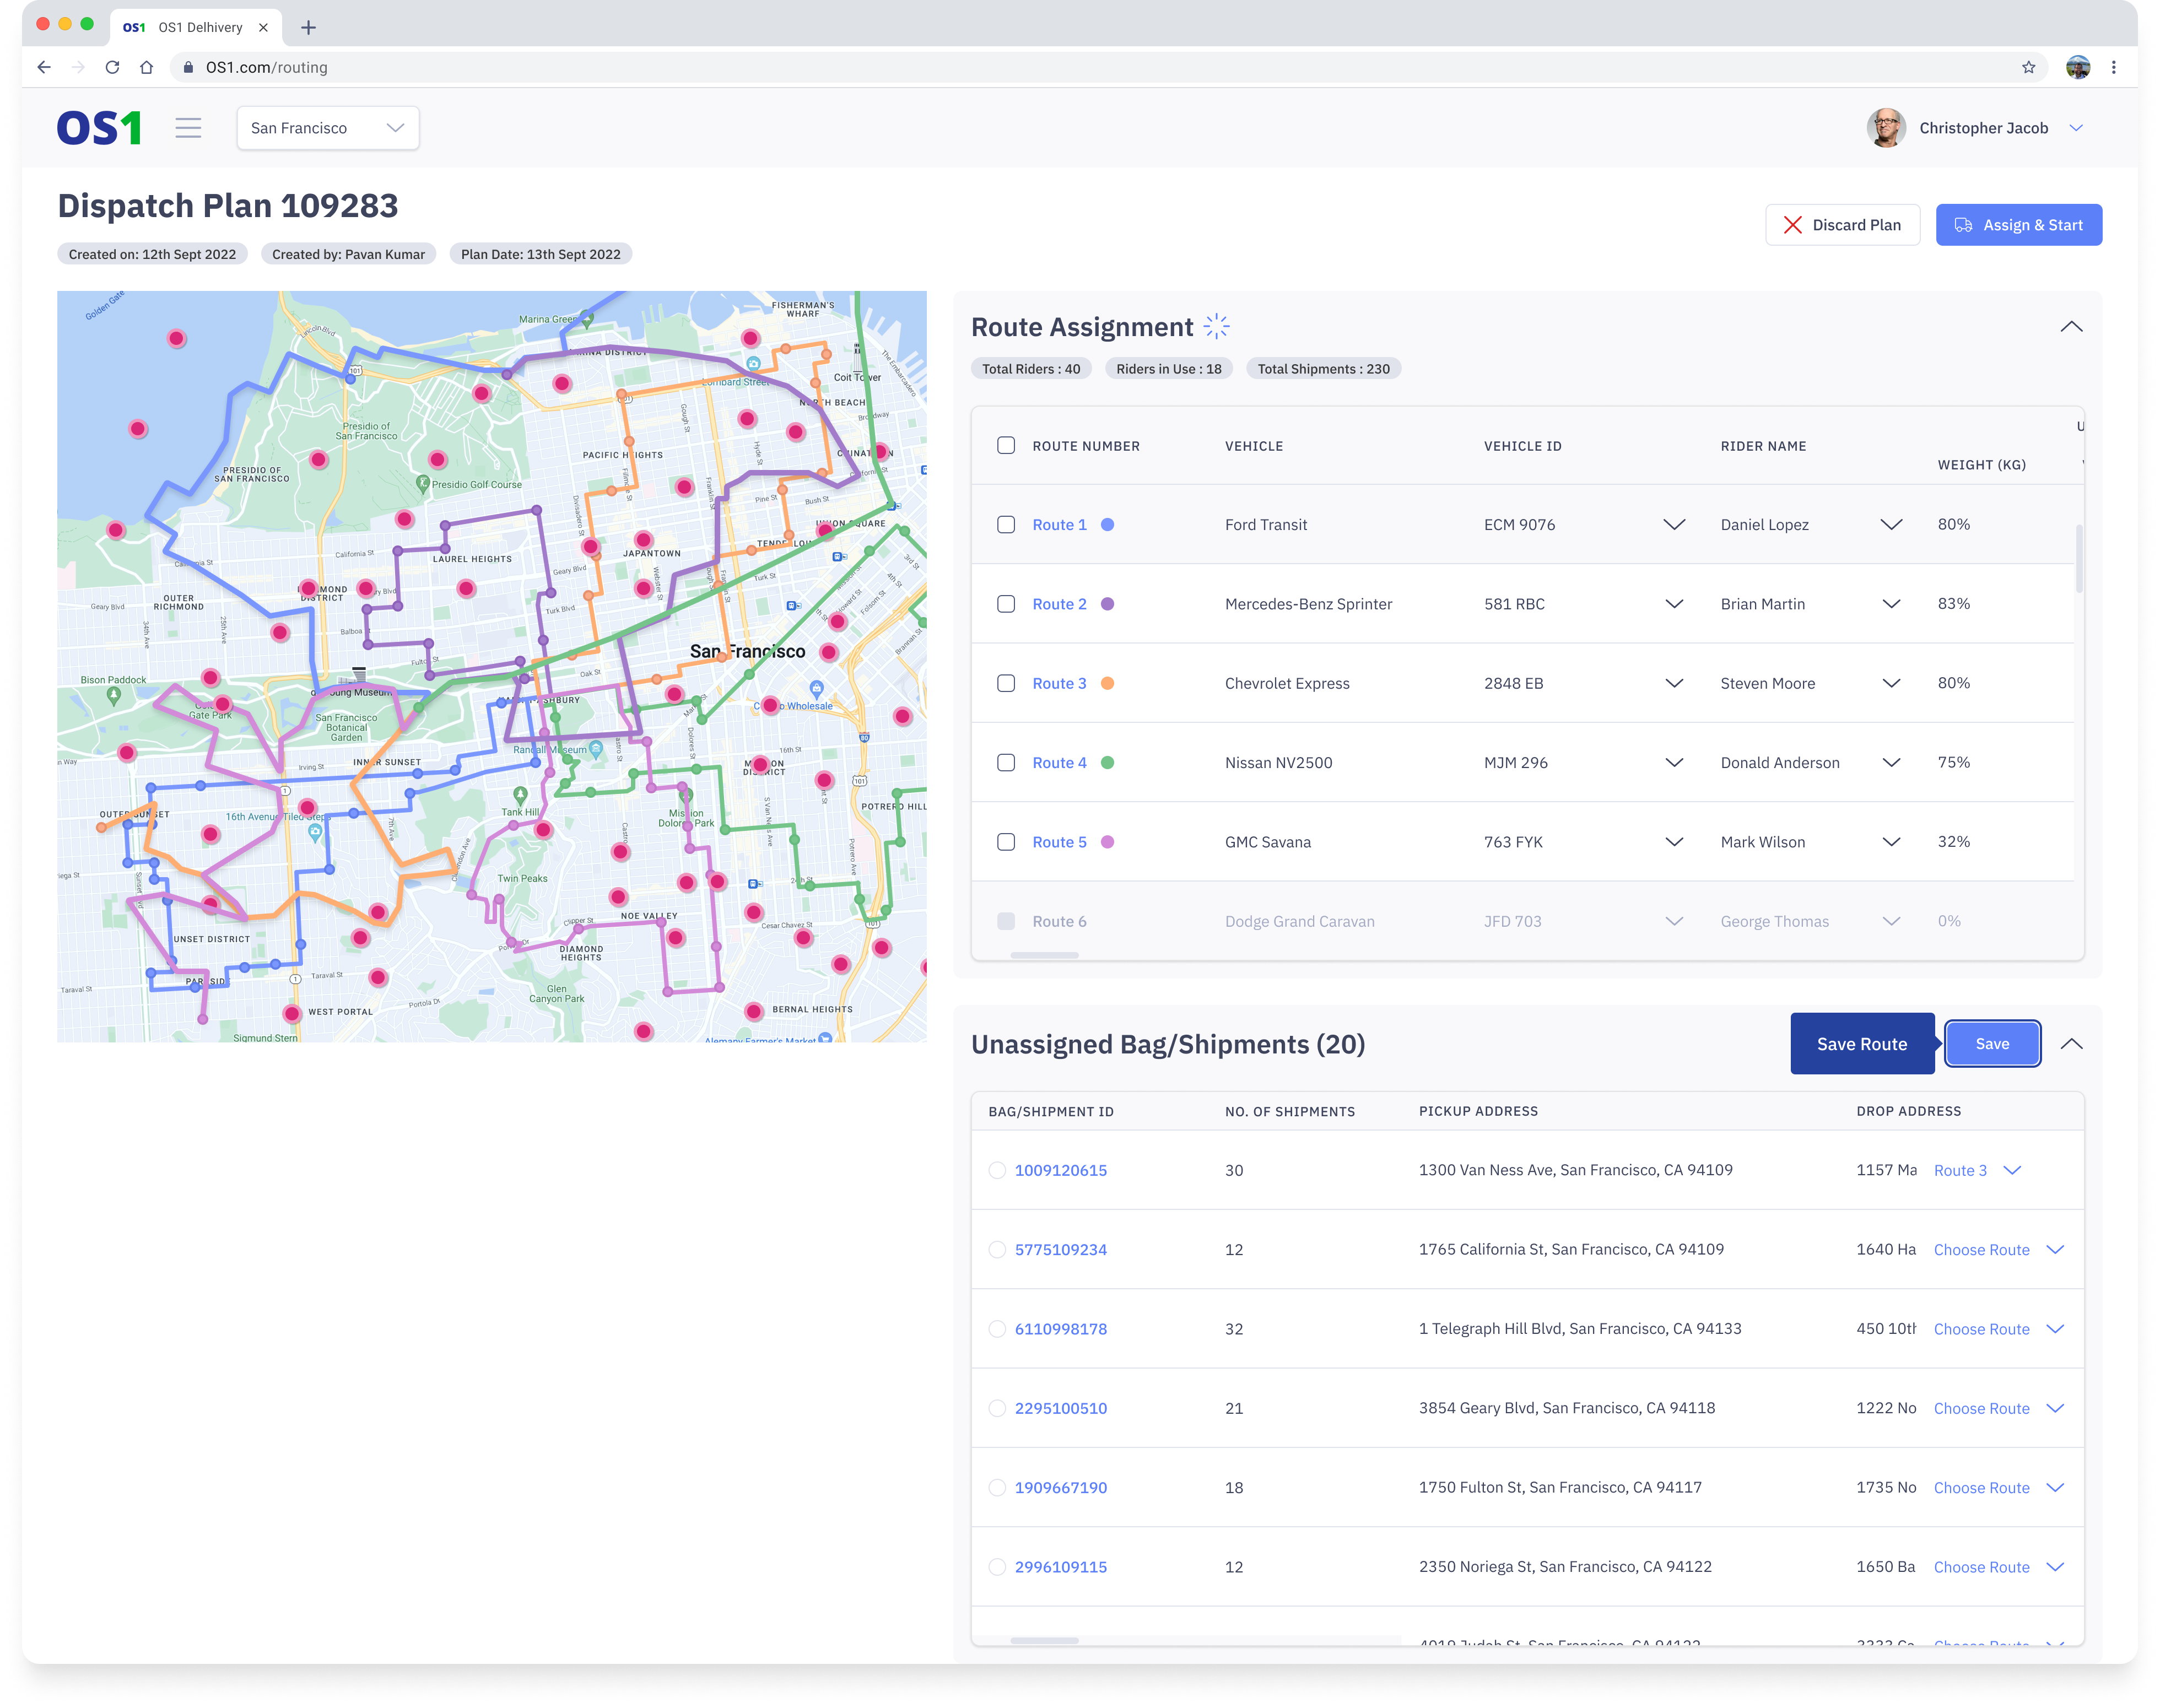
- you can assign the routes to multiple orders before committing the change
- once you are happy with the changes, click on "Assign" button to effectively save the changes
The same can be done through the Route Details page.
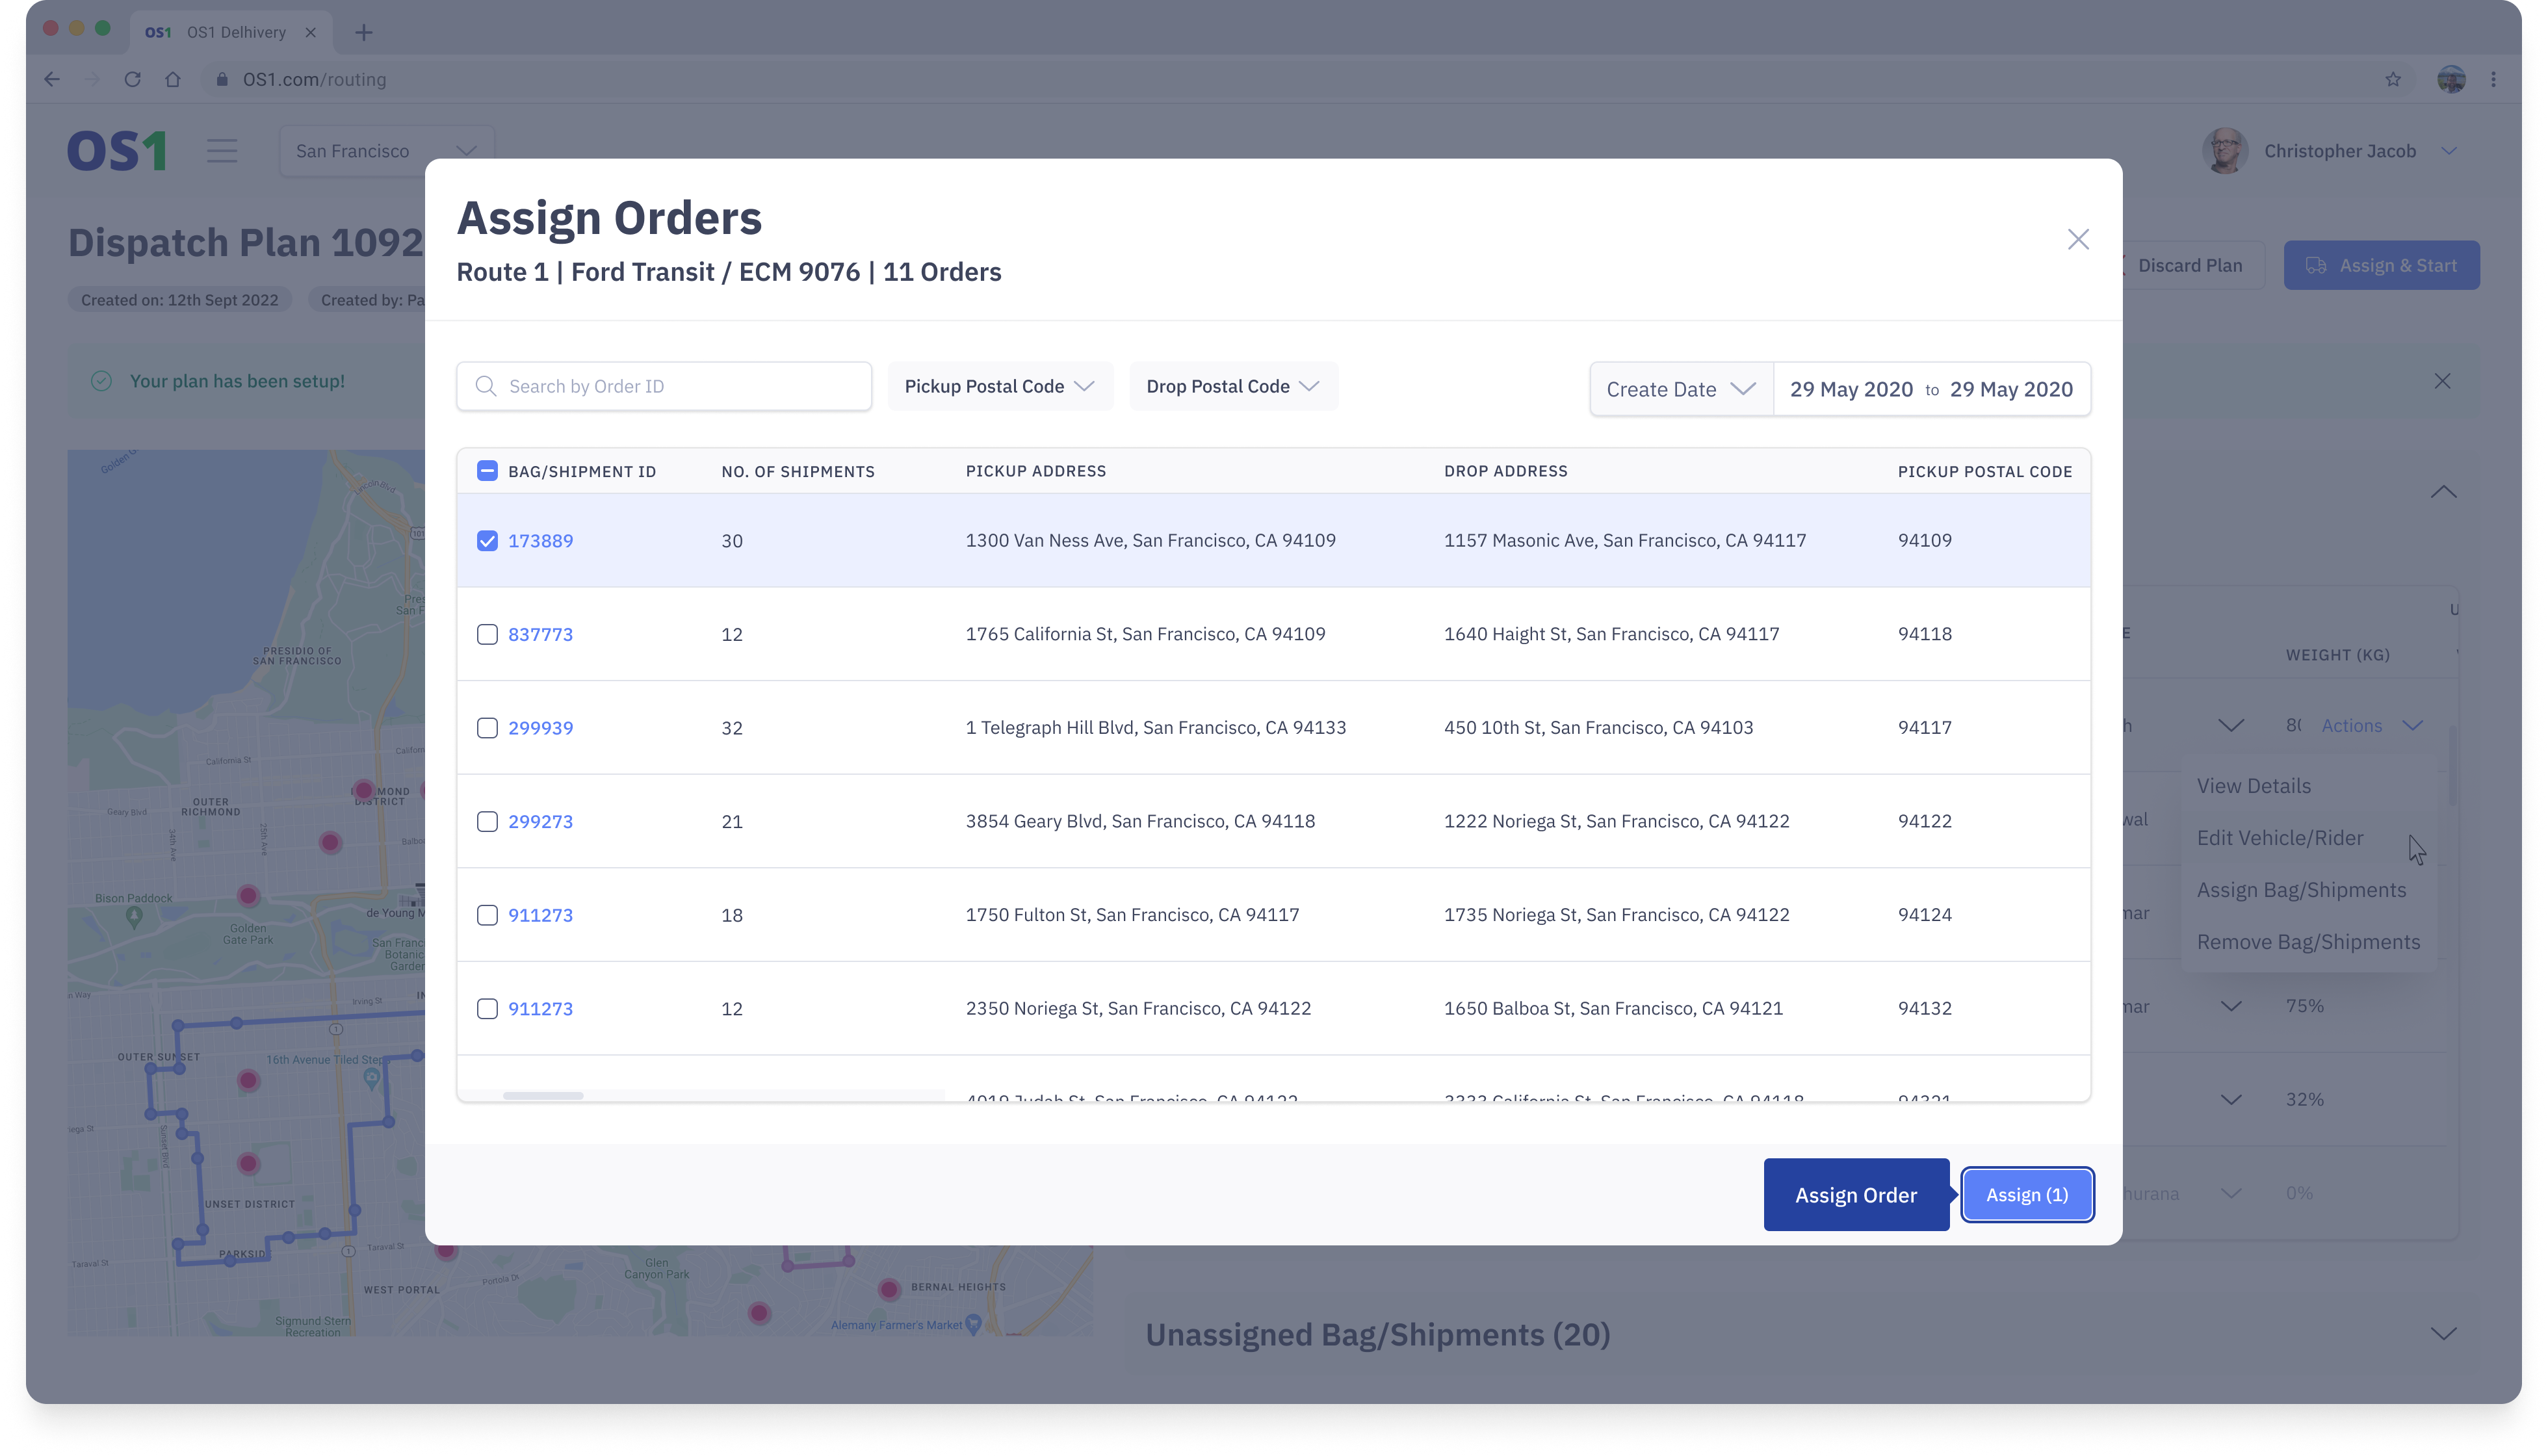
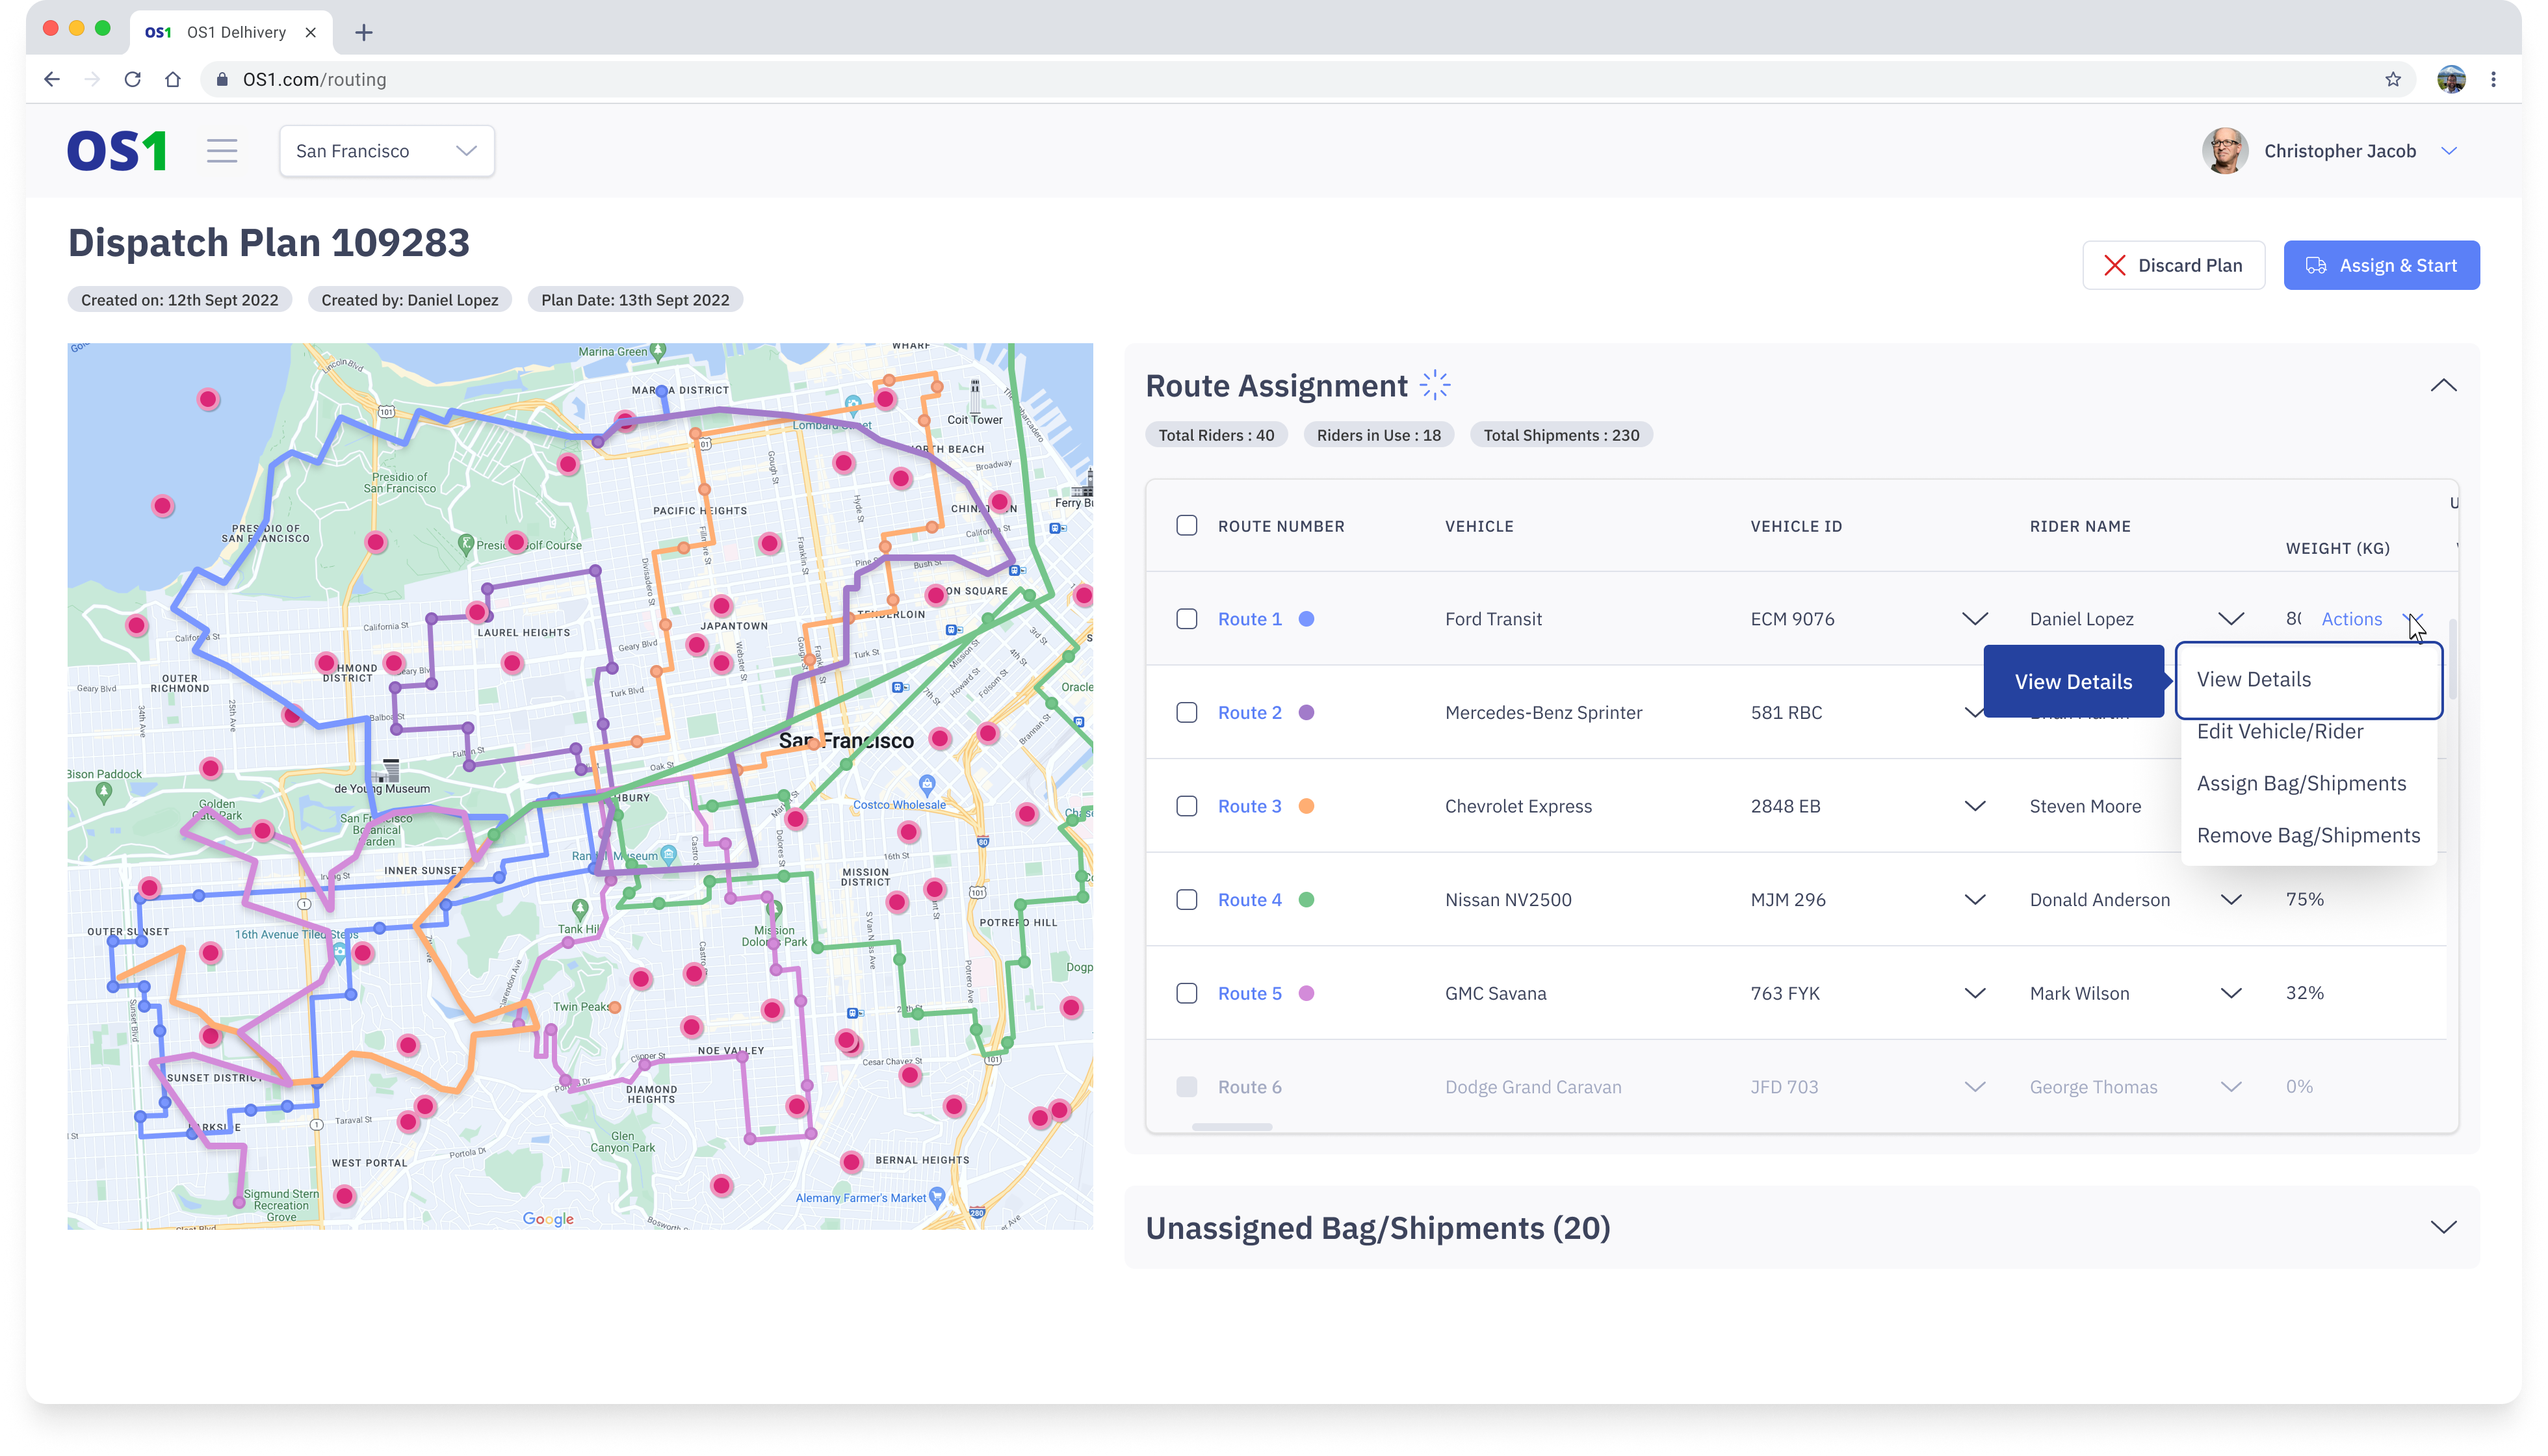
- Route Assignment Table - The Route Assignment Table allows you to assign unassigned orders to a single route at a time.
- To do this, click on the "Assign Orders" action button for the desired route in the table.
- A modal will appear, displaying all unassigned orders, and you can select multiple orders to be assigned to the selected route.
- Once the orders are selected, click the "Assign" button to save the changes. This process can be repeated for other routes as needed.
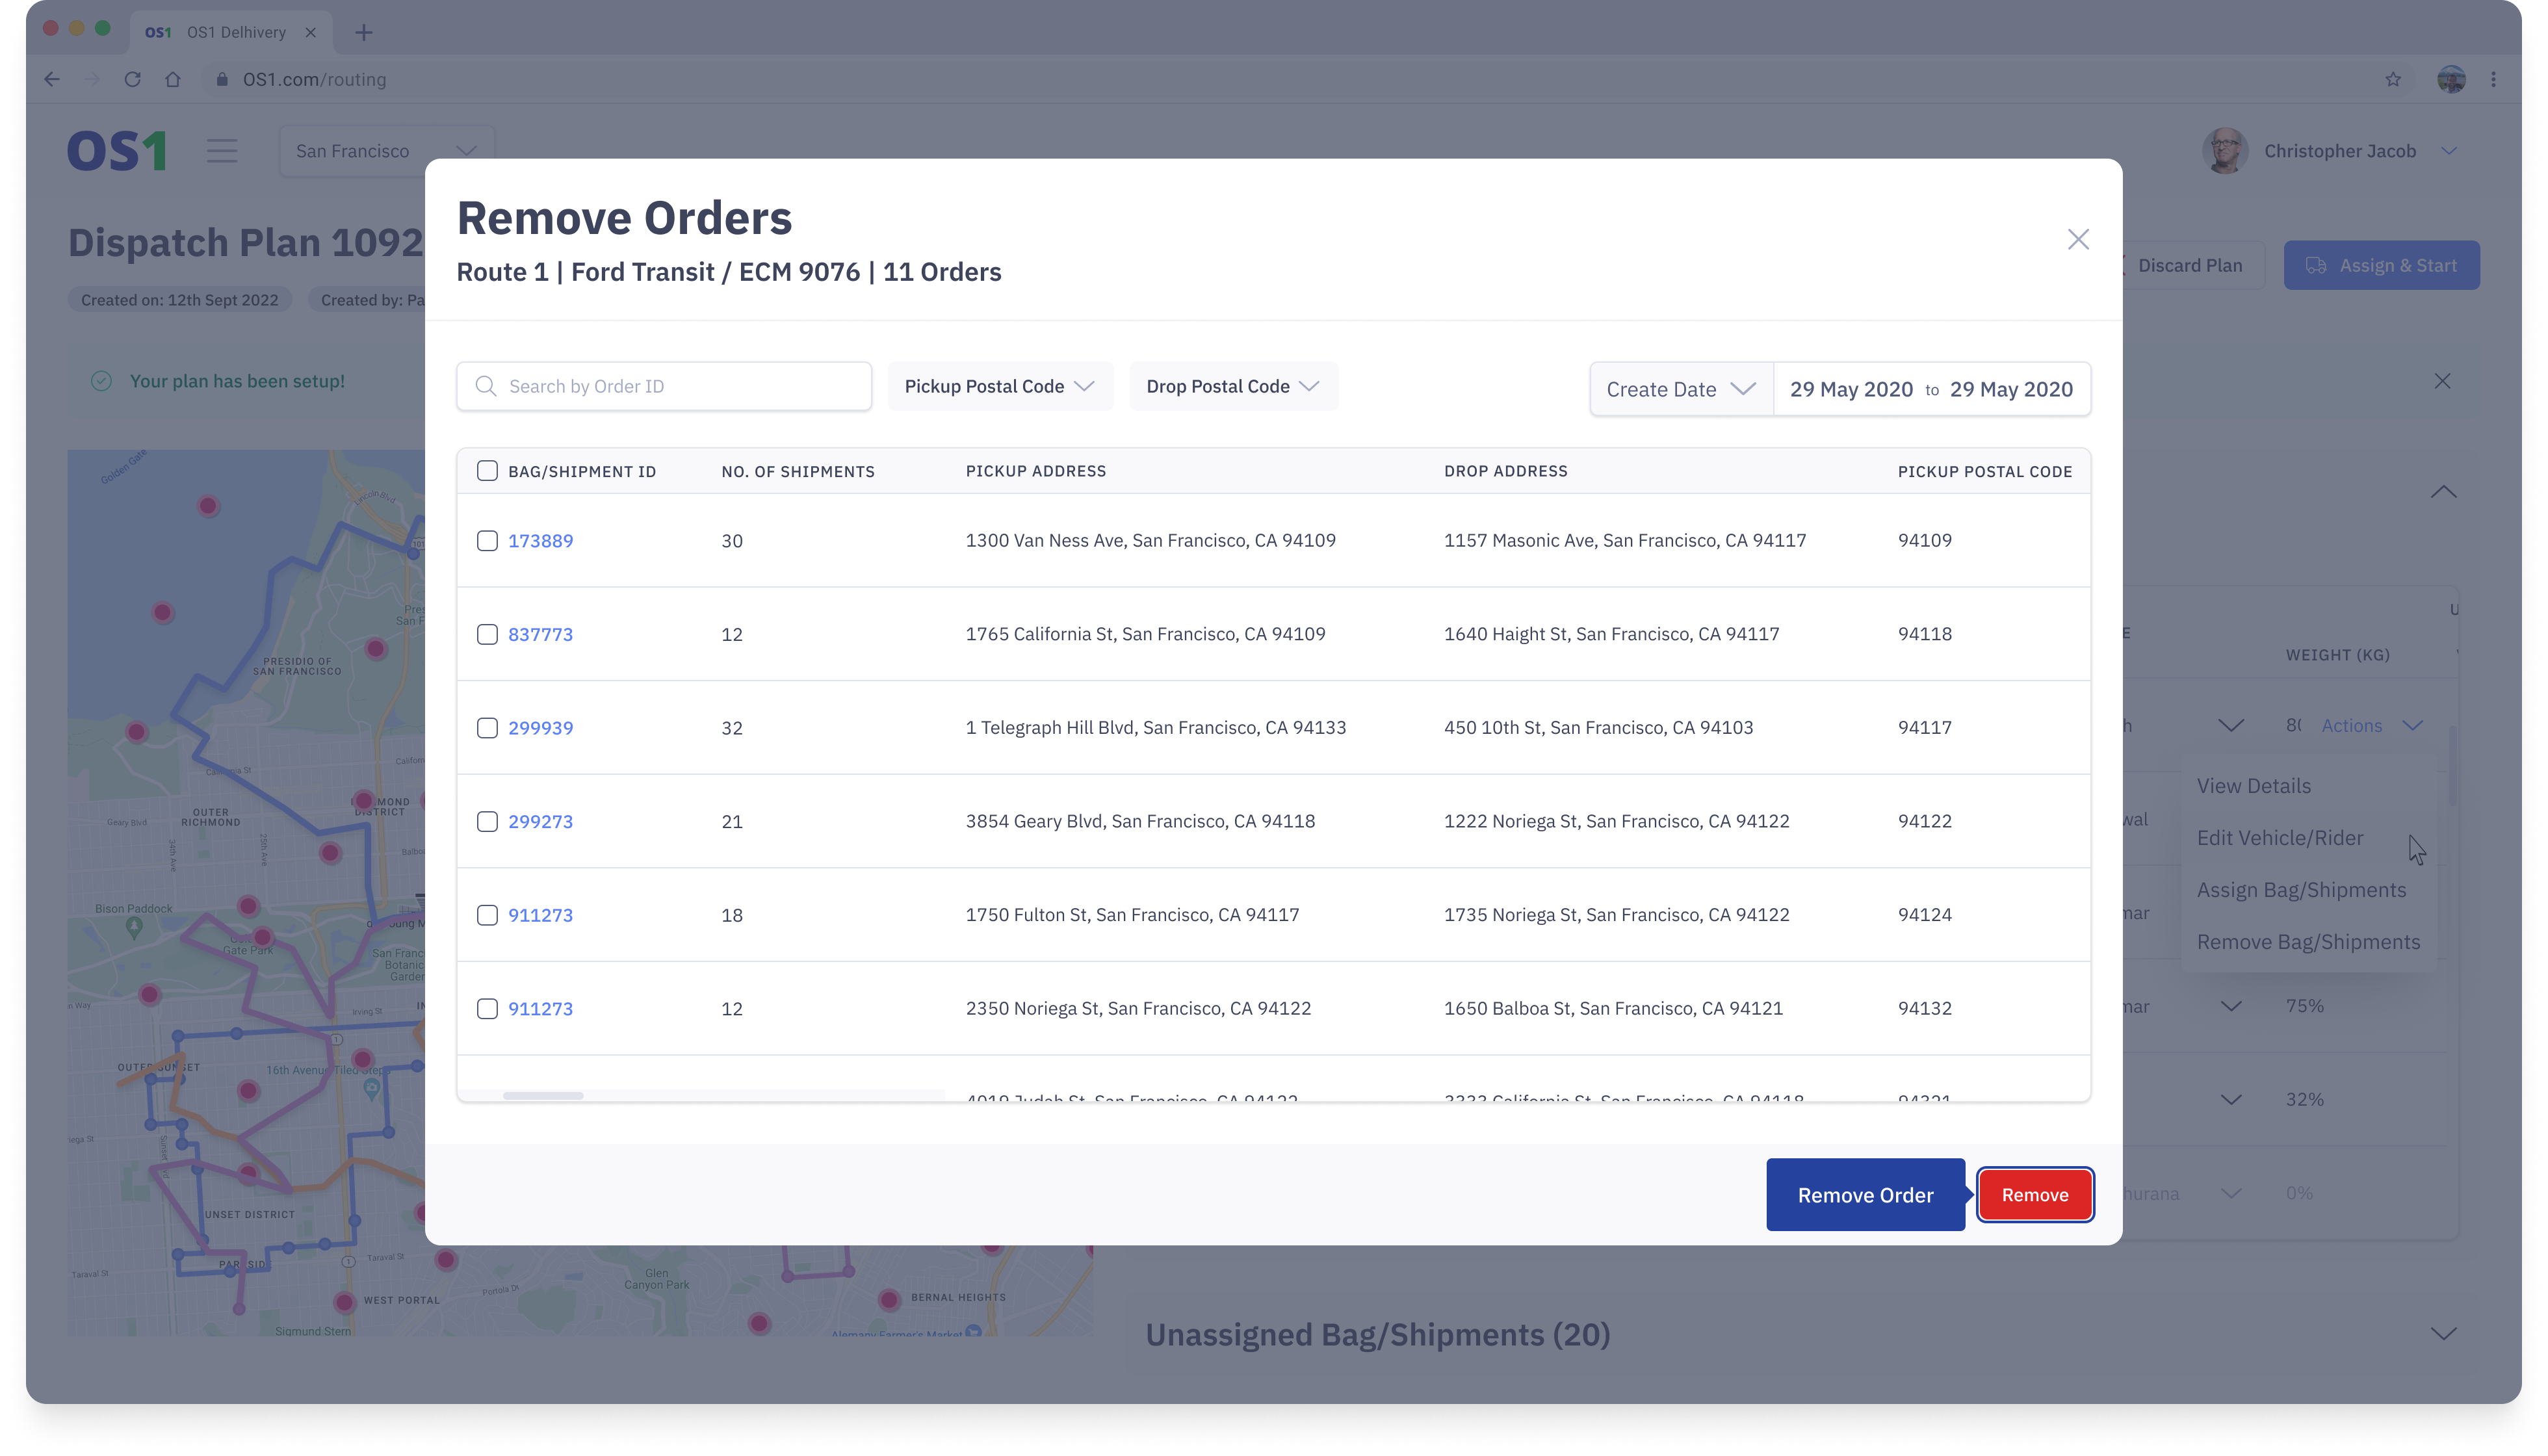
- To remove assigned orders, follow these steps:
- Click on the 'Remove Orders' action on the route assignment table.
- A modal will open, displaying all assigned orders. Select the orders you want to remove from this particular route.
- Click the 'Remove' action to save the changes.
- View Details within a Route: You can click on either 'View Details' or 'Route No.' to access the details within a specific route.
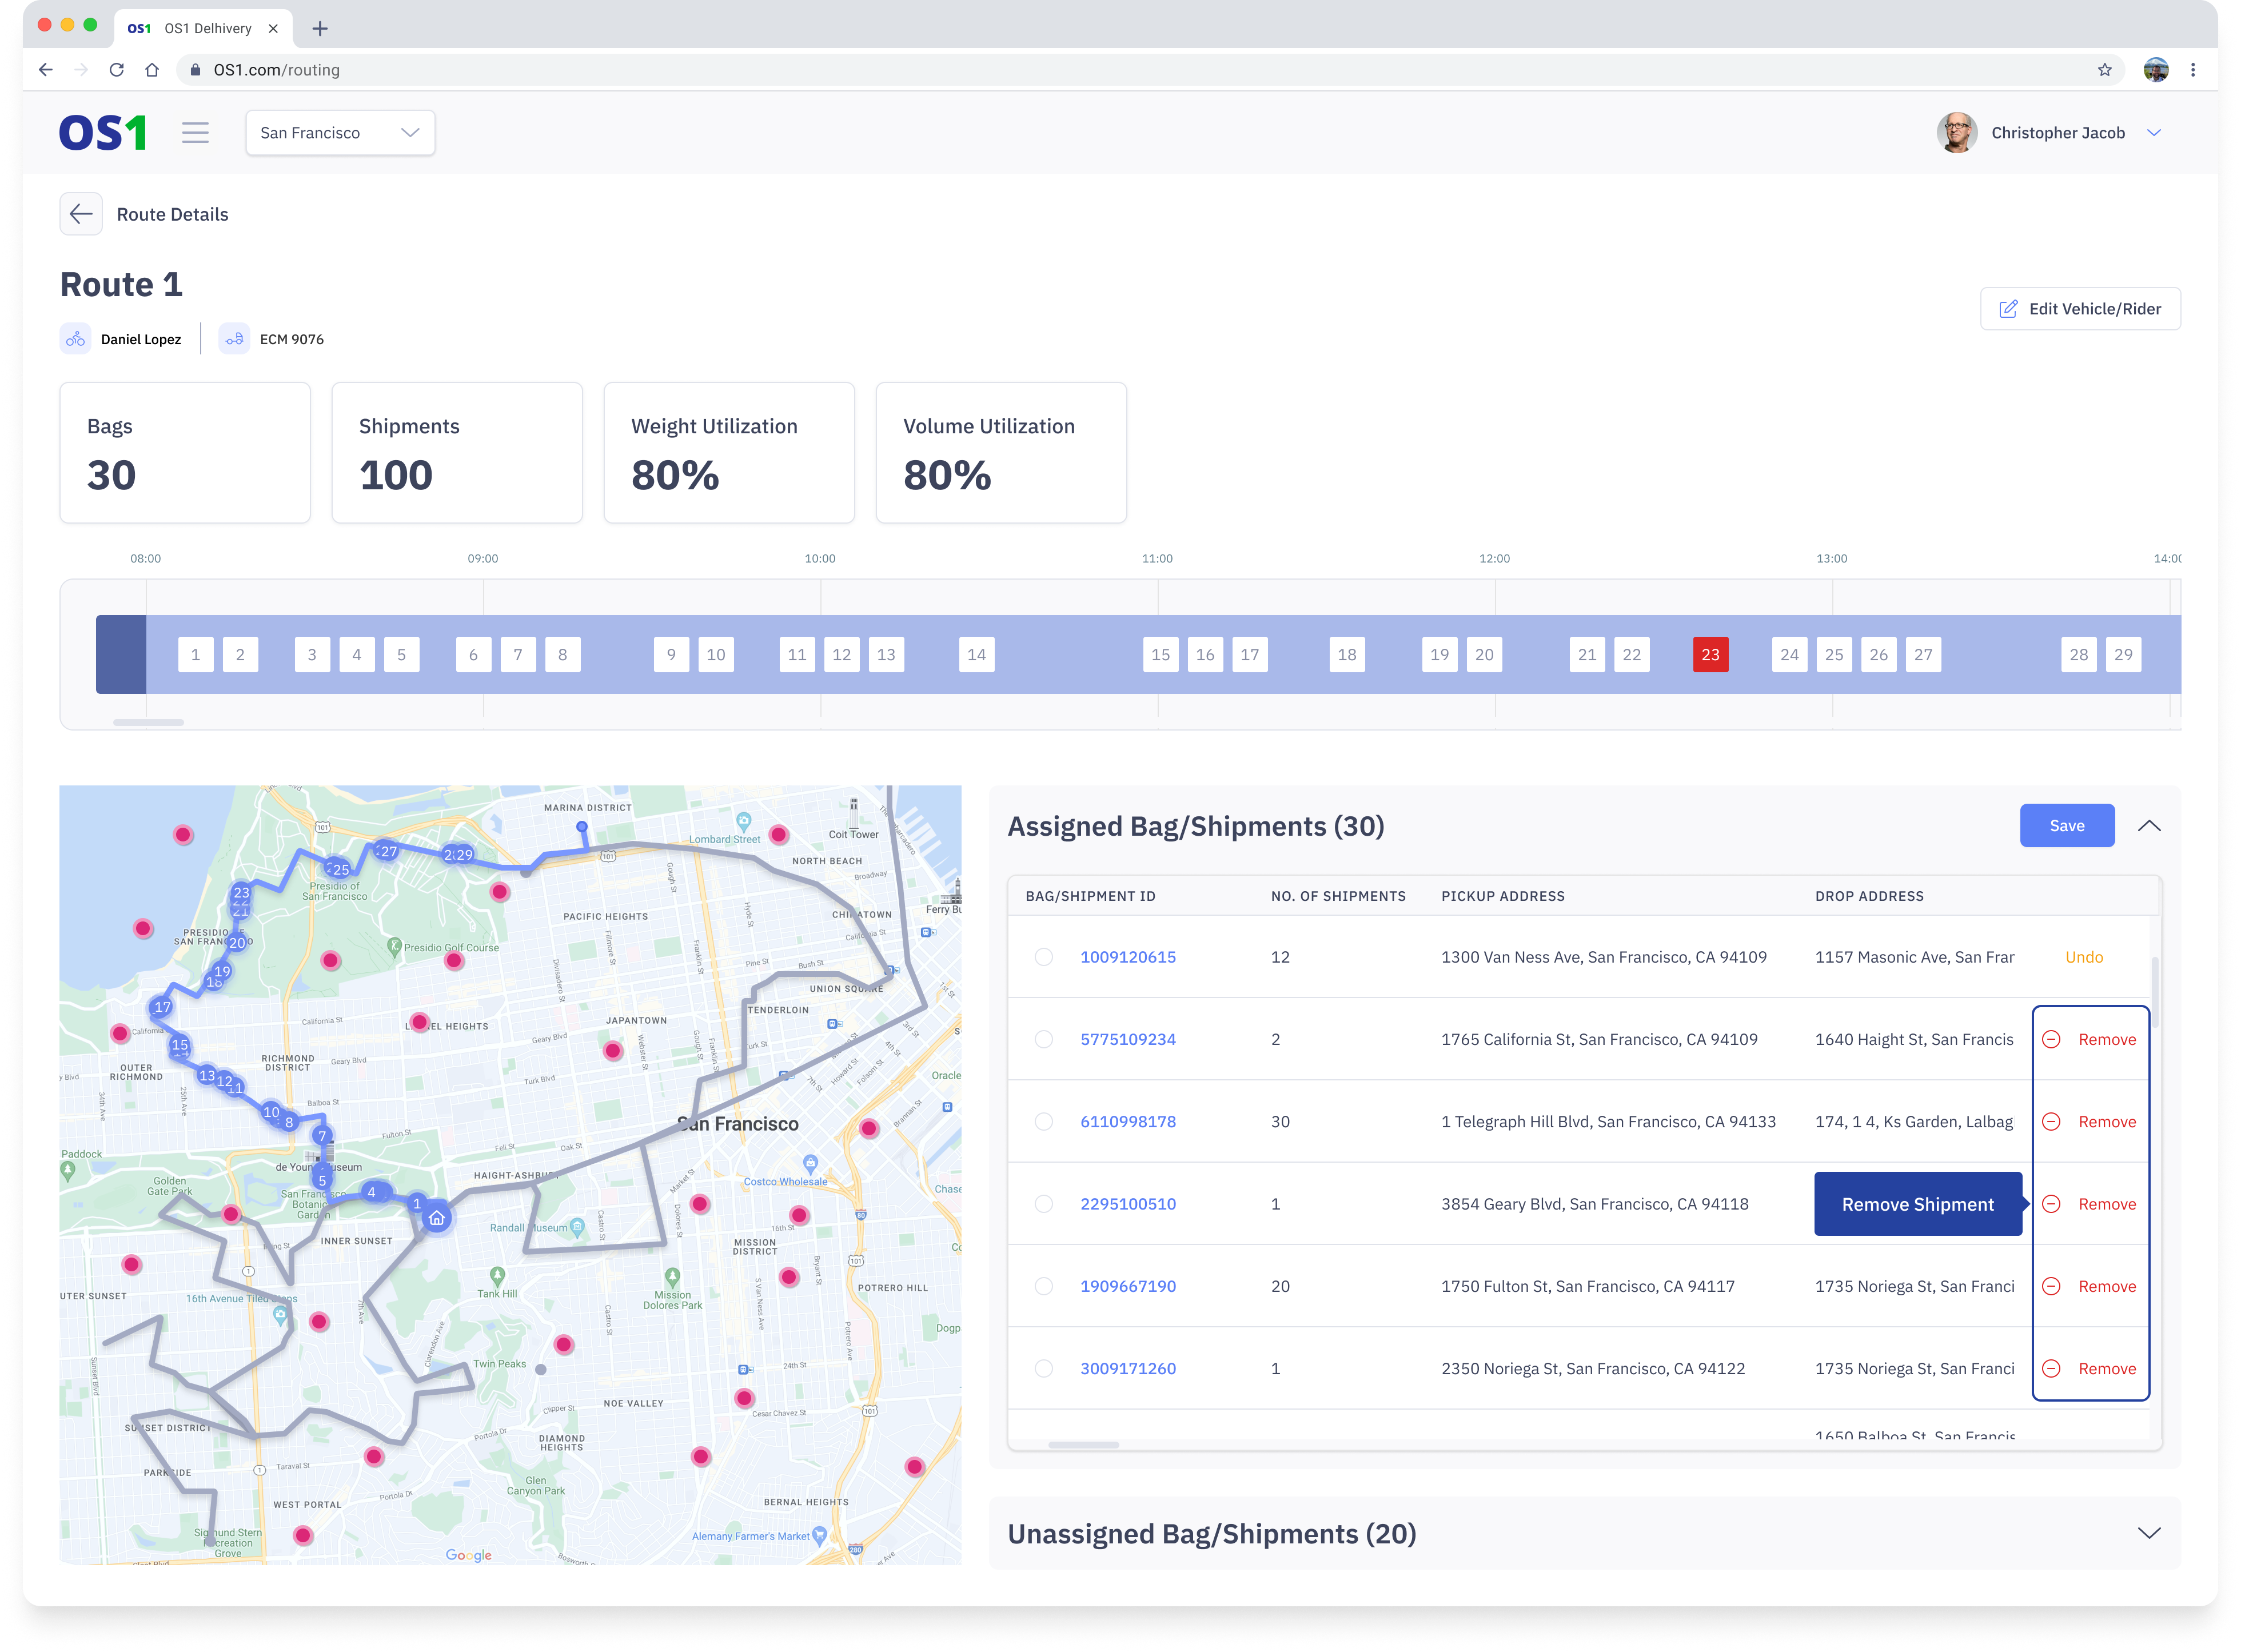
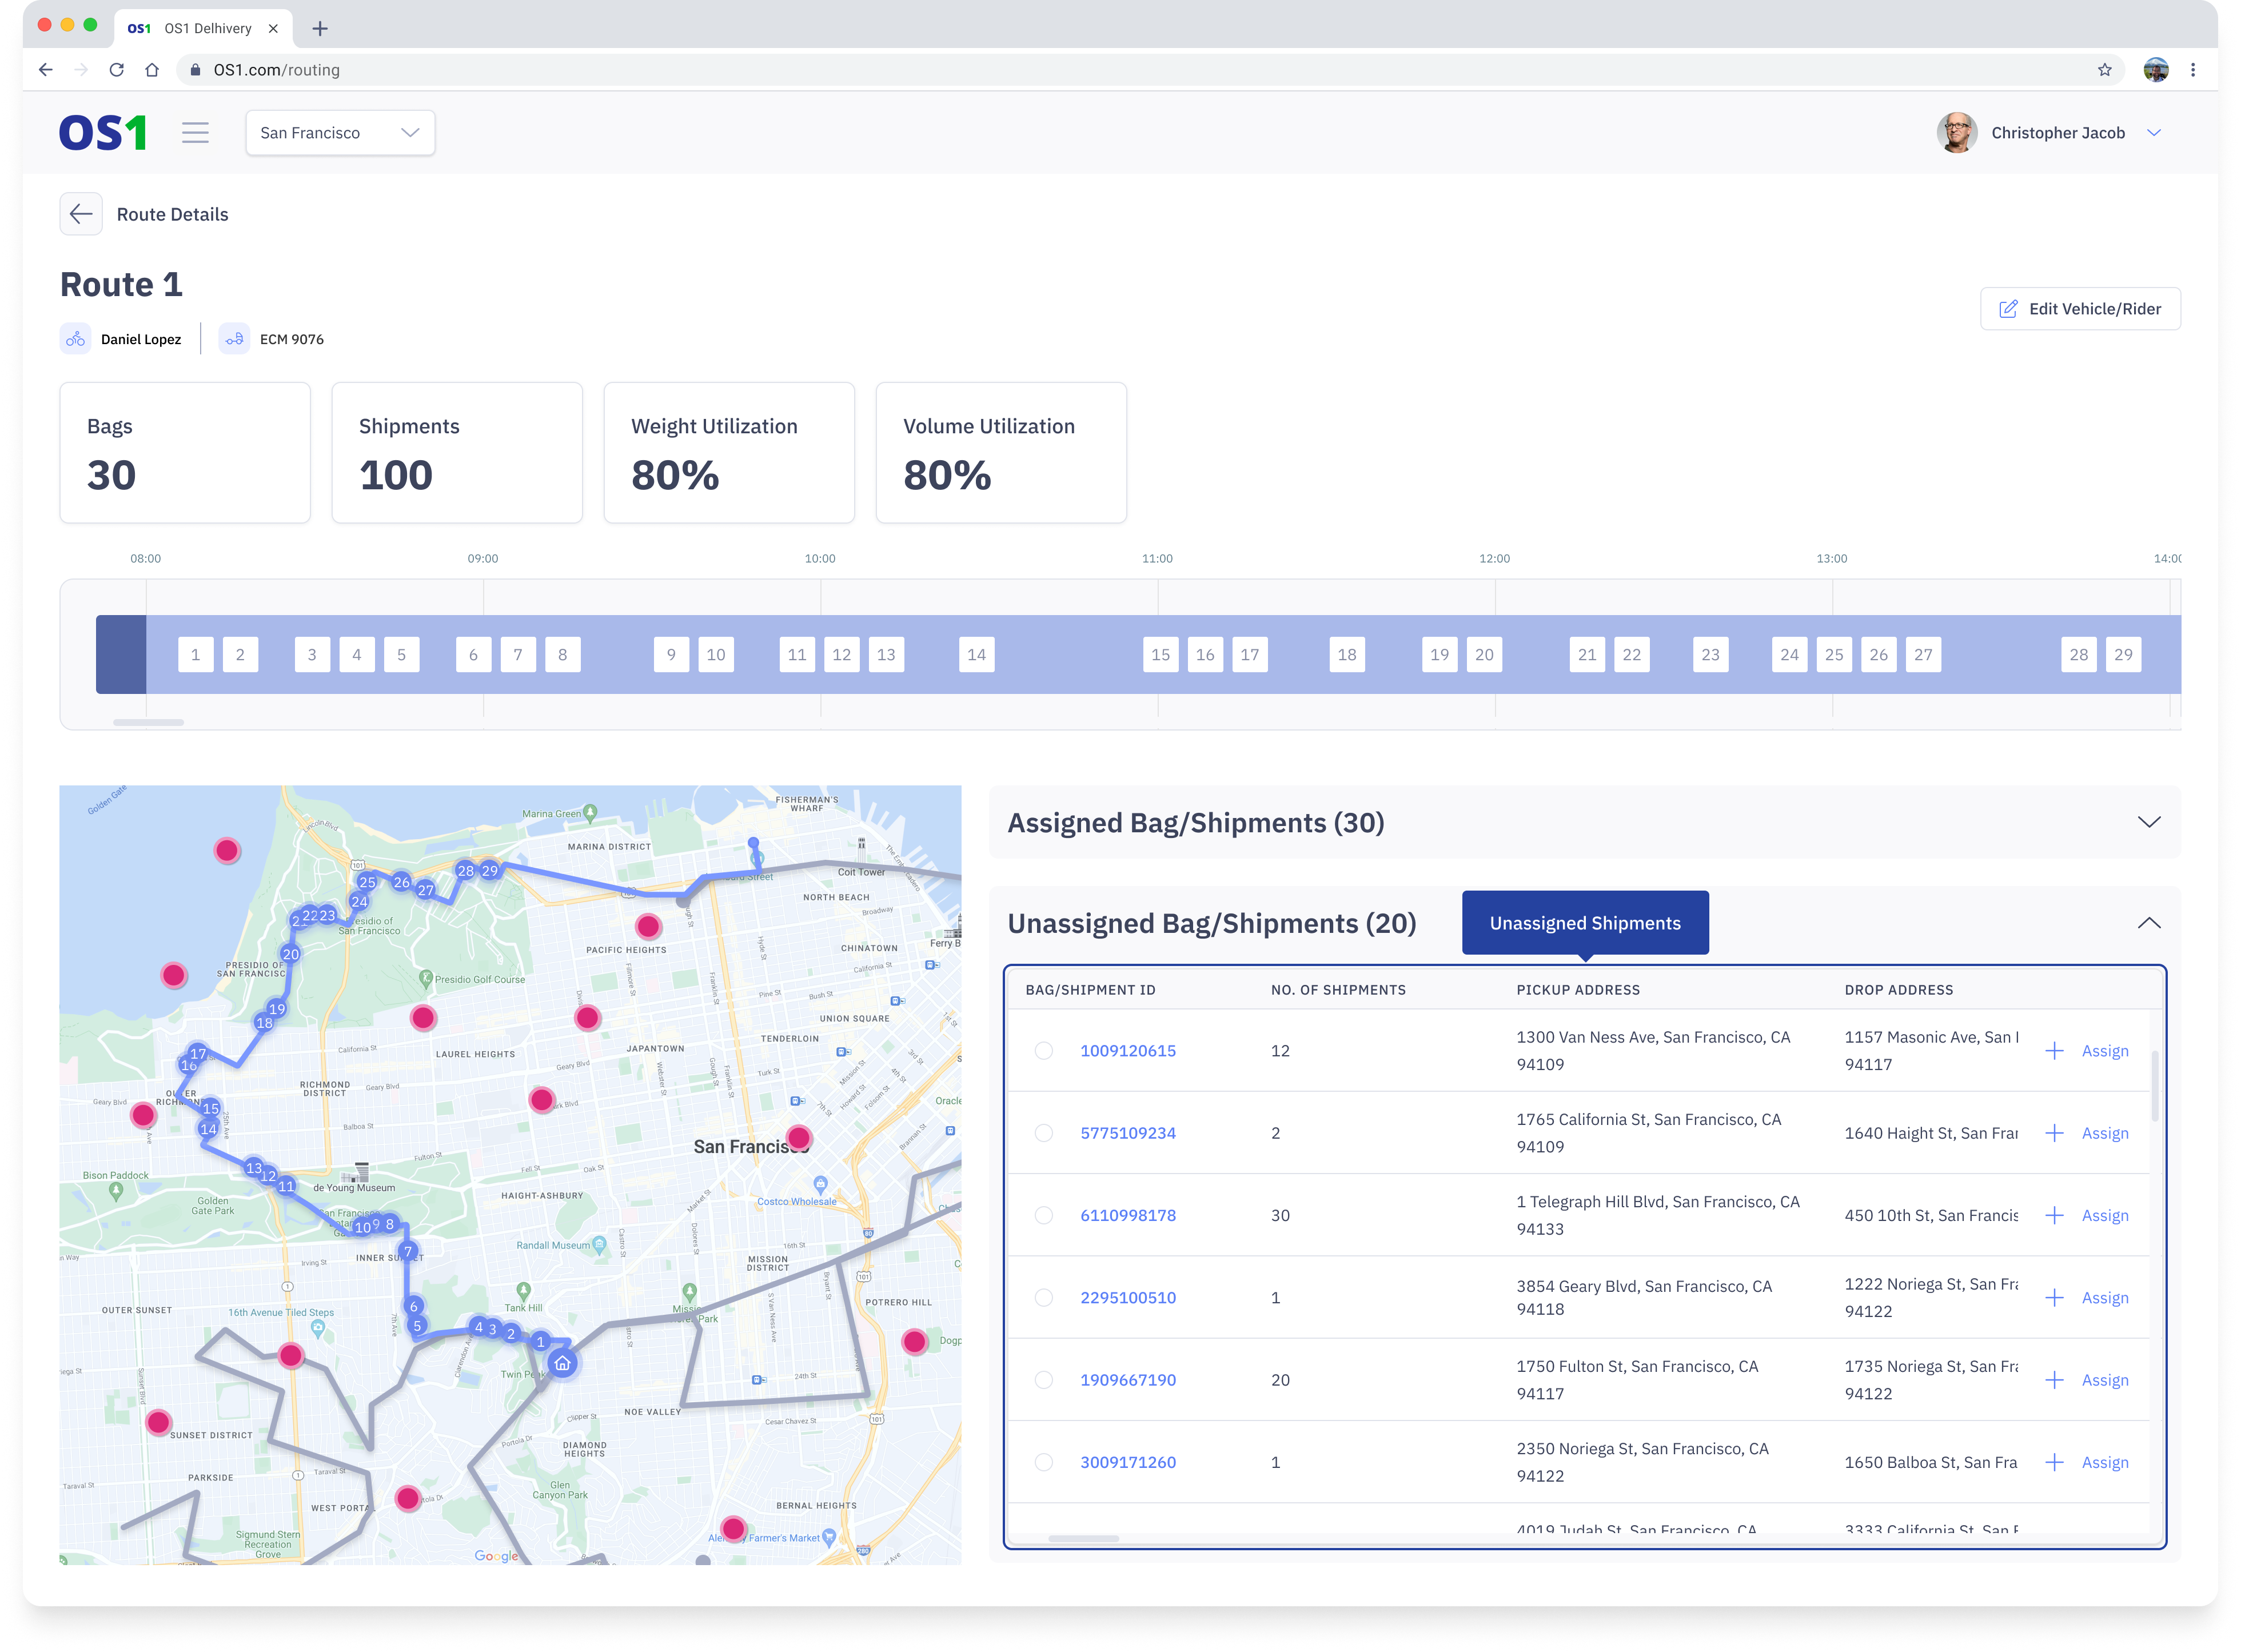
Route Details
The Route Details page provides a comprehensive view of the tasks along the route. It displays the sequence of tasks both on the map and on the Gantt chart, along with their respective completion times.
You can perform the following manual actions on the route/routes so that the dispatch plan is ready to be published to the riders:
- Edit Route Information:
- Click on the "Edit" button next to the route on the routing plan page.
- This will open a modal where you can view the already selected vehicle model, vehicle ID, and rider name. You can edit this information with the correct details before publishing the route.

- Assign orders on a route
- Open the unassigned orders table, and then click on ‘Assign’ for each order to assign multiple orders to the route.
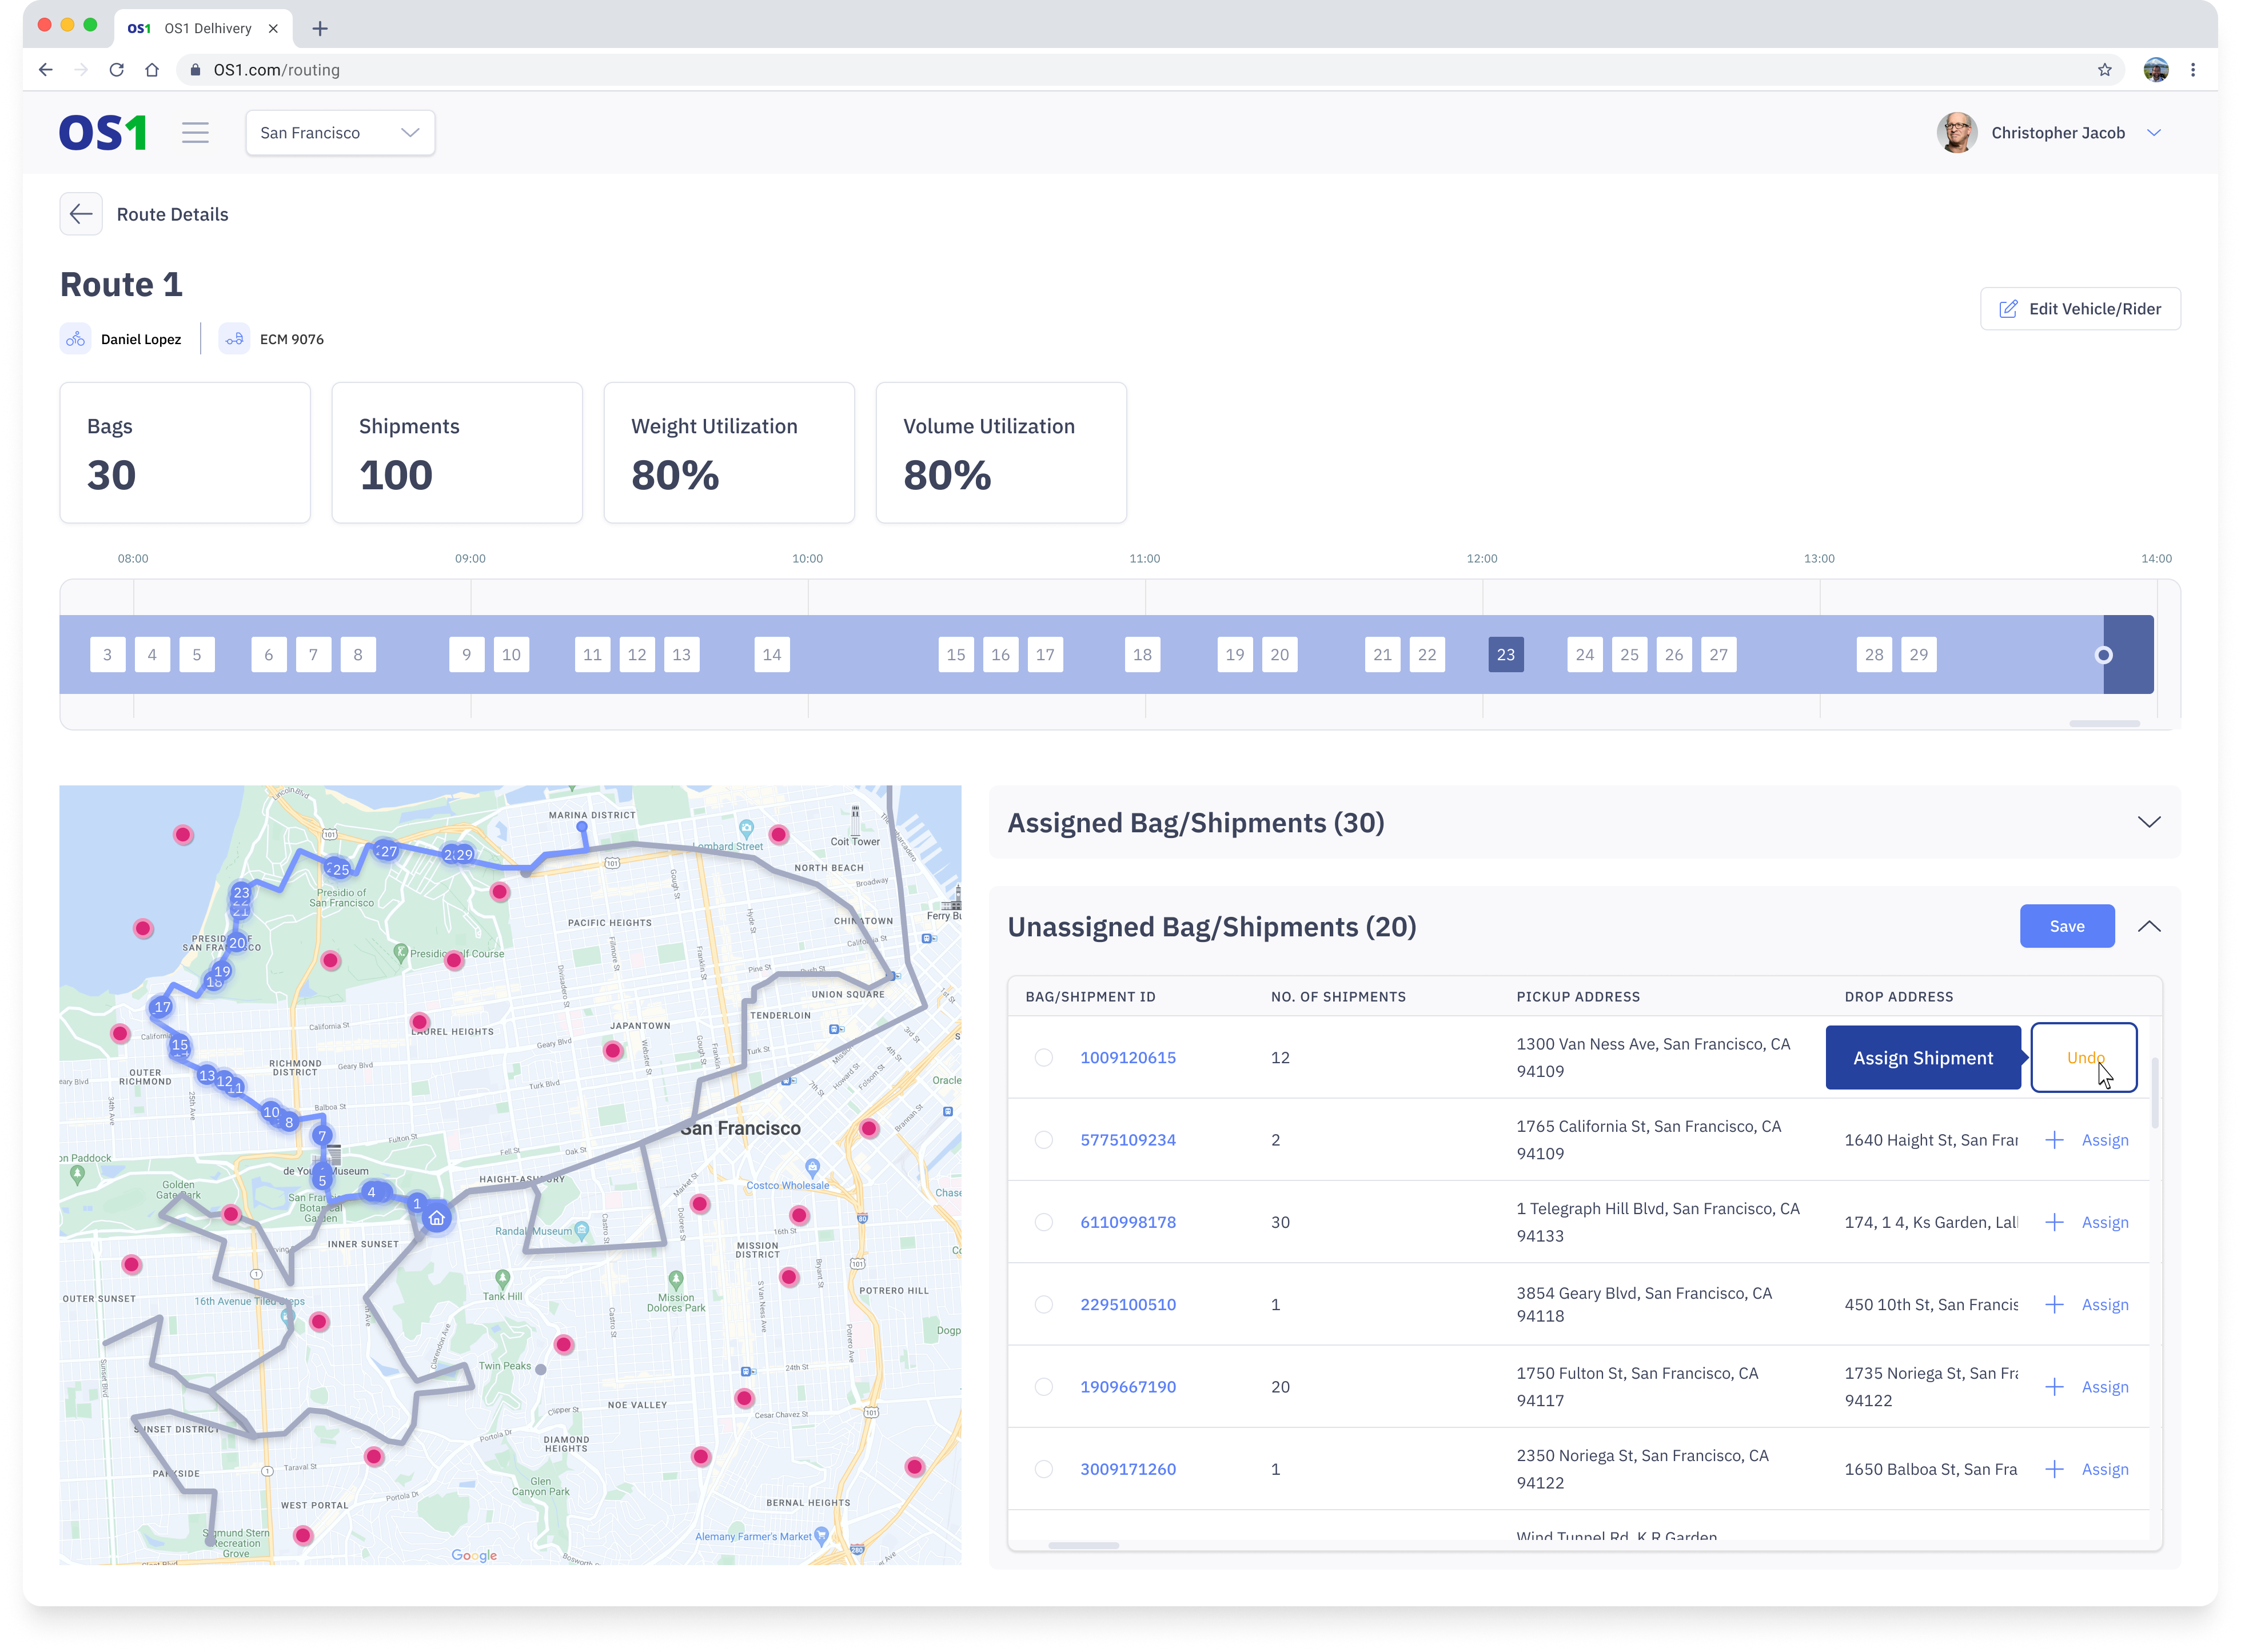
- After assigning the orders, click ‘Save’ to update the route with all the changes.
- Remove orders on a route
- To remove orders from a route, open the Assigned Orders table and select multiple orders to be removed by clicking on the 'Remove' button for each.
- After removing the orders, click 'Save' to update the route with the changes.