
Creating and Managing Users
As a Business Owner, you need to manage the various users from your organisation who can access DispatchOne. Further, you need to define their roles so the users will have the right access.
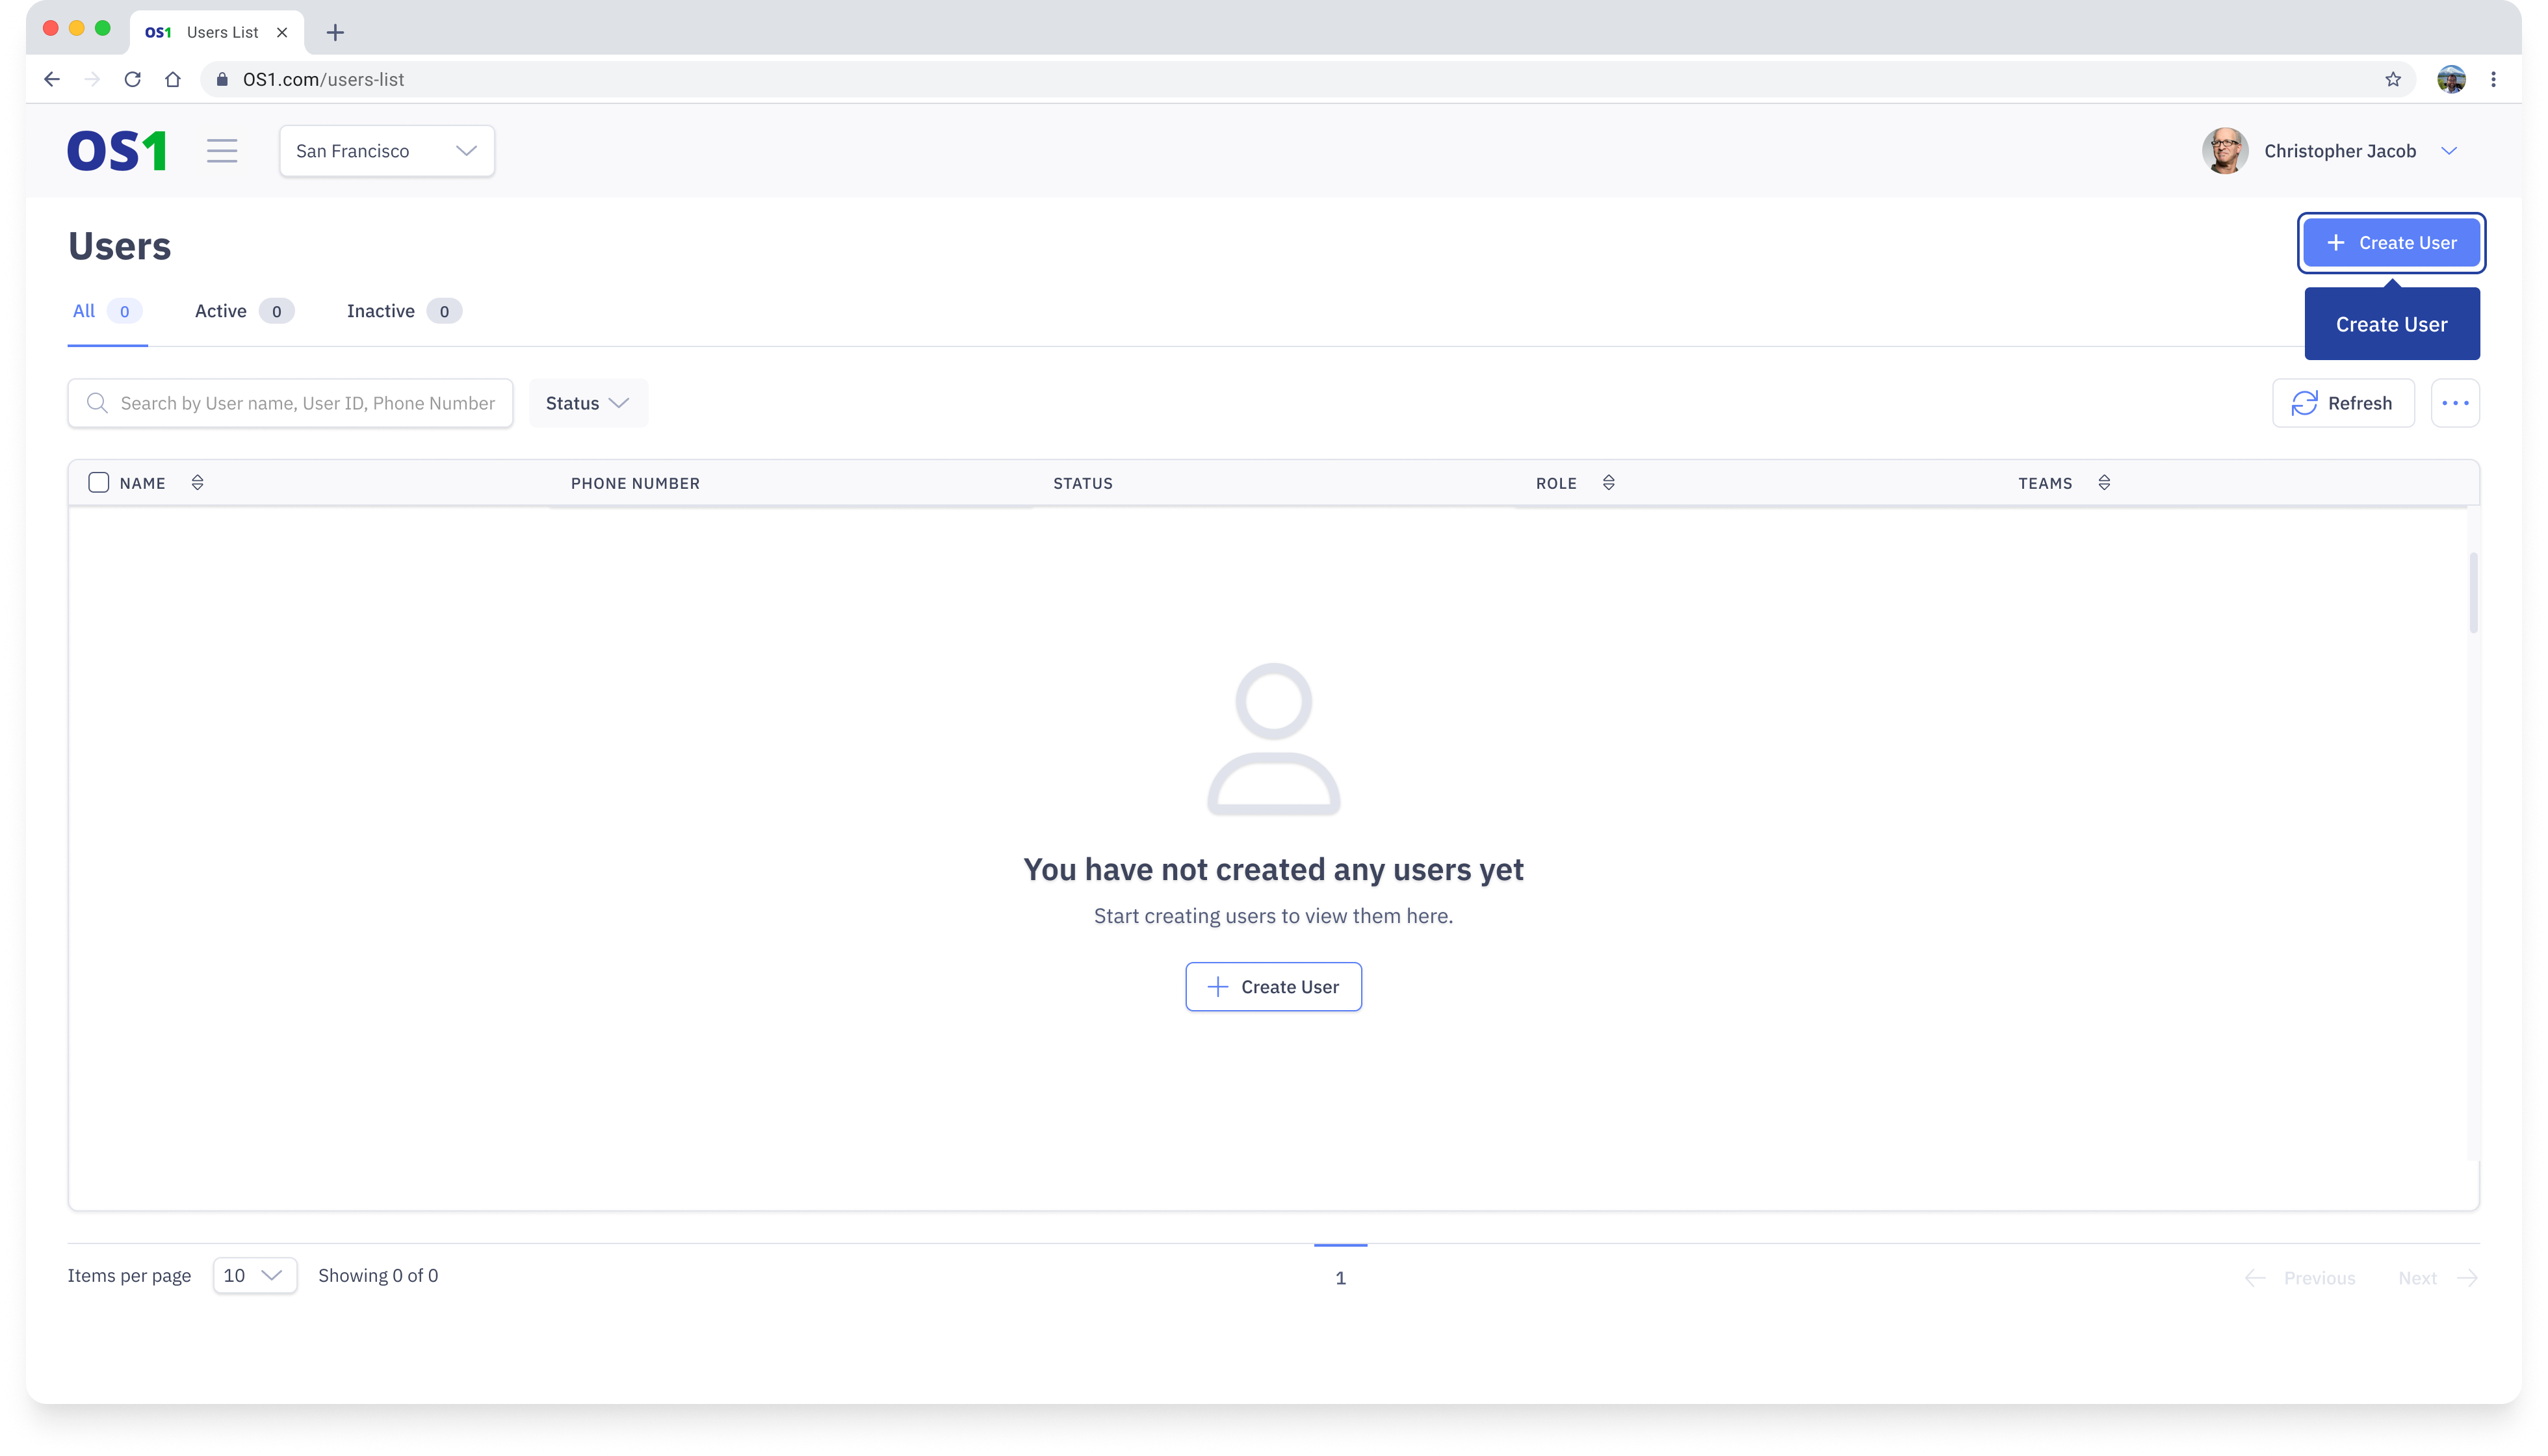
To create and manage the Users, simply click on the “Users” application located in the side navigation menu. Here you will be able to perform various actions, including:
- Creating new users using the “Create User” button
- Viewing a list of all existing Users in the system
- Editing the information of existing Users using the “Edit” button
- Searching for a specific User by their name, ID, or phone number
- Filtering the user list based on their status, role, or team
- Modifying the columns that you see on the User table
- Updating the status of users using the status update feature
Create User
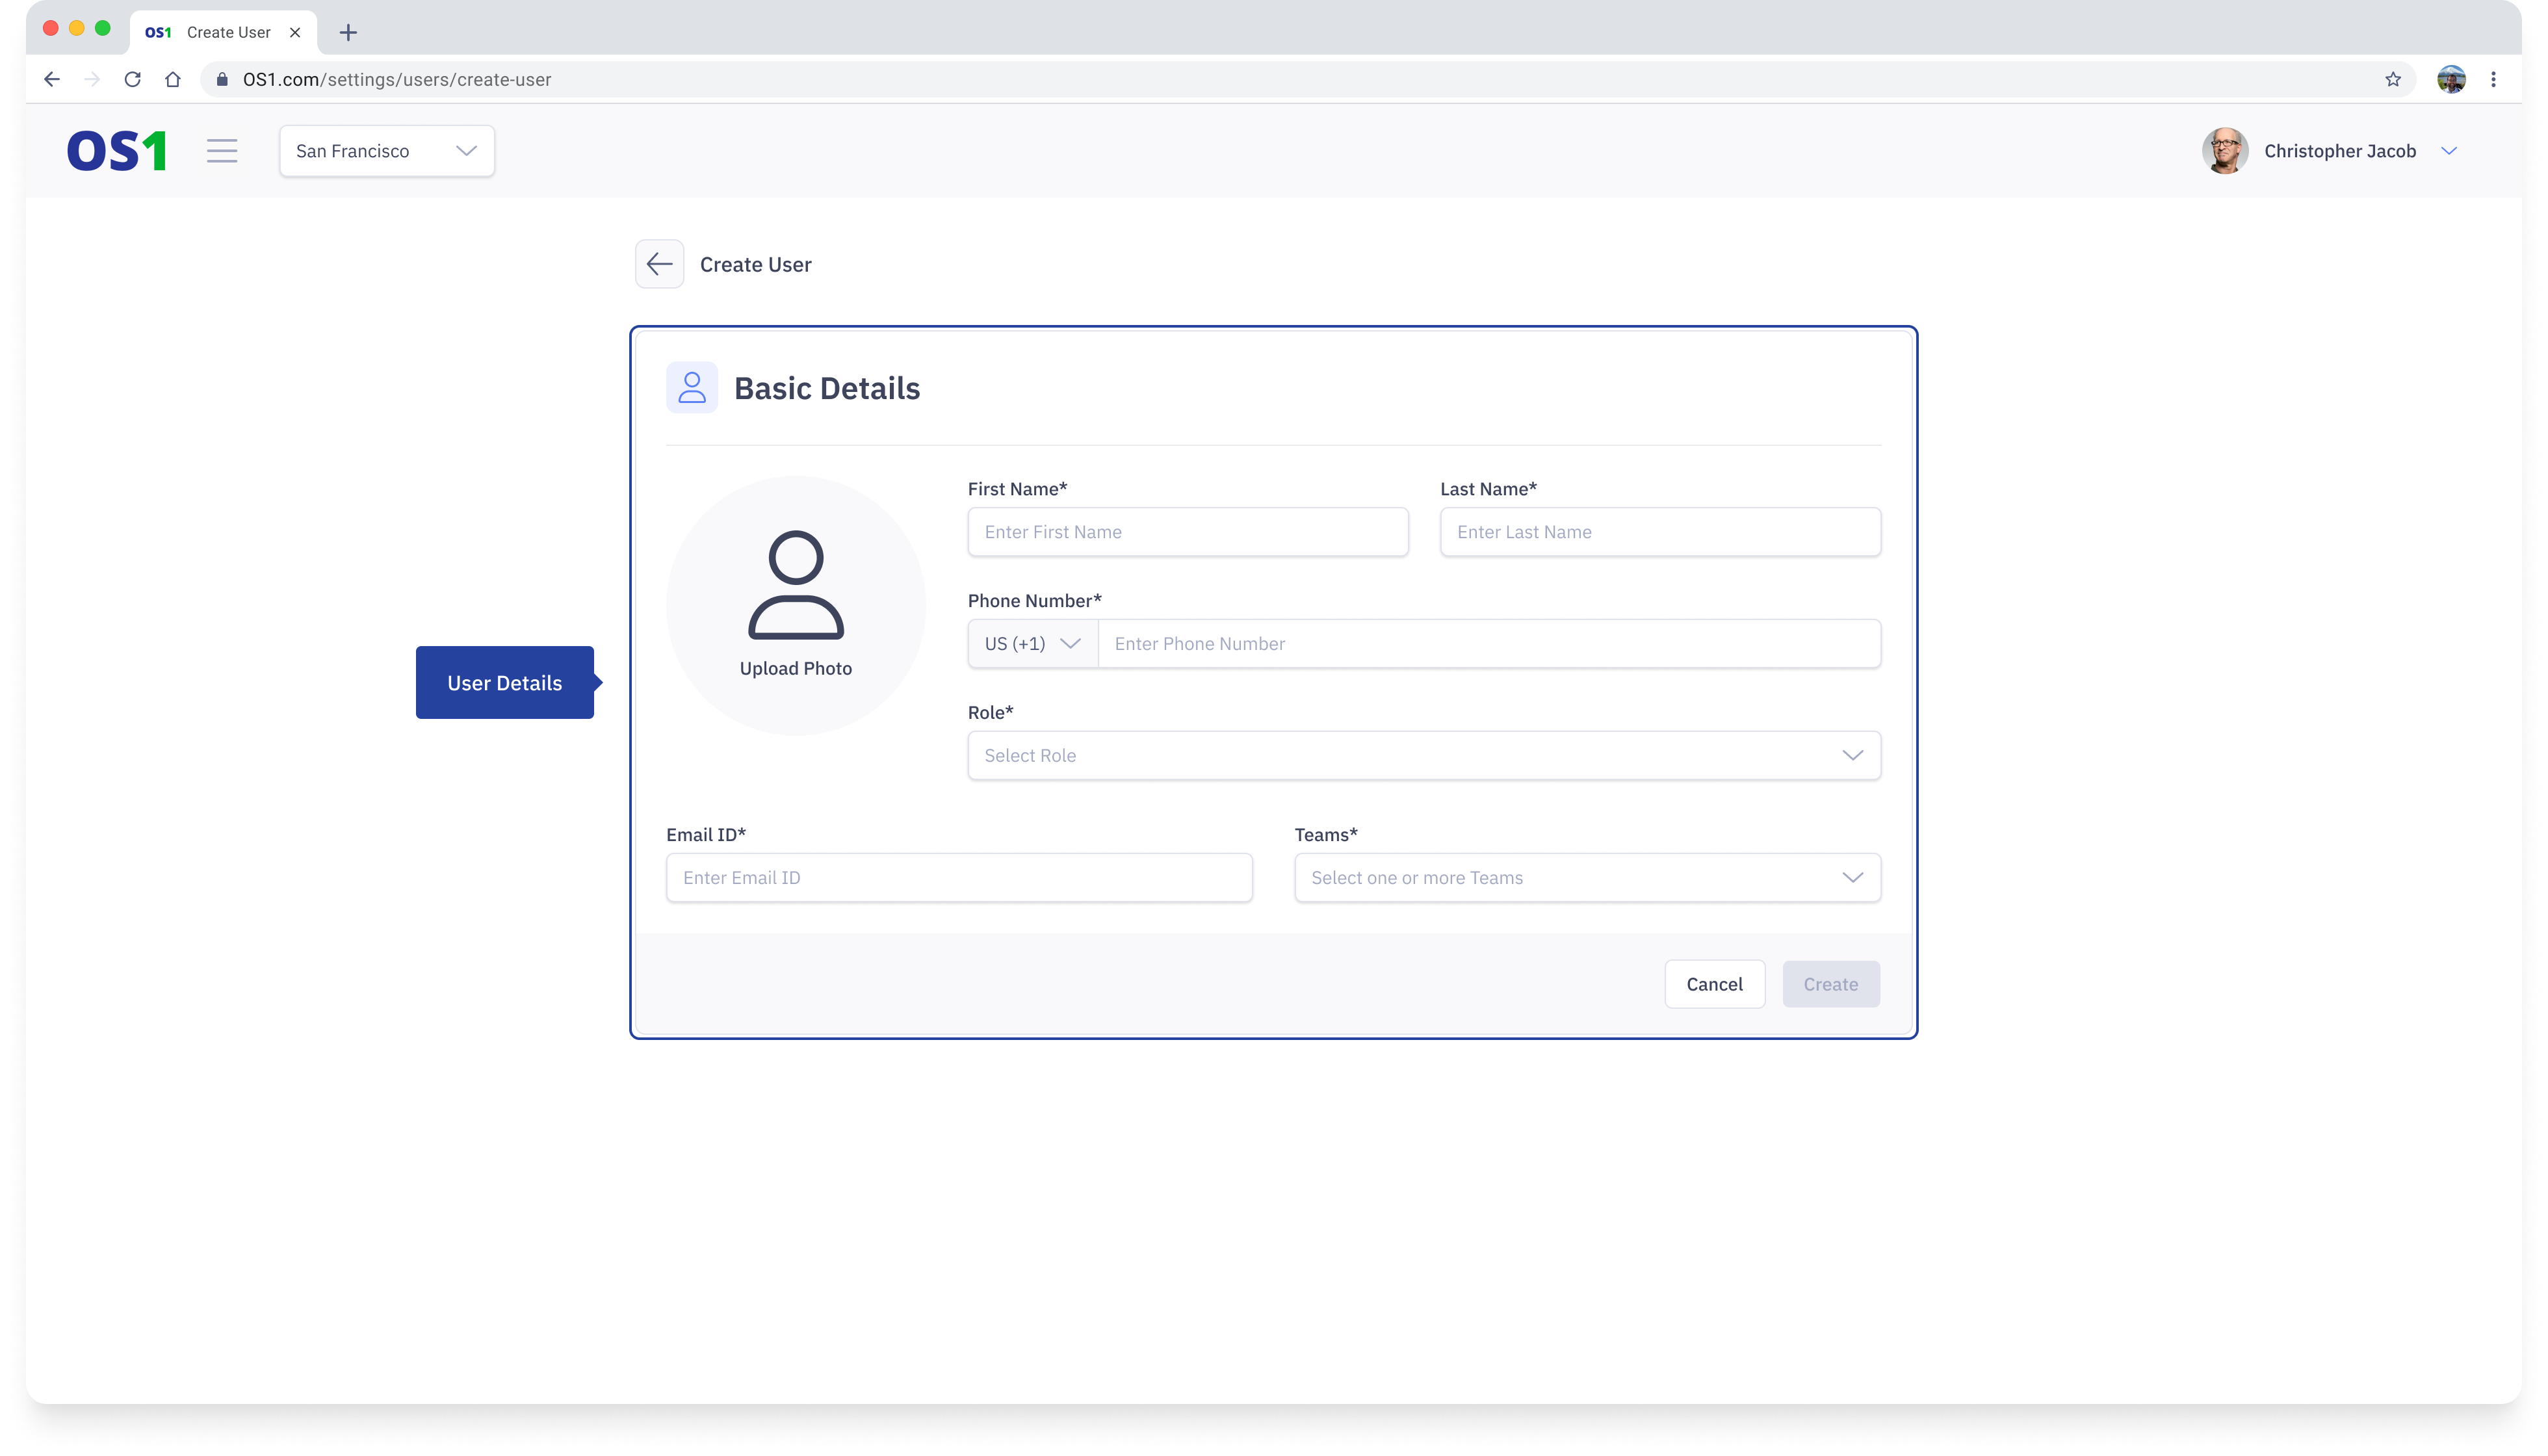
To create a User on DispatchOne, navigate to the Users page and click on the "Create User" button located in the top right corner of the page. This will take you to the Create User page, where you need to enter the following information:
- First Name: Enter the user's first name
- Last Name: Enter the user's last name
- Phone Number: Enter the user's phone or mobile number
- Role: Select a role for the user. Choose between 'Business Owner, 'Team Manager', or 'Field Executive'.
- Email: Enter the user's email ID
- Team: Select the team from the dropdown list to which you want to assign this user. You can select one or more teams.
- Profile Picture: This is optional. If you have a picture of the user, you can upload it in the "Upload Photo" section.
After entering all the required information, you can create the user by clicking on the "Create" button.
View Users
Once you have created a User, you can see the list of all the created Users on the User Listing page. You can see the following information about each user in the table:
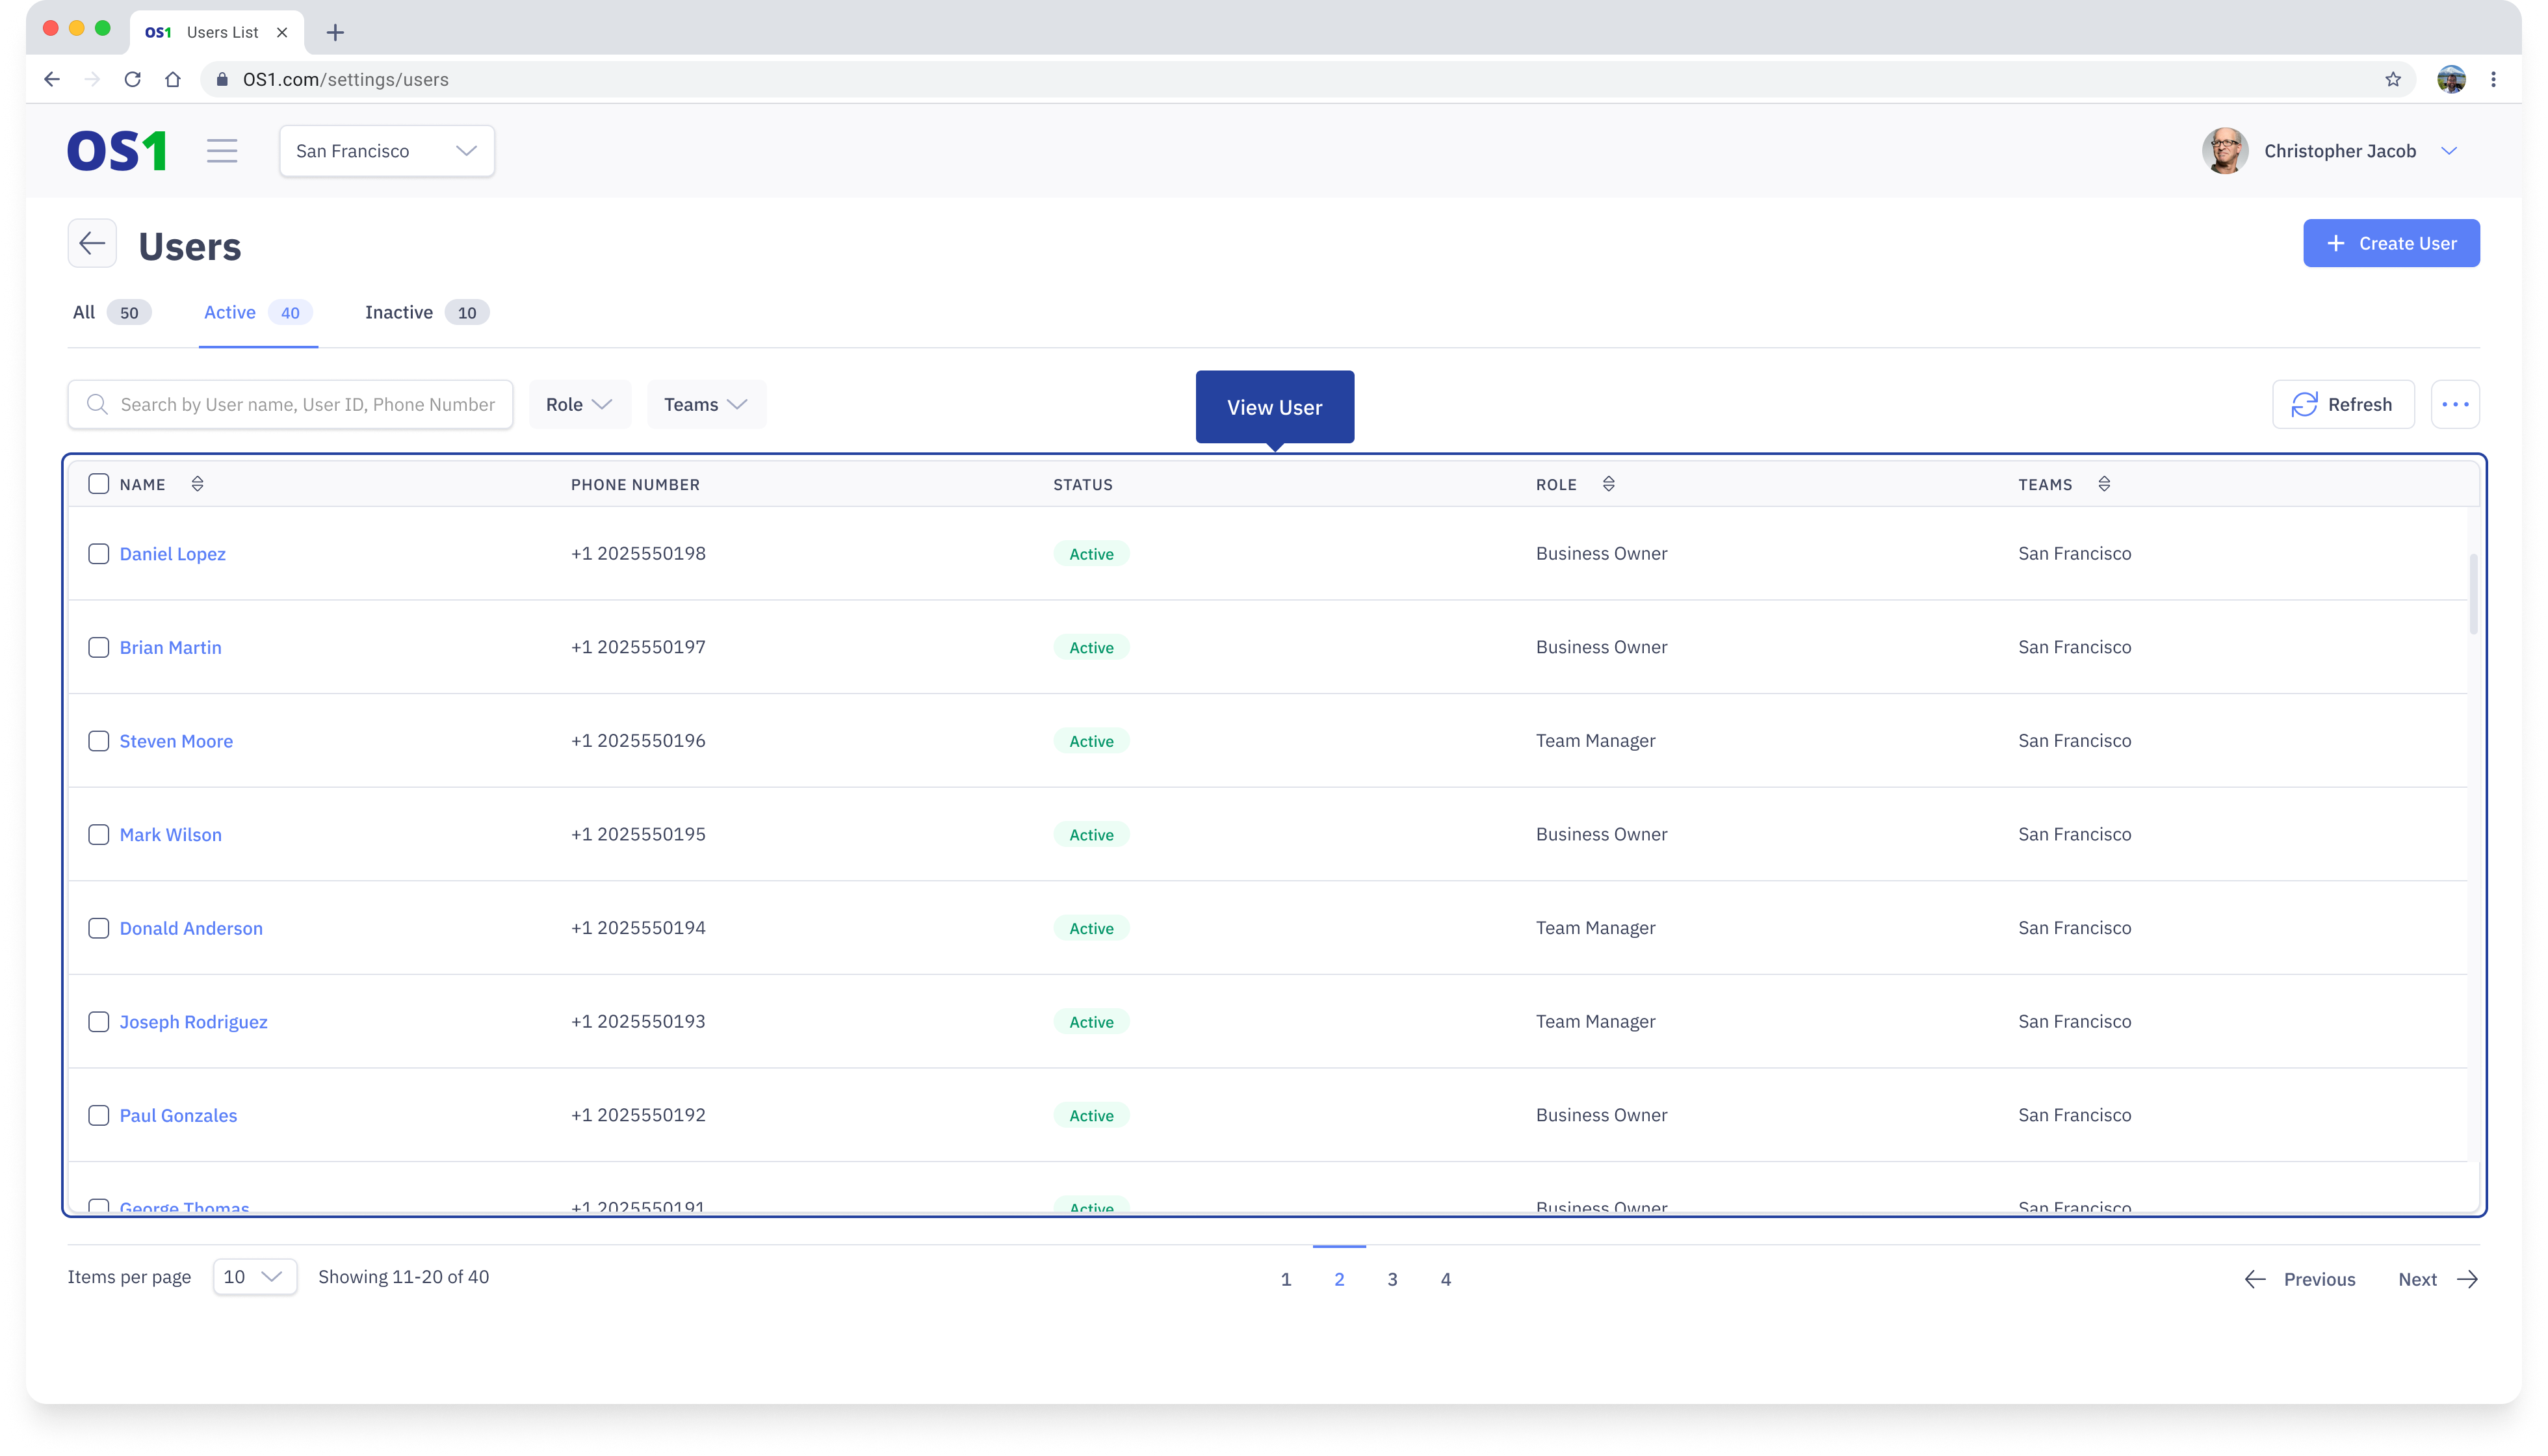
- User ID: This system-generated ID is created by combining the user's First Name, Last Name, and the last four digits of their phone number.
- User Name: This column displays the user's full name.
- Phone Number: This column shows the last four digits of the user's phone number.
- Status: The user's status indicates the current status of the user, based on the role of the user
- Role: The role assigned to the user
- Teams: This column shows the Teams the user is associated with
- Created At (hidden by default)
- Updated At (hidden by default)
- Created By (hidden by default)
- Updated By (hidden by default)
Edit User

To edit a User, navigate to the Users Listing page. Click on the Edit button located in the last column of the User table to access the Edit User page.
Once you have updated all the required information then you need to click on the Save button in order to update User details.
Search User
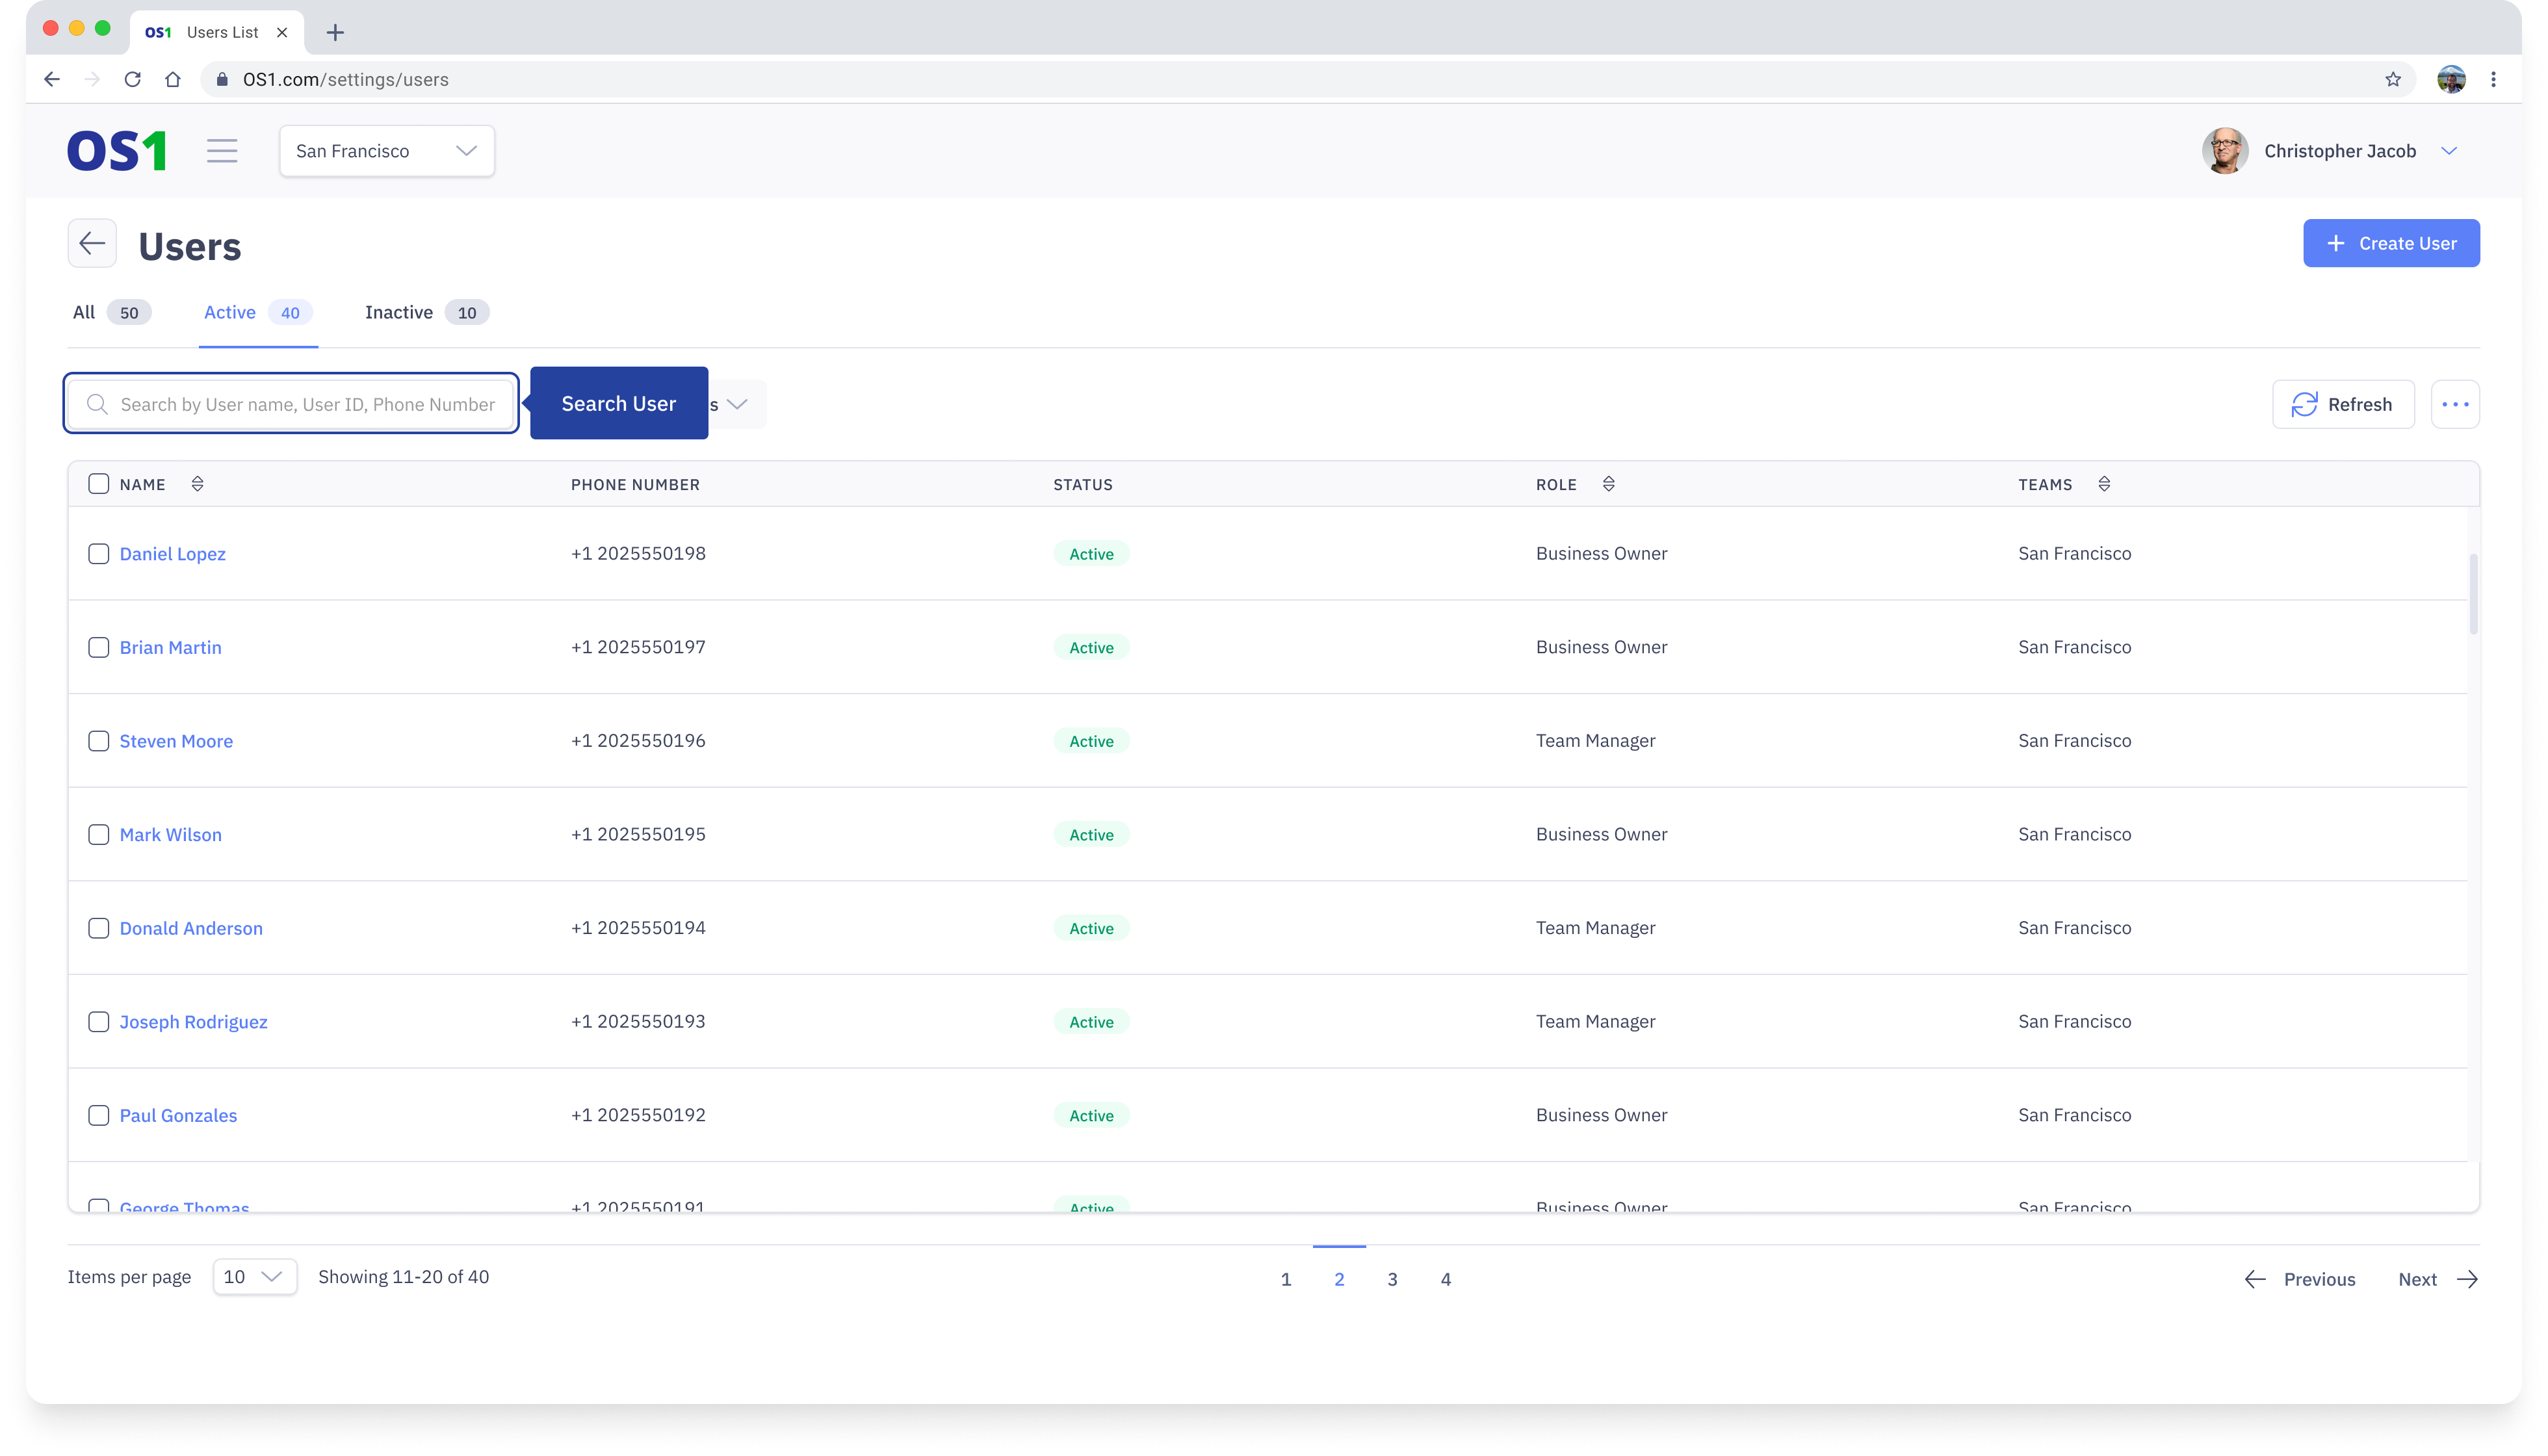
To search for a User, enter the User ID, User Name, or User Phone Number in the search bar on the User Listing page.
User Status Update
You can also update the status of a single user or multiple users from the User Listing page. To do this:
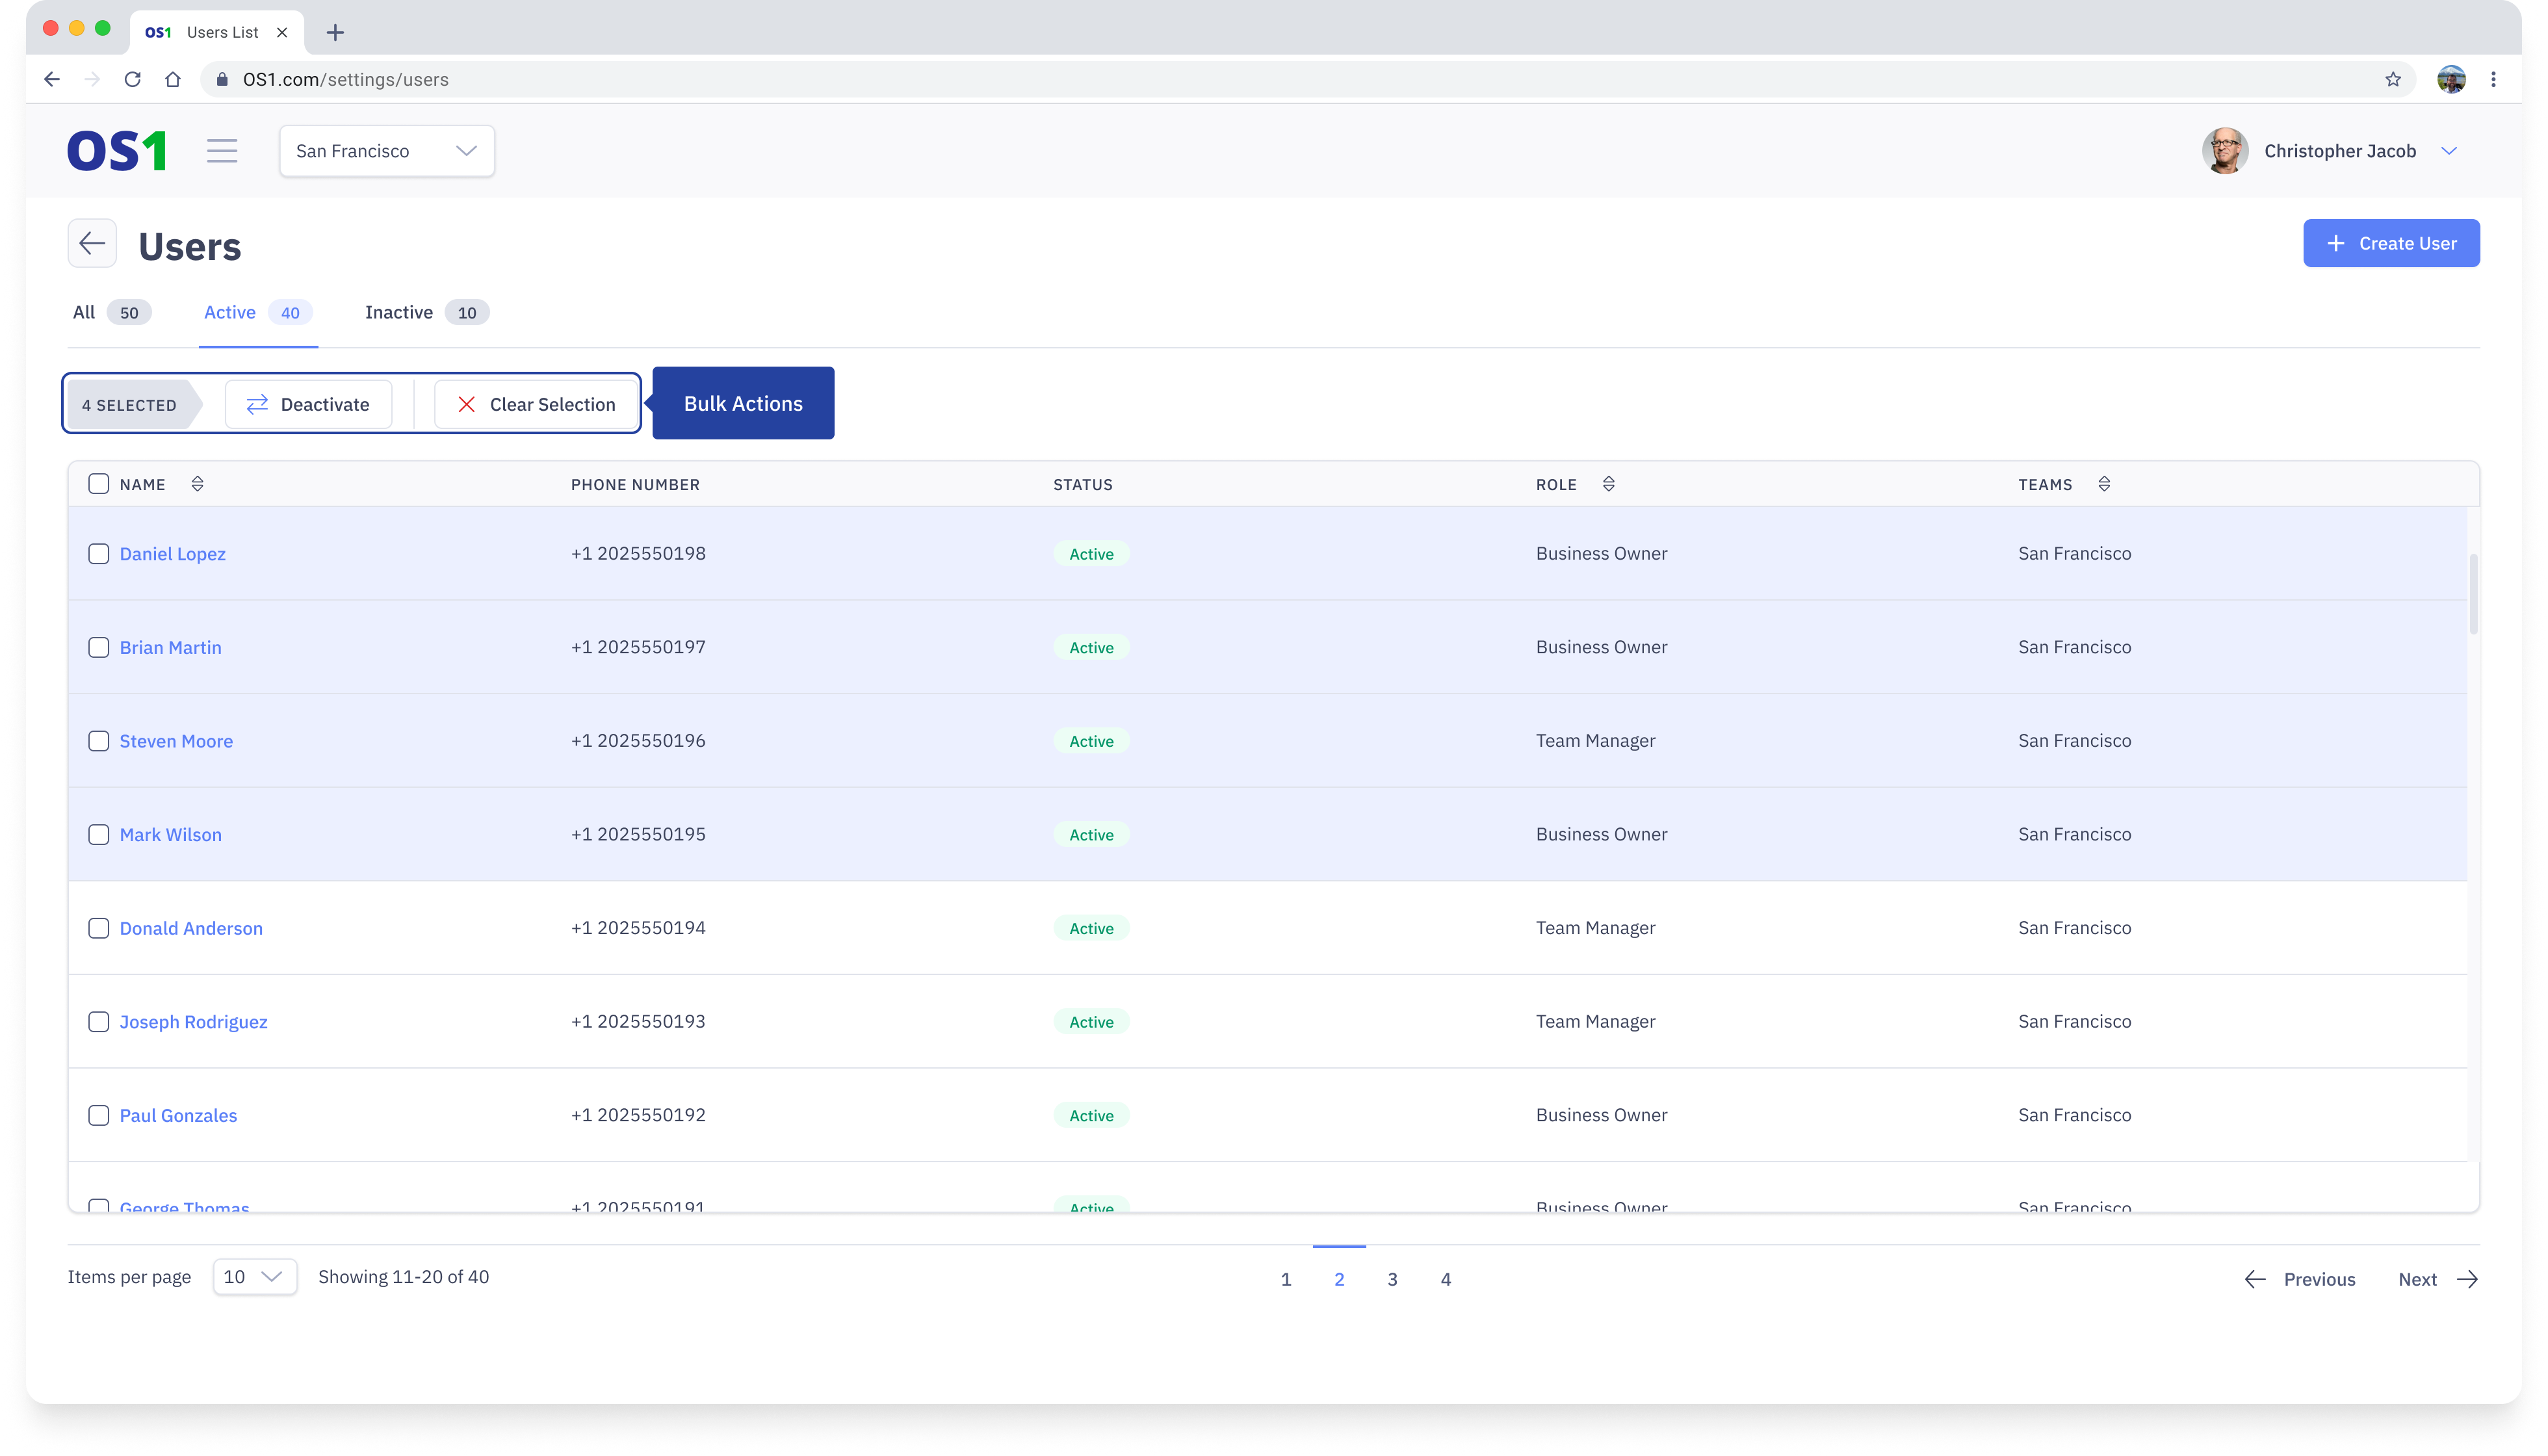
- Select the checkboxes next to each user ID
- After selecting the checkboxes, a "Change Status" button will appear above the table. Click on it, and a pop-up will appear, prompting you to select the new status to which you want to update the selected records
- Once you have selected the new status from the dropdown menu, click on the "Save" button to apply the changes to the selected records